


Quick Answer
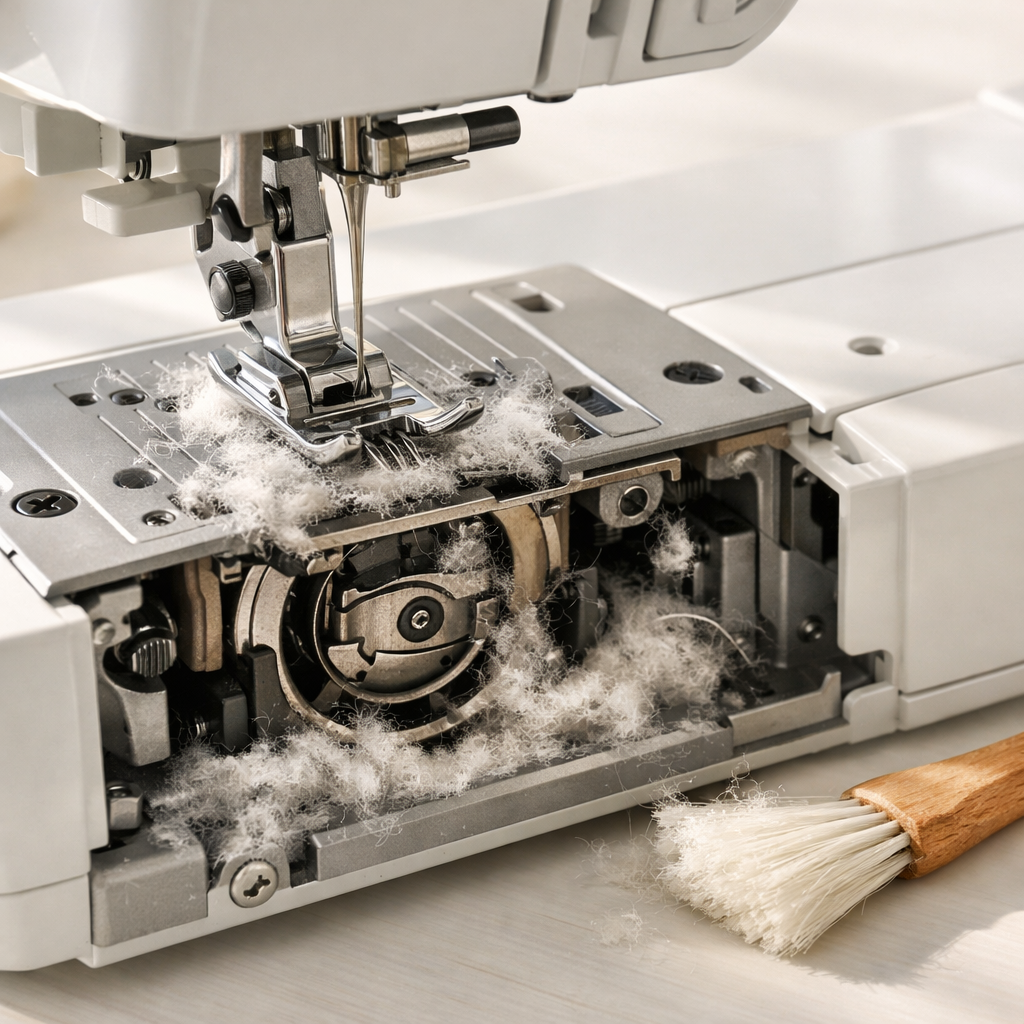
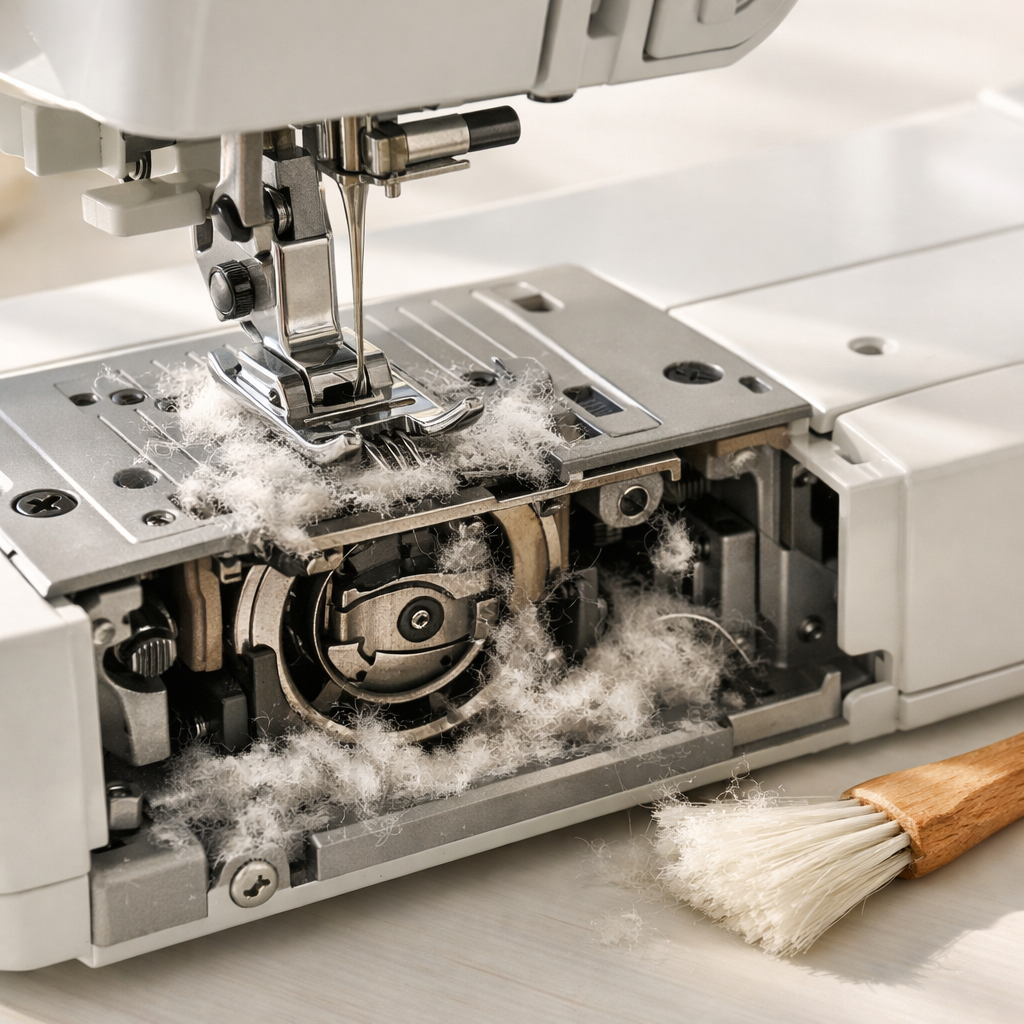
Cleaning lint out of a sewing machine requires removing the needle plate and bobbin case, then using a small brush to sweep away accumulated fibers from the feed dogs, bobbin housing, and tension discs. Most machines need lint cleaning every 8-10 hours of sewing time, or after completing 3-4 projects. Regular lint removal prevents skipped stitches, thread tension problems, and premature wear on moving parts.
Key Takeaways
- Lint buildup happens naturally as thread fibers shed during sewing, accumulating fastest in the bobbin area and feed dog mechanism
- Clean every 8-10 sewing hours or after 3-4 projects to maintain optimal machine performance
- Essential tools include a small stiff brush (often included with your machine), soft cloth, and optionally a bulb-style air blower
- Never use compressed air cans as the propellant can push lint deeper into mechanisms and leave moisture residue
- Bobbin case area requires the most attention since 80% of lint accumulates where the bobbin thread feeds through
- Cleaning and oiling are separate tasks, always clean lint first, then oil only the points specified in your manual
- Neglected lint causes skipped stitches, thread breakage, unusual noise, and can eventually damage timing mechanisms
- Computerized machines need extra care, avoid getting lint near circuit boards and never use liquid cleaners on electronic components
- Signs you need to clean now include visible lint around the needle, inconsistent stitch quality, or a grinding sound during operation
What Is Lint Buildup in Sewing Machines and Why Does It Happen
Lint buildup consists of tiny thread fibers that shed from both the top thread and bobbin thread during normal sewing. Every time the needle pierces fabric and the threads interlock, microscopic fibers break away and settle into the machine’s mechanical spaces, particularly around the bobbin case, feed dogs, and tension discs.
The amount of lint your machine produces depends on several factors:
- Thread quality, Bargain threads shed 3-4 times more fibers than high-quality polyester or cotton threads
- Fabric type, Fleece, flannel, and knits produce significantly more lint than quilting cotton or denim
- Sewing speed, Higher speeds generate more friction, causing increased fiber shedding
- Thread age, Old thread becomes brittle and sheds more readily than fresh spools
Polyester thread typically produces less lint than cotton thread because the fibers are smoother and more tightly twisted. However, cotton thread lint is often easier to remove since it doesn’t cling to metal surfaces as stubbornly as synthetic fibers.
Common mistake: Many sewers assume that because they can’t see lint, their machine doesn’t need cleaning. Lint accumulates in hidden areas beneath the needle plate where it’s invisible during normal use but still affects performance.
How Often Should I Clean Lint Out of My Sewing Machine
Clean your sewing machine’s lint every 8-10 hours of active sewing time, which typically translates to every 3-4 projects for hobby sewers. If you sew daily or work with high-lint fabrics like fleece or terry cloth, increase cleaning frequency to every 2-3 projects or once weekly.
Frequency guidelines by sewing habits:
- Occasional sewers (1-2 projects monthly), Clean every 3-4 projects or quarterly
- Regular hobbyists (weekly sewing sessions), Clean after every 3 projects or monthly
- Frequent sewers (daily use), Clean weekly or after every major project
- Professional sewers (8+ hours daily), Clean daily before starting work
Certain situations demand immediate cleaning regardless of your regular schedule:
- After sewing fleece, minky, or other high-pile fabrics
- Following a quilting project with extensive piecing
- When you notice visible lint around the needle area
- If stitches become irregular or threads start breaking
- After sewing with metallic or specialty threads that shed heavily
Choose daily cleaning if you run a sewing business, work on client projects with tight deadlines, or use an industrial machine. The 10 minutes spent cleaning prevents costly mid-project breakdowns.
What Tools Do I Need to Clean Lint From a Sewing Machine
The essential tool for cleaning lint from a sewing machine is a small, stiff-bristled brush, often called a lint brush or machine brush. Most sewing machines include one in the accessory kit, featuring a narrow profile that reaches into tight spaces and bristles firm enough to dislodge packed lint without damaging delicate parts.
Complete cleaning toolkit:
- Lint brush, Small stiff brush (usually 4-6 inches long) with firm natural or nylon bristles
- Soft lint-free cloth, Microfiber or old t-shirt material for wiping surfaces
- Tweezers, Pointed tweezers for removing stubborn lint clumps
- Bulb-style air blower, Camera lens blower (optional) for gentle air bursts
- Small screwdriver, For removing needle plates (check your manual for the correct size)
- Good lighting, Headlamp or clip-on LED light to see into dark crevices
- Owner’s manual, Reference guide for your specific machine’s disassembly
What NOT to use:
- Compressed air cans (propellant damages mechanisms)
- Vacuum cleaner hoses (suction too strong, can pull out small parts)
- Cotton swabs (leave fibers behind)
- Wet cloths or cleaning solutions (moisture causes rust)
If you’ve lost your original lint brush, purchase a replacement designed specifically for sewing machines rather than using a toothbrush or paintbrush. Sewing machine brushes have stiffer bristles angled to reach around feed dogs and into bobbin cases without bending.
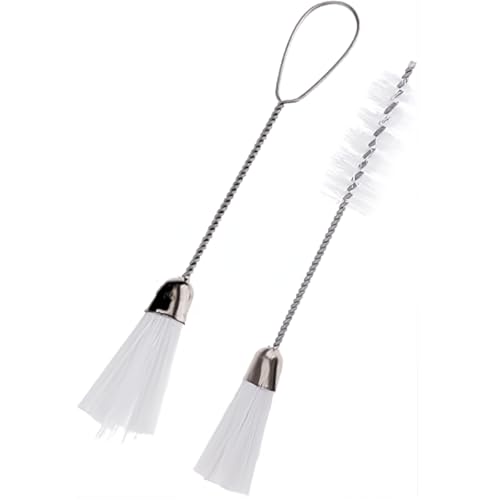
Double-ended design for thorough cleaning – Each brush features two unique bristle tips, making it easier to clean hard-to-reach areas in sewing machines, keyboards, bottles, and more.

Package Include:8 pcs sewing machine cleaning brush

【Package includes】- 1 pcs curved nose tweezers, 1 pcs double-ended fluff brush, 1 pcs needle board screwdriver and 4 pcs screwdrivers, 7 pcs in total. Different styles of screwdrivers, a sufficient number of tools are sufficient for your daily cleaning and repair needs.
Best Brush for Cleaning Sewing Machine Lint
The best brush for cleaning sewing machine lint features stiff natural bristles (horsehair or boar bristle), a narrow profile between 0.25-0.5 inches wide, and a handle length of 4-6 inches for comfortable control. Purpose-made sewing machine brushes outperform household alternatives because their bristle stiffness and shape match the tight spaces and packed lint found in bobbin areas.
Top brush characteristics:
- Bristle stiffness, Firm enough to dislodge packed lint but not so hard they scratch metal parts
- Bristle length, 0.5-0.75 inches allows reaching around feed dogs
- Handle design, Slim wooden or plastic handle that doesn’t block your view
- Bristle material, Natural fibers (horsehair) or quality nylon; avoid soft synthetic bristles
Popular brush options:
- Original equipment brush, The brush included with your machine is sized perfectly for your model
- Dritz lint brush, Widely available at fabric stores, features dual-ended design with different bristle widths
- Gingher lint brush, Professional-grade with extra-stiff bristles for industrial machines
- Double-ended machine brush, One end for large areas, narrow end for tight spaces
Common mistake: Using a soft paintbrush or makeup brush seems logical but these lack the stiffness needed to dislodge lint that’s been compressed by machine vibration. The lint simply moves around rather than coming free.
Choose a brush with a light-colored handle so you can easily spot it in your sewing kit. Many sewers keep two brushes, one at their main sewing station and a backup in their portable supply case.
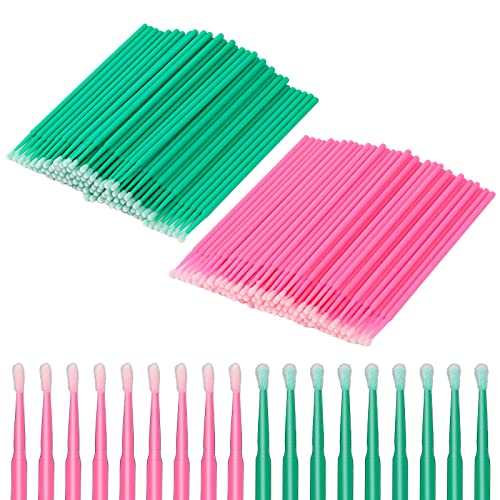
VALUE PACK: You will receive 200 pcs of sewing machine cleaning brushes, including 100 pcs each of pink and green, enough tomeet your use and replacement needs.

The Package Height Of The Product Is 1.27 Inches
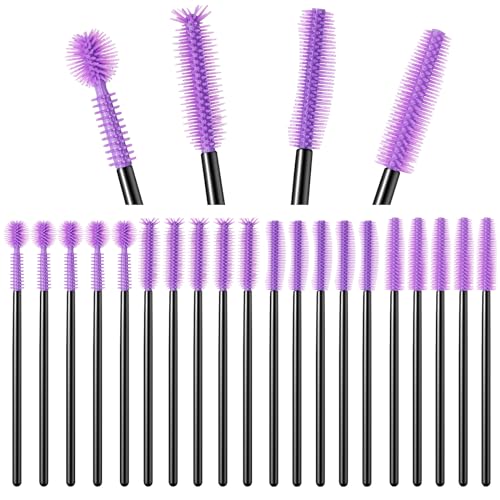
Dense Brush: thin and dense silicone bristles can penetrate deeply into the narrow corners and crevices of the sewing machine to clean away accumulated dust, fluff and threads
How to Clean Lint From the Bobbin Case Area
Cleaning the bobbin case area removes 80% of the lint in your machine since this is where thread friction is highest. Start by turning off and unplugging your machine, then remove the bobbin, bobbin case (if removable), and needle plate according to your owner’s manual instructions.
Step-by-step bobbin area cleaning:
- Remove the bobbin, Take out the bobbin and set it aside on a clean surface
- Remove the bobbin case, If your machine has a removable case, release the latch and lift it out
- Remove the needle plate, Use the appropriate screwdriver to remove 1-2 screws holding the plate (some snap off without tools)
- Brush the feed dogs, Use firm downward strokes to sweep lint from between the feed dog teeth
- Clean the bobbin housing, Brush around the entire circular housing where the bobbin case sits, paying attention to the tension spring
- Clean the hook race, For front-loading bobbins, brush the hook mechanism that rotates around the bobbin
- Remove stubborn clumps, Use tweezers to pull out any compressed lint balls
- Wipe surfaces, Use a soft cloth to wipe the needle plate and bobbin case
- Reassemble, Replace the needle plate, bobbin case, and bobbin in reverse order
Critical areas that trap lint:
- Between feed dog teeth, Lint packs tightly in these narrow gaps
- Under the feed dogs, Lift the feed dogs if your manual shows how to access this area
- Bobbin case tension spring, Lint wraps around this small spring
- Hook race groove, The circular track where the hook travels collects a lint ring
Edge case: If you find oil mixed with lint creating a sticky paste, you’ve been over-oiling your machine. Clean this thoroughly with a dry cloth before it hardens and causes timing problems.
Perform this deep bobbin area cleaning every 8-10 sewing hours. Between deep cleanings, do a quick 2-minute brush-out after each project by removing just the bobbin and brushing visible lint without removing the needle plate.


Bobbin Case 15 Class Machine #15277

Wide Compatibility for Brother & Babylock Machines:This bobbin case is designed to directly replace part #XC3152221 and fits a wide range of popular Brother models—including CE1100PRW, CS6000I, CE2000, CE5000, PE770, SE400, SE700,SE600,SQ9185, and many more—as well as Babylock models such as BL80B Jubilant, Sofia BL137A, Grace BL40A, Rachel BL50A, and Ellure Plus BLR2. Refer to the full list in the description for additional compatible machines.

1PCS Bobbin Case Compatible with Brother Sewing Machine.
How to Clean Lint From Hard to Reach Areas in Your Sewing Machine
Hard-to-reach areas in sewing machines include the spaces behind the needle bar, inside the upper tension assembly, around the take-up lever, and in the narrow gaps beside the feed dogs. These spots require a combination of angled brushing, gentle air puffs from a bulb blower, and strategic lighting to access effectively.
Techniques for difficult spaces:
Behind the needle bar:
- Remove the presser foot and needle
- Angle your brush upward from below the needle bar
- Use a bulb blower to push lint downward where you can brush it away
- Shine a flashlight from the side to spot hidden lint
Upper tension assembly:
- Raise the presser foot to release tension discs
- Slide a folded piece of muslin or denim between the discs to absorb lint
- Gently brush around the outside of the tension housing
- Never disassemble tension mechanisms unless your manual specifically instructs you to
Take-up lever area:
- Manually turn the handwheel to move the take-up lever to its lowest position
- Brush downward along the thread path
- Use tweezers to remove any visible lint clumps
Beside feed dogs:
- With the needle plate removed, angle your brush to sweep lint from the narrow channels on each side of the feed dogs
- Work from back to front, pushing lint toward the opening where you can remove it
Pro tip: Create a “lint catcher” by placing a piece of paper or small tray under your machine before cleaning. This catches falling lint so you can dispose of it easily rather than having it scatter across your sewing table.
Common mistake: Trying to blow lint out with your breath introduces moisture into the machine, which can cause rust on steel parts. Always use a dry bulb blower designed for camera lenses if you need air assistance.
For truly inaccessible areas that show lint buildup, consult your owner’s manual about authorized service. Some internal spaces should only be accessed by trained technicians who know how to reassemble complex timing mechanisms.
Can I Use Compressed Air to Clean Sewing Machine Lint
Do not use compressed air cans to clean lint from sewing machines because the propellant contains moisture and chemicals that leave residue on metal parts, and the high pressure can force lint deeper into mechanisms where it becomes impossible to remove. Compressed air also risks blowing small parts (springs, screws, washers) out of position or into unreachable spaces.
Why compressed air causes problems:
- Moisture content, Propellant contains difluoroethane or similar chemicals that leave a wet residue, promoting rust
- Excessive pressure, 30-50 PSI force pushes lint past seals into gear chambers and timing mechanisms
- Propellant residue, Chemical film attracts more lint and can degrade plastic parts over time
- Uncontrolled direction, Wide spray pattern blows lint into areas you can’t access for removal
- Temperature drop, Rapid propellant expansion creates frost that introduces moisture
Safe alternatives to compressed air:
- Bulb-style air blower, Camera lens blowers produce gentle, dry air puffs perfect for dislodging surface lint
- Manual brushing, A stiff brush physically removes lint rather than relocating it
- Tweezers, Direct removal of visible lint clumps
- Gravity, Turn the machine to different angles so lint falls out naturally after brushing
Choose a bulb blower if you need air assistance for delicate areas like computerized machine circuit boards or optical sensors. These produce 1-2 PSI of dry air, enough to move lint without forcing it into mechanisms.
Exception: Some industrial sewing machine manuals specifically recommend low-pressure shop air (under 10 PSI) with an inline moisture trap. This applies only to industrial machines designed for this maintenance method, not domestic machines.
Is It Safe to Vacuum Lint Out of a Sewing Machine
Vacuuming lint from a sewing machine is risky because standard vacuum suction (60-100 inches of water lift) can pull out small parts like screws, springs, and washers, or damage delicate mechanisms. While some sewers use vacuum attachments successfully, manual brushing remains the safer, more controlled method for most machines.
Risks of vacuuming:
- Lost parts, Small screws, tension springs, and washers can be sucked into the vacuum bag
- Damaged mechanisms, Strong suction can pull on thread guides, bend springs, or shift timing components
- Incomplete cleaning, Vacuum only removes loose surface lint, leaving packed lint behind
- Static electricity, Vacuum suction creates static that can damage computerized machine circuits
If you choose to vacuum:
- Use the lowest suction setting available
- Hold the vacuum hose 1-2 inches away from surfaces rather than touching them
- Brush lint loose first, then vacuum only the loose debris
- Never vacuum near computerized components or circuit boards
- Check that all screws and small parts are secure before starting
- Work in good lighting so you can see if any parts start to move
Better approach: Brush lint onto a piece of paper or into a small tray, then vacuum the paper. This gives you the convenience of quick cleanup without risking your machine’s internal parts.
Choose manual brushing if you have a computerized machine, vintage machine with delicate parts, or any machine where you’re unsure about the security of small components. The 5 extra minutes spent brushing thoroughly prevents the risk of a $200+ repair bill.
What Happens If I Never Clean Lint Out of My Sewing Machine
Neglecting lint cleaning leads to progressively worse performance problems starting with minor stitch irregularities and eventually causing mechanical damage that requires professional repair. Accumulated lint interferes with thread movement, restricts moving parts, and traps heat that accelerates wear on plastic components.
Progressive problems from lint buildup:
Early stage (1-3 months without cleaning):
- Occasional skipped stitches
- Slight tension inconsistencies
- Visible lint around needle area
- Faint dusty smell during use
Moderate stage (3-6 months without cleaning):
- Frequent thread breakage
- Uneven stitch length
- Difficulty threading bobbin case
- Grinding or clicking sounds
- Machine runs noticeably louder
Advanced stage (6+ months without cleaning):
- Bobbin case jams frequently
- Feed dogs fail to advance fabric properly
- Needle strikes the hook or needle plate
- Motor strains and overheats
- Timing mechanisms slip out of alignment
Permanent damage risks:
- Worn hook race, Lint acts as an abrasive, grinding grooves into the polished hook surface
- Damaged timing, Restricted movement causes the hook and needle to fall out of sync
- Broken plastic gears, Heat buildup from friction melts or cracks plastic timing gears
- Seized bearings, Lint mixed with old oil creates a paste that locks up rotating parts
- Burned motor, Excessive resistance from lint-clogged mechanisms overworks the motor
Repair costs for lint-related damage:
- Timing adjustment: $80-150
- Hook race replacement: $100-200
- Motor replacement: $150-300
- Complete overhaul: $200-400
Common misconception: “My machine still sews fine, so it doesn’t need cleaning.” Lint damage accumulates gradually and often becomes apparent only after it’s caused expensive internal wear. Regular cleaning costs nothing but prevents hundreds in repair bills.
Difference Between Cleaning Lint and Oiling a Sewing Machine
Cleaning lint and oiling a sewing machine are two separate maintenance tasks that must be performed in the correct order, always clean first, then oil. Cleaning removes debris that would trap oil and create an abrasive paste, while oiling reduces friction on metal parts after they’ve been cleaned.
Key differences:
| Aspect | Lint Cleaning | Oiling |
|---|---|---|
| Purpose | Remove fiber debris and dust | Lubricate moving metal parts |
| Frequency | Every 8-10 sewing hours | Every 40-50 sewing hours or quarterly |
| Tools needed | Brush, cloth, tweezers | Sewing machine oil, precision applicator |
| Areas addressed | All surfaces, especially bobbin area | Only specific oil points in manual |
| Time required | 10-15 minutes | 5 minutes |
| Can skip? | Never, causes damage | Some modern machines are self-lubricating |
Why order matters:
Oiling before cleaning traps lint in the oil, creating a sticky paste that’s harder to remove and acts as an abrasive compound that accelerates wear. Always brush away all lint first, then apply tiny drops of oil only to the points specified in your owner’s manual.
Oiling guidelines:
- Use only sewing machine oil (clear, odorless, lightweight mineral oil)
- Apply 1-2 drops per oil point, more is not better
- Common oil points include the hook race, bobbin case shaft, and upper thread guide posts
- Never oil plastic parts, rubber belts, or electronic components
- Run the machine for 30 seconds after oiling to distribute lubricant
- Wipe away excess oil before sewing on fabric
Modern machine exception: Many computerized sewing machines manufactured after 2015 have sealed bearings and self-lubricating mechanisms that never require oiling. Check your manual, if it doesn’t list oil points, your machine is designed to run without additional lubrication.
Choose professional service if your manual recommends annual oiling by a technician. Some machines have internal oil points that require partial disassembly to access safely.
How to Clean Lint From Computerized Sewing Machines Safely
Cleaning lint from computerized sewing machines requires extra caution around circuit boards, sensors, and electronic components that can be damaged by moisture, static electricity, or physical contact. Focus cleaning efforts on the mechanical areas (bobbin case, feed dogs, needle bar) while avoiding any areas where you see circuit boards or wire connections.
Safe cleaning approach for computerized machines:
- Always unplug completely, Remove the power cord from both the wall and machine to prevent electrical shorts
- Identify electronic zones, Consult your manual to locate circuit boards, usually in the right side panel or top housing
- Clean mechanical areas only, Focus on bobbin case, feed dogs, needle plate, and thread path
- Use dry tools exclusively, Never use liquid cleaners, damp cloths, or compressed air near electronics
- Avoid static-generating materials, Don’t use synthetic brushes or cloths that create static electricity
- Use a bulb blower for sensors, Gently puff air at optical sensors or thread detection windows
- Don’t remove side panels, Unless your manual specifically instructs you to, keep electronic housings closed
Areas requiring special care:
- Automatic thread cutter, Brush carefully around the blade mechanism without touching electrical contacts
- Needle position sensors, Use only a bulb blower near these optical components
- LCD screen, Wipe only with a dry microfiber cloth designed for electronics
- Touchscreen controls, Clean with electronics-safe wipes, never spray directly on the screen
- USB ports and card slots, Use a bulb blower to remove dust, never insert brushes
What to avoid:
- Compressed air (moisture damages circuits)
- Vacuum cleaners (static electricity)
- Wet cloths or cleaning solutions
- Removing panels not shown in your owner’s manual
- Touching circuit boards or wire connections
- Inserting tools into ventilation slots
Common mistake: Assuming that because a machine is computerized, it needs less cleaning. Electronic machines still have mechanical bobbin systems that accumulate lint at the same rate as mechanical machines.
Choose professional service if you see lint buildup near circuit boards or inside electronic housings. Technicians have anti-static tools and training to safely clean these areas without risking expensive electronic damage.
Do All Sewing Machines Get Lint Buildup the Same Way
Not all sewing machines accumulate lint at the same rate or in the same locations because bobbin system design, thread path complexity, and machine speed vary significantly between models. Front-loading bobbin machines typically collect more visible lint than top-loading drop-in bobbin systems, while industrial machines running at high speeds generate lint faster than domestic machines.
Lint accumulation by machine type:
Mechanical machines with front-loading bobbins:
- Lint concentrates in the hook race and around the bobbin case
- Requires removing needle plate for thorough cleaning
- Visible lint buildup in feed dog area
- Cleaning frequency: every 8-10 hours
Drop-in bobbin machines:
- Lint collects in the bobbin housing but is more visible
- Easier to access without removing needle plate
- Less lint trapped in hard-to-reach areas
- Cleaning frequency: every 10-12 hours
Sergers and overlock machines:
- Generate 3-4 times more lint due to multiple threads and cutting blade
- Lint accumulates around all loopers and the knife mechanism
- Requires cleaning after every project or every 4-6 hours
- Cutting blade area needs special attention
Embroidery machines:
- Produce less lint due to slower speeds and finer threads
- Lint concentrates around the bobbin area only
- Cleaning frequency: every 15-20 hours
Industrial machines:
- High speeds (3000-5000 stitches per minute) generate lint rapidly
- Require daily cleaning for consistent performance
- Often have larger bobbin areas that hold more lint before problems appear
- May have oil-bath lubrication that traps lint differently
Factors affecting lint production:
- Stitch type, Zigzag and decorative stitches create more friction than straight stitching
- Thread quality, Budget threads shed 3-4 times more than premium brands
- Fabric type, Fleece, flannel, and knits produce heavy lint; wovens produce less
- Machine age, Worn parts create more friction, increasing lint production
- Tension settings, Overly tight tension causes more thread fiber breakage
Adjust cleaning frequency based on your specific machine type and sewing habits rather than following a one-size-fits-all schedule. A serger used daily needs cleaning every 2-3 days, while an embroidery machine used weekly might need cleaning only monthly.
Common Mistakes When Cleaning Lint From Sewing Machines
The most common mistake when cleaning lint from sewing machines is using compressed air or vacuum cleaners, which push lint deeper into mechanisms or create static that damages electronics. Other frequent errors include over-oiling, using household cleaning products, and failing to consult the owner’s manual for model-specific instructions.
Top cleaning mistakes to avoid:
Using the wrong tools:
- Compressed air cans (force lint deeper, leave moisture)
- Cotton swabs (leave fibers behind)
- Wet cloths or cleaning solutions (cause rust)
- Vacuum cleaners on high suction (pull out small parts)
- Toothpicks or sharp objects (scratch metal surfaces)
Improper technique:
- Oiling before cleaning (traps lint in oil)
- Over-oiling (attracts more lint and dust)
- Cleaning while machine is plugged in (electrical shock risk)
- Forcing parts that don’t easily remove (breaks plastic clips)
- Skipping the owner’s manual (miss model-specific steps)
Incomplete cleaning:
- Only cleaning visible areas while ignoring the bobbin housing
- Forgetting to clean the upper thread path and tension discs
- Neglecting the area under the feed dogs
- Cleaning the bobbin case but not the hook race
- Reassembling before removing all loose lint
Timing and frequency errors:
- Waiting until problems appear before cleaning (damage already occurring)
- Cleaning too infrequently for high-lint fabrics
- Never removing the needle plate for deep cleaning
- Assuming computerized machines don’t need cleaning
Reassembly mistakes:
- Installing the bobbin case incorrectly (causes timing problems)
- Forgetting to replace the needle plate screws (vibration loosens plate)
- Not testing with scrap fabric before starting a project
- Leaving tools inside the machine (screwdriver under needle plate)
How to avoid mistakes:
- Read your owner’s manual before first cleaning
- Take photos during disassembly to remember part placement
- Work in good lighting so you can see all lint
- Keep a cleaning checklist specific to your machine model
- Test sew on scrap fabric after reassembly
- Set calendar reminders for regular cleaning
Edge case: If you break a plastic part during cleaning (bobbin case latch, needle plate clip), order a replacement immediately rather than trying to repair it with glue. Broken parts cause timing problems and can damage other components.
Signs Your Sewing Machine Needs Lint Cleaning
Your sewing machine needs immediate lint cleaning when you notice skipped stitches, inconsistent tension, unusual noise, or visible lint accumulation around the needle area. These symptoms indicate that lint has built up enough to interfere with thread movement or restrict mechanical parts.
Immediate cleaning indicators:
Performance problems:
- Skipped stitches or irregular stitch length
- Thread breaking frequently (top or bobbin)
- Tension problems that don’t resolve with adjustment
- Difficulty pulling fabric through (feed dogs not gripping)
- Bobbin thread showing on top of fabric
- Machine jamming or stopping mid-seam
Audible signs:
- Grinding or scraping sounds
- Clicking or ticking noises
- Motor sounds strained or labored
- Machine runs louder than normal
- Squeaking from the bobbin area
Visual indicators:
- Lint visible around the needle or presser foot
- Dust accumulation on the machine surface
- Lint balls in the bobbin case
- Thread wrapped around the bobbin case or hook
- Fabric leaves lint trails on your sewing table
Tactile clues:
- Handwheel feels stiff or resistant
- Bobbin case doesn’t drop in smoothly
- Thread doesn’t pull freely through guides
- Presser foot lifter feels sticky
Fabric-related signs:
- Puckered seams that weren’t puckered before
- Fabric doesn’t feed evenly
- Needle pulls threads from the fabric
- Stitches look loose or loopy
Timeline indicators:
- 8-10 hours have passed since last cleaning
- You’ve completed 3-4 projects
- You just finished sewing fleece, flannel, or high-pile fabric
- It’s been more than a month since cleaning
Don’t wait for multiple symptoms, clean as soon as you notice any single indicator. Early cleaning prevents the cascade of problems that occur when lint restricts multiple mechanisms simultaneously.
Prevention tip: Keep a small notebook or phone note tracking your cleaning dates and hours sewn. This helps you identify your machine’s specific lint accumulation pattern and establish an optimal cleaning schedule.
Frequently Asked Questions
How long does it take to clean lint out of a sewing machine? A thorough lint cleaning takes 10-15 minutes including removing the needle plate, brushing all accessible areas, and reassembling. Quick maintenance cleaning (bobbin area only, without removing the needle plate) takes 3-5 minutes and should be done after each project.
Can lint buildup permanently damage my sewing machine? Yes, severe lint buildup can cause permanent damage including worn hook races, broken timing, damaged gears, and seized bearings. These repairs typically cost $150-400, while regular cleaning costs nothing and prevents this damage entirely.
Should I clean my sewing machine before or after oiling it? Always clean lint before oiling. Oiling first traps lint in the oil, creating an abrasive paste that accelerates wear on metal parts. Clean thoroughly, then apply 1-2 drops of sewing machine oil only to the points specified in your manual.
What’s the white fuzzy stuff in my sewing machine? The white fuzzy accumulation is lint composed of microscopic thread fibers that shed during sewing. Both top thread and bobbin thread contribute to this buildup, which concentrates in the bobbin area, around feed dogs, and in tension assemblies.
Do I need to clean my sewing machine if I only use it occasionally? Yes, occasional sewers should clean their machines every 3-4 projects or quarterly, whichever comes first. Lint accumulates based on sewing hours, not calendar time, but dust also settles on machines during storage and should be removed before extended use.
Can I use a paintbrush to clean lint from my sewing machine? Avoid paintbrushes because they’re too soft to dislodge packed lint effectively. Use a stiff-bristled brush designed for sewing machines, which has the firmness needed to remove compressed lint from feed dogs and bobbin housings without damaging metal parts.
Why does my machine still have problems after cleaning lint? If problems persist after thorough lint cleaning, you may have a tension issue, timing problem, or worn parts that require professional service. Also verify you’ve reassembled all parts correctly and that the bobbin case is properly seated in its housing.
Is it normal for some machines to produce more lint than others? Yes, lint production varies by machine type, thread quality, and fabric choice. Sergers produce 3-4 times more lint than regular machines, while embroidery machines produce less. Cheap thread and high-pile fabrics dramatically increase lint regardless of machine type.
Can I prevent lint buildup in my sewing machine? You can reduce but not eliminate lint by using high-quality thread, sewing at moderate speeds, and choosing lower-lint fabrics when possible. However, all sewing machines produce some lint during normal operation, making regular cleaning essential rather than optional.
What should I do if I find oil mixed with lint in my machine? Clean the oil-lint mixture thoroughly with a dry cloth, as this paste accelerates wear on metal parts. This indicates over-oiling, use less oil in the future (1-2 drops per point) and ensure you’re only oiling the specific points listed in your manual.
Do self-lubricating sewing machines still need lint cleaning? Yes, self-lubricating machines still accumulate lint at the same rate as traditional machines. “Self-lubricating” refers only to sealed bearings that don’t require manual oiling, these machines still need regular lint removal from the bobbin area, feed dogs, and thread path.
How do I know if I’ve cleaned all the lint out? After brushing, shine a bright light into the bobbin area and around the feed dogs. If you see no visible lint and the metal surfaces look clean and shiny, you’ve removed the accessible lint. Run the machine briefly and check again for any lint that vibration may have loosened.
Conclusion
Cleaning lint out of a sewing machine is the single most important maintenance task for preventing performance problems and extending machine life. By removing the bobbin case and needle plate every 8-10 sewing hours and using a stiff brush to sweep away accumulated fibers, you’ll maintain consistent stitch quality and avoid expensive repairs caused by lint-related damage.
Take action now:
- Schedule your next cleaning, Add a calendar reminder for every 8-10 sewing hours or after 3-4 projects
- Gather your tools, Locate your lint brush, owner’s manual, and appropriate screwdriver
- Perform a quick check, Remove your bobbin right now and look for lint accumulation
- Clean if needed, If you see visible lint or can’t remember your last cleaning, spend 15 minutes cleaning today
- Track your cleaning, Start a simple log noting cleaning dates and hours sewn to establish your machine’s pattern
The 10-15 minutes spent on regular lint cleaning prevents the frustration of mid-project machine problems, saves hundreds in repair costs, and ensures your sewing machine delivers consistent, professional-quality stitches for years to come. Make lint cleaning as routine as changing your needle, and your machine will reward you with reliable performance project after project.


