


Quick Answer
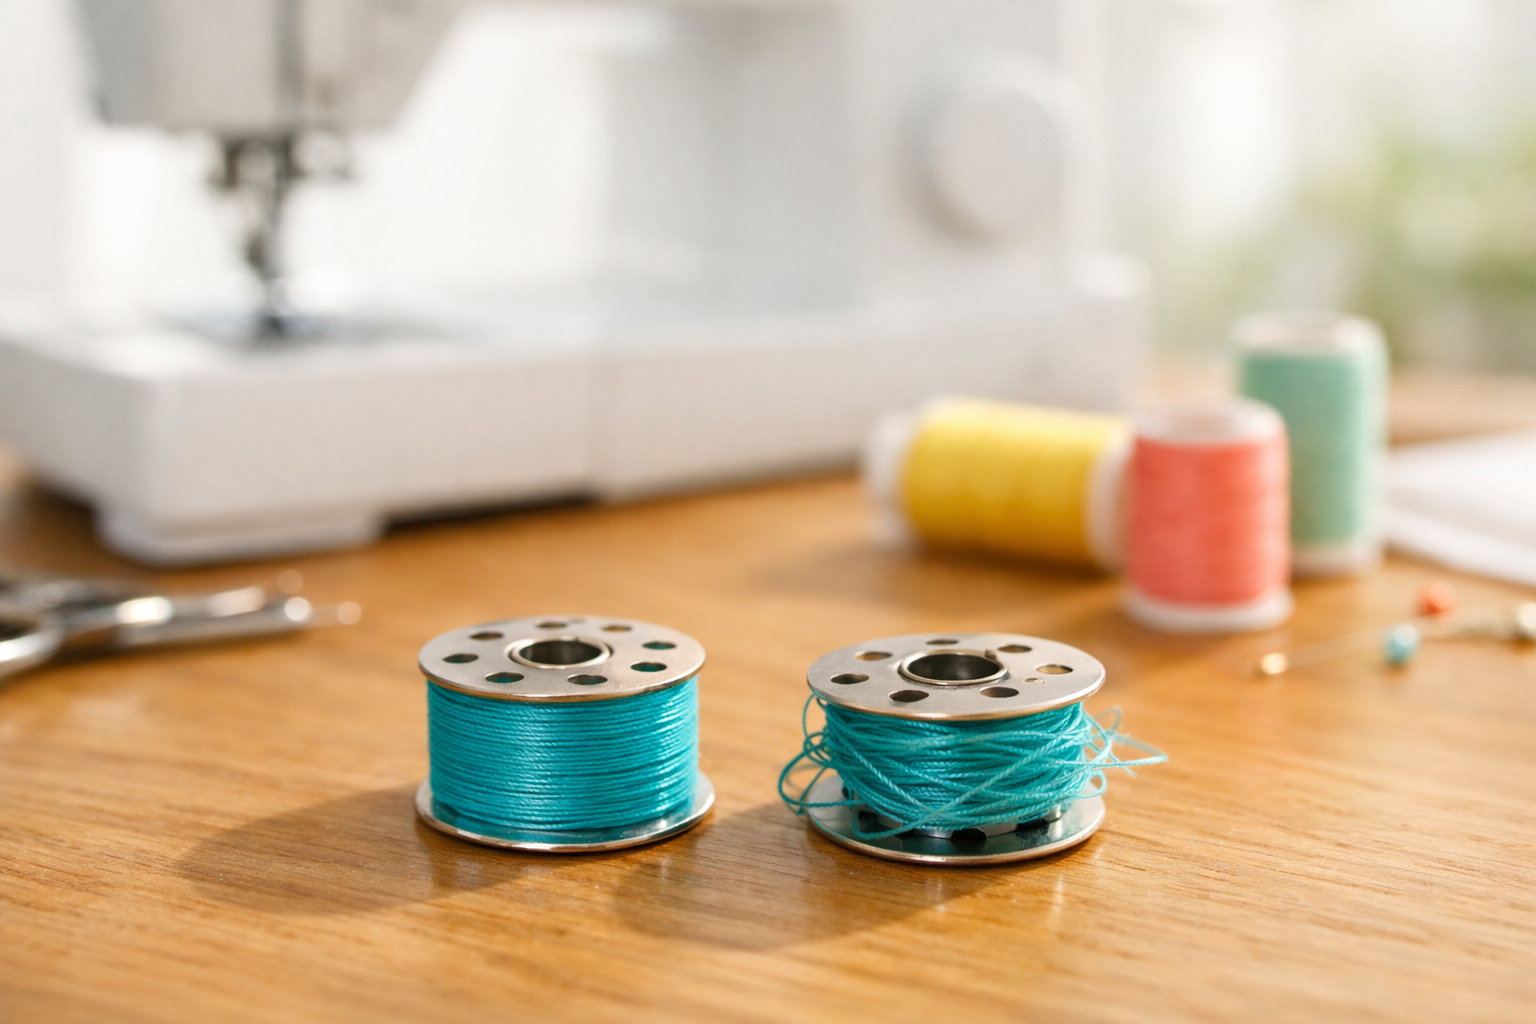
Winding a bobbin correctly means threading your machine’s bobbin winder properly, filling the bobbin evenly to about 80-90% capacity, and maintaining consistent tension throughout the winding process. A correctly wound bobbin has smooth, even layers of thread without gaps, bulges, or loose spots, which prevents thread breaks, tension problems, and skipped stitches during sewing. Most sewing machines have a built-in bobbin winder that automates this process when set up correctly.
Key Takeaways
- Always use the correct bobbin type for your specific sewing machine model, using the wrong size or style causes tension issues and jamming
- Fill bobbins to 80-90% capacity, leaving a small gap at the top rim to prevent overfilling and thread tangling
- Thread must pass through the tension disc on your bobbin winder for even winding, skipping this step creates loose, uneven bobbins
- Wind at moderate speed (not full throttle) to maintain consistent tension and prevent thread stretching or breaking
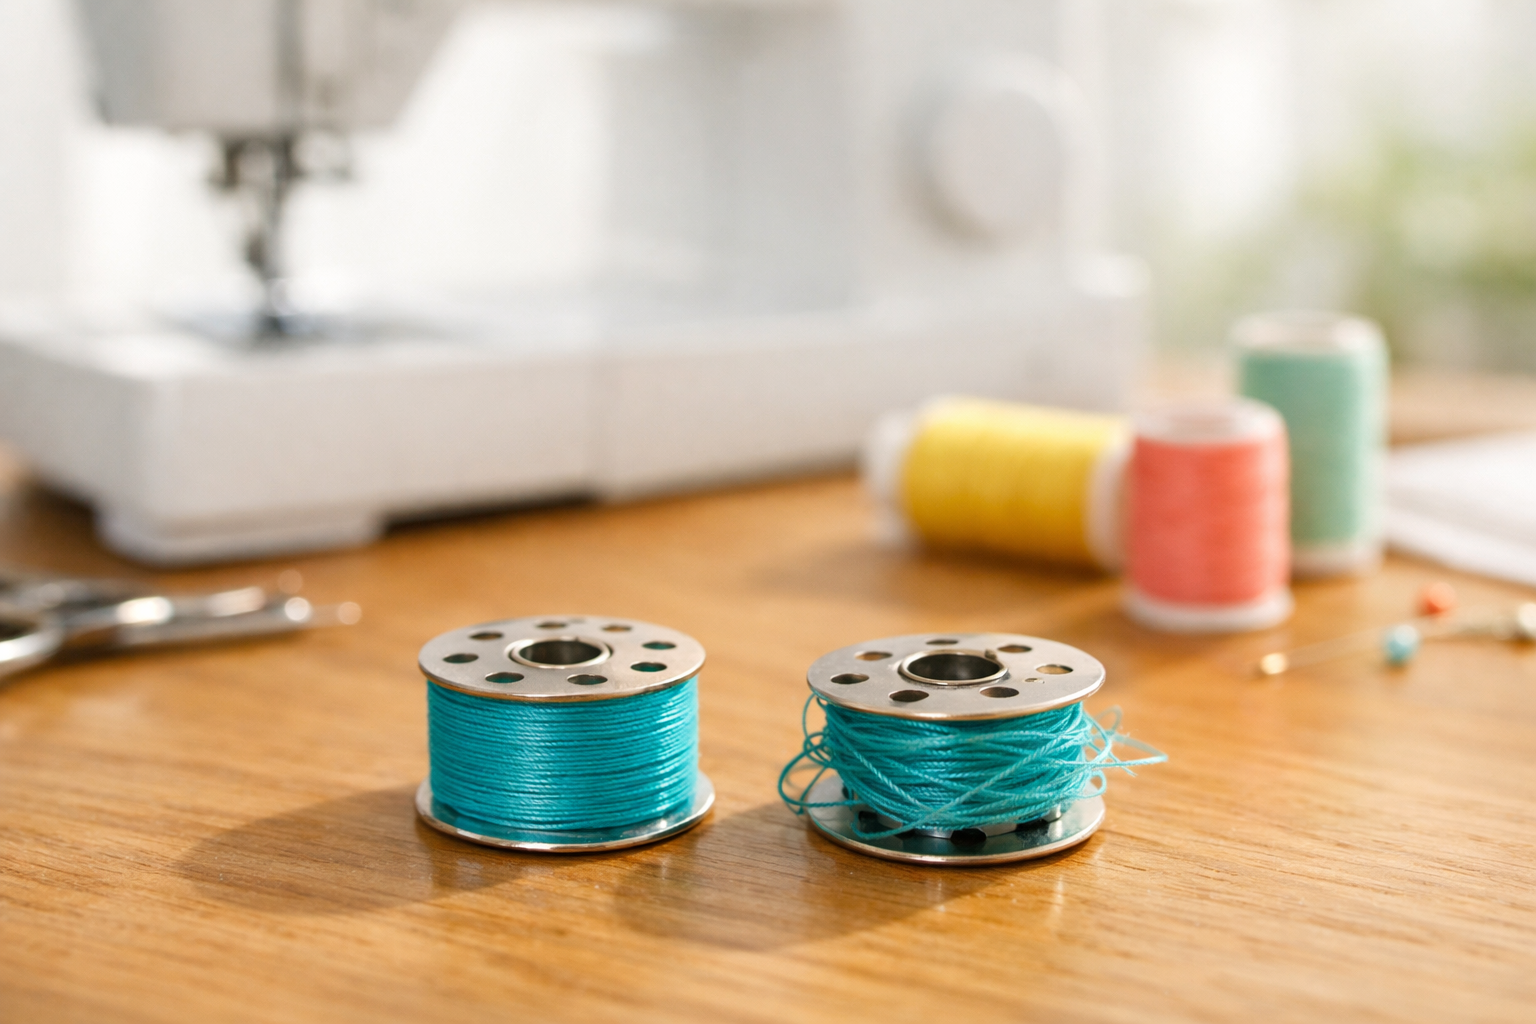
- A properly wound bobbin has smooth, flat layers with no gaps, bulges, or thread crossing unevenly from side to side
- Bobbin thread breaking during winding usually means the thread is caught somewhere, the tension is too tight, or you’re winding too fast
- Uneven winding on one side indicates the bobbin isn’t seated correctly on the winder spindle or the thread guide is misaligned
- Hand-winding works in a pinch but machine winding produces more consistent tension and even layers
- Check your bobbin before every project,a poorly wound bobbin from last month can ruin today’s sewing
- Most tension problems trace back to the bobbin,learning to wind correctly solves about 60% of common sewing frustrations
What Is a Bobbin and Why Does It Need to Be Wound Correctly?
A bobbin is a small spool that holds the lower thread in your sewing machine, working together with the upper thread to create a lockstitch. The bobbin sits in a case beneath your fabric, and when wound correctly, it feeds thread smoothly and evenly to form balanced stitches.
Correct bobbin winding matters because your sewing machine relies on precise tension between the upper and lower threads. When a bobbin is wound unevenly, too loosely, or too tightly, it disrupts this tension balance and causes problems like:
- Thread breaks mid-seam, forcing you to stop and rethread
- Skipped stitches that leave gaps in your seam
- Puckered fabric where the stitches pull too tight
- Bird’s nesting (tangled thread clumps) on the underside of your fabric
- Inconsistent stitch length that looks unprofessional
Think of a bobbin like a tire, if it’s not wound evenly, it wobbles. That wobble translates directly into stitch problems. A well-wound bobbin rotates smoothly in its case, releasing thread at a consistent rate that matches your upper thread tension.
Choose machine winding if you want consistent results and plan to sew more than a quick repair. Choose hand winding if your machine’s bobbin winder is broken or you’re doing emergency repairs away from your machine.
How Do I Know If My Bobbin Is Wound Too Tight or Too Loose?
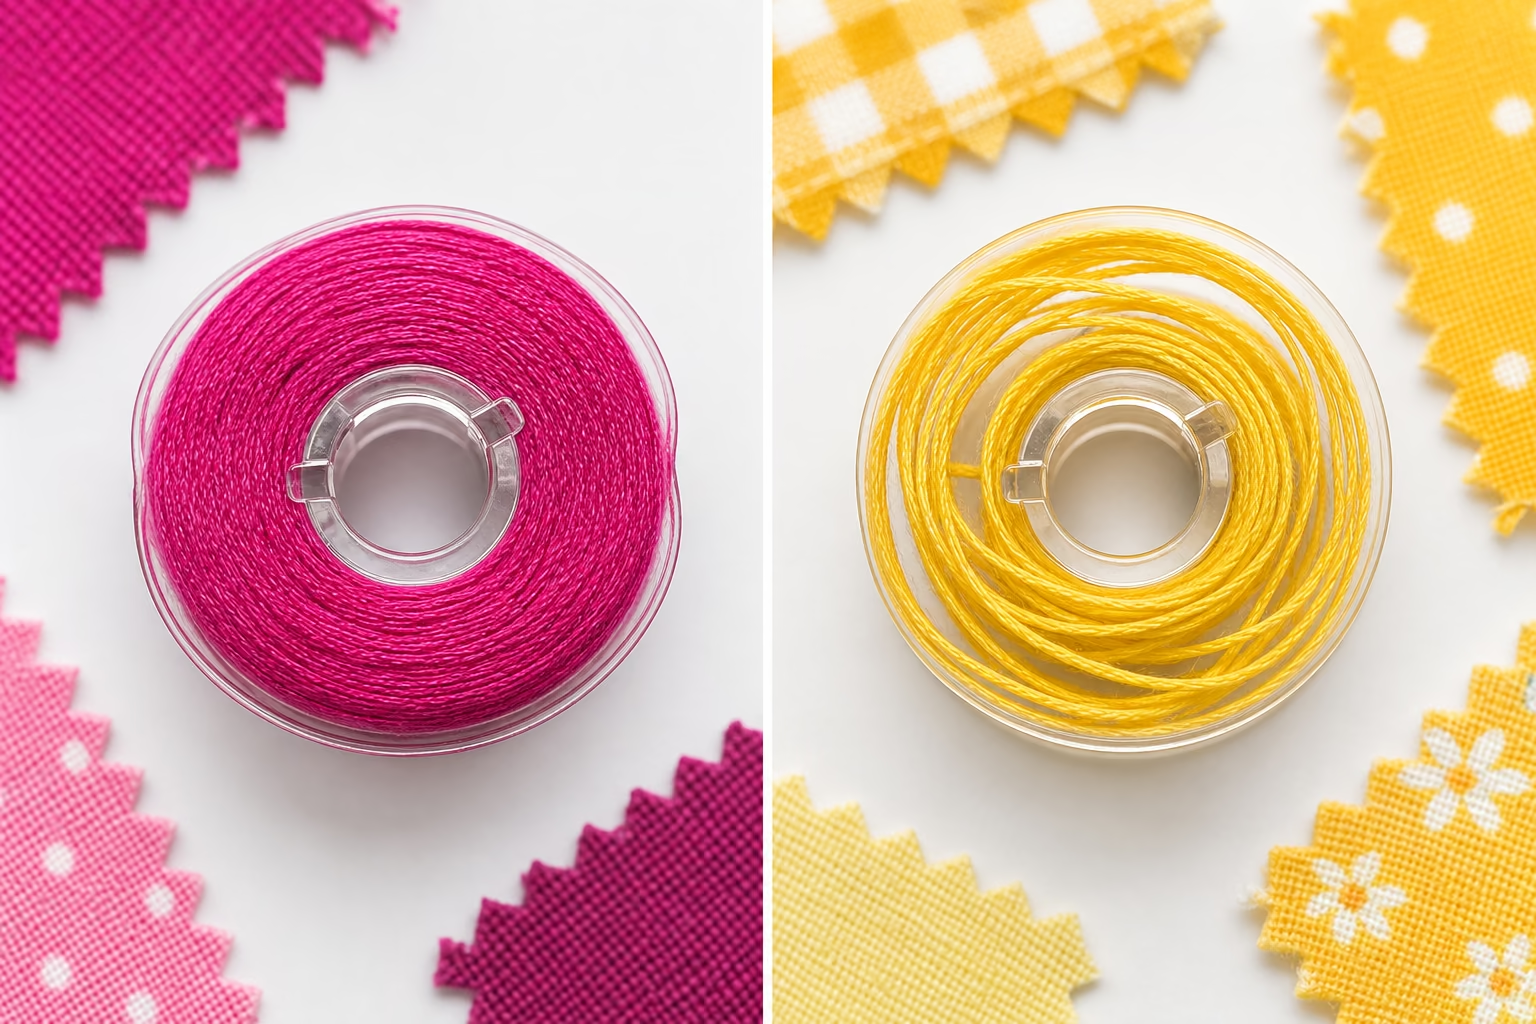
A bobbin wound too tight will have thread that feels hard and compressed, the bobbin sides may bulge slightly outward, and the plastic bobbin itself might look warped or stressed. A bobbin wound too loose will have visible gaps between thread layers, the thread may slip or unwind on its own, and you can often see the bobbin’s core through the thread layers.
Visual inspection checklist:
- Just right: Thread layers lie flat and smooth, edges are even, you can barely see the bobbin core through the thread, the bobbin feels firm but not rock-hard
- Too tight: Thread bulges in the middle, bobbin sides bow outward, thread feels compressed and hard to pull, plastic looks stressed
- Too loose: Gaps between thread wraps, thread feels spongy, layers are uneven, thread unwinds when you set the bobbin down
The squeeze test: Gently squeeze the sides of a wound bobbin between your thumb and finger. A correctly wound bobbin has a little give but springs back. An overly tight bobbin feels rigid like a hockey puck. A loose bobbin compresses easily and stays compressed.
Common mistake: Winding at full speed creates tight bobbins because the thread stretches under tension, then relaxes later and becomes loose in spots. Wind at 50-70% of your machine’s top speed for best results.
If you discover a poorly wound bobbin mid-project, don’t try to fix it, just unwind it completely and start over. Trying to add more thread to a loose bobbin or use a tight bobbin “just this once” will cost you more time in troubleshooting than rewinding takes.
How to Wind a Bobbin Correctly on Your Sewing Machine
Most modern sewing machines have a built-in bobbin winder on top of the machine, usually to the right of the needle. The process takes about 30 seconds once you know the steps.
Step-by-step winding process:
Place your thread spool on the spool pin at the top of your machine, with the thread unwinding in the correct direction (check your manual, some machines prefer clockwise, others counterclockwise)
Thread through the bobbin winder tension disc,this small disc or guide is separate from your main threading path and is specifically for bobbin winding; it’s often marked with a “B” or bobbin icon
Thread the bobbin by pulling the thread end through one of the small holes in the bobbin from the inside out, leaving a 4-5 inch tail
Place the bobbin on the bobbin winder spindle, pushing it firmly until it clicks or locks into place
Engage the bobbin winder by sliding the spindle to the right (on most machines) or pushing it down, this disengages your needle so it won’t move during winding
Hold the thread tail with one hand and press your foot pedal or start button to begin winding slowly
Trim the tail after a few wraps have secured the thread to the bobbin, don’t wait too long or the tail gets wound into the layers
Let the machine wind until the bobbin is 80-90% full; many machines stop automatically when the bobbin reaches capacity
Disengage the winder, remove the bobbin, and trim the thread, leaving a 3-4 inch tail for threading into your bobbin case
Decision rule: If your machine has an automatic bobbin winder that stops on its own, trust it, the manufacturer calibrated that stop point for optimal fullness. If your machine requires manual monitoring, stop when thread reaches about 1/8 inch below the bobbin’s top rim.

Compact and Portable: This mini electric bobbin winder is designed for convenient use and quick winding jobs, making it ideal for sewing enthusiasts who need a quick, on the go bobbin winding solution

COMPACT & PORTABLE DESIGN: The SINGER Portable Bobbin Winder is a lightweight, compact tool, perfect for winding bobbins on the go. Whether you’re at home, attending sewing classes, or traveling, this portable winder offers a quick and convenient solution for ensuring you always have bobbins ready.

FAST, EVEN WINDING FOR MORE SEWING TIME: A high-speed motor fills bobbins quickly and stops automatically at capacity to help prevent overfilling. Consistent winding supports smooth stitches and keeps projects moving without interruptions
What Happens If You Wind a Bobbin the Wrong Way?
Winding a bobbin in the wrong direction or without proper threading creates uneven tension that causes the thread to either feed too quickly (creating loose, loopy stitches on the bottom) or too slowly (causing tight stitches that pucker fabric). The most common wrong-way mistake is skipping the bobbin winder tension disc, which results in loose, sloppy winding that unravels easily.
Consequences of incorrect winding:
- Skipped tension disc: Creates loose, uneven layers that cause bird’s nesting and thread bunching under your fabric
- Wrong direction on spool pin: Thread twists as it unwinds, creating weak spots that break during sewing
- Overfilled bobbin: Thread catches on the bobbin case edges, causing jams and uneven feeding
- Thread tail wound into layers: Creates a bump that causes the bobbin to wobble and feed unevenly
- Starting without securing the thread: First few layers slip and bunch, creating an unstable foundation
Real-world example: Threading the bobbin from outside-in instead of inside-out means the thread end is trapped under the wound layers. When you try to thread your bobbin case, you can’t find the thread end without unwinding half the bobbin.
The good news? Bobbin winding mistakes are easy to spot before you start sewing. Always give your wound bobbin a quick visual check, if it doesn’t look smooth and even, rewind it. Those 30 seconds save 30 minutes of frustration later.
Can I Use Any Bobbin with My Sewing Machine?
No, you must use the specific bobbin type and size designed for your sewing machine model. Using the wrong bobbin, even one that looks similar, causes tension problems, jamming, and can damage your machine’s bobbin case or hook assembly.
Why bobbin compatibility matters:
Sewing machines use different bobbin systems, and each requires precise dimensions. A bobbin that’s even 1-2 millimeters too wide or too narrow won’t sit correctly in the bobbin case, causing the thread to feed unevenly or jam completely.
Common bobbin types:
- Class 15 (Style A): Most common for home machines, 20.5mm diameter, 11.5mm wide, flat on both sides
- Class 66: Slightly larger, 20.5mm diameter, 9mm wide, used in older machines
- Class M (Style L): Small bobbins for compact machines, 20mm diameter, 9mm wide
- Drop-in bobbins: Vary by manufacturer; Brother, Singer, and Janome each have proprietary sizes
- Industrial bobbins: Larger and heavier, not interchangeable with home machine bobbins
How to identify your bobbin type:
- Check your sewing machine manual, it lists the exact bobbin class or part number
- Look at your existing bobbins for stamped numbers or letters
- Measure your bobbin with a ruler if you’ve lost the manual
- Search “[your machine brand and model] bobbin type” online
- Bring an existing bobbin to a sewing shop for matching
Common mistake: Buying a variety pack of “universal” bobbins online. These packs often include multiple types, and beginners use whichever one fits loosely in the case, not realizing the fit should be snug and precise.
Choose metal bobbins if you sew frequently with heavy threads or do a lot of machine embroidery, they’re more durable. Choose plastic bobbins if your machine manufacturer specifies them (some machines require plastic to avoid magnetic interference with computerized features).
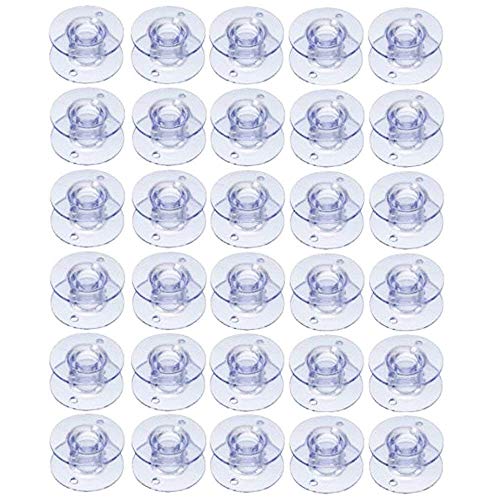
Compatible with Brother Models Listed Below

10 Bobbins Included: Ideal for Pre Winding Your Embroidery Bobbin Thread to Have Ready When Needed, and for Keeping Extra Bobbins on Hand for Winding Sewing Thread Colors to Suit Your Projects

What you get: the package includes 4 pieces sewing machine bobbin case, you can change and replace according to your own interest, or share with others
How Full Should I Fill the Bobbin When Winding?
Fill your bobbin to approximately 80-90% of its capacity, leaving a small gap (about 1/8 inch or 2-3mm) between the top thread layer and the bobbin’s rim. This prevents overfilling, which causes thread to catch on the bobbin case edges and creates tension problems.
Why the gap matters:
When you overfill a bobbin, the thread layers rise above the bobbin’s rim and can catch on the metal edges of your bobbin case as the bobbin rotates. This creates drag that disrupts tension and can cause the thread to break or create uneven stitches. The gap allows the bobbin to rotate freely inside its case without friction.
Visual guide to bobbin fullness:
- Underfilled (50% or less): Wastes bobbins and means more frequent changes, but doesn’t cause sewing problems
- Optimal (80-90%): Smooth layers just below the rim, maximum thread without overfilling
- Overfilled (95-100%): Thread mounds above the rim, catches on bobbin case, causes jams
How many yards fit on a bobbin?
A standard Class 15 bobbin holds approximately 60-70 yards of all-purpose thread when filled to 80-90% capacity. Thicker threads (like topstitching thread) fill the bobbin faster and hold less yardage. Finer threads (like 60-weight) hold more yardage.
Decision rule: If you’re working on a large project like a quilt, wind 2-3 bobbins at the start so you don’t have to stop mid-seam to refill. If you’re doing a quick repair, a half-full bobbin is fine, you don’t need to maximize capacity.
Many modern machines have an automatic stop feature that disengages the bobbin winder when the bobbin reaches optimal fullness. If your machine has this feature, trust it, the manufacturer tested and calibrated that stop point.
My Bobbin Thread Keeps Breaking While Winding, What Am I Doing Wrong?
Bobbin thread breaks during winding usually happen because the thread is caught somewhere in the thread path, you’re winding too fast, the thread tension is set too tight, or you’re using old, brittle thread. Check the entire thread path from spool to bobbin for snags, lint, or rough spots.
Troubleshooting checklist for thread breaks:
- Check the spool pin: Make sure the thread unwinds freely and isn’t caught under the spool or on a rough edge
- Inspect the tension disc: Thread should pass through the bobbin winder tension disc smoothly, if it’s too tight, loosen it slightly
- Look for lint buildup: Clean around the bobbin winder spindle and tension disc with a small brush
- Examine the thread quality: Old thread (5+ years) becomes brittle and breaks easily, replace it
- Slow down: Wind at 50-60% speed instead of full throttle to reduce stress on the thread
- Check the bobbin holes: Some bobbins have rough edges around the threading hole that can cut thread, smooth them with fine sandpaper if needed
Common mistake: Threading the bobbin through the wrong hole. Most bobbins have multiple small holes, use the one closest to the center for the most secure anchor. Threading through an outer hole creates uneven tension that can cause breaks.
When thread breaks repeatedly:
- If it breaks at the spool: The thread is unwinding against its natural twist direction, flip the spool over
- If it breaks at the tension disc: The disc is too tight or has a burr, adjust or clean it
- If it breaks at the bobbin: The hole has a rough edge, switch to a new bobbin
- If it breaks with all threads: Your bobbin winder mechanism may need servicing
Quick fix: If you need to finish winding a bobbin and keep experiencing breaks, try winding by hand for that bobbin, then take your machine to a technician to diagnose the winder issue.
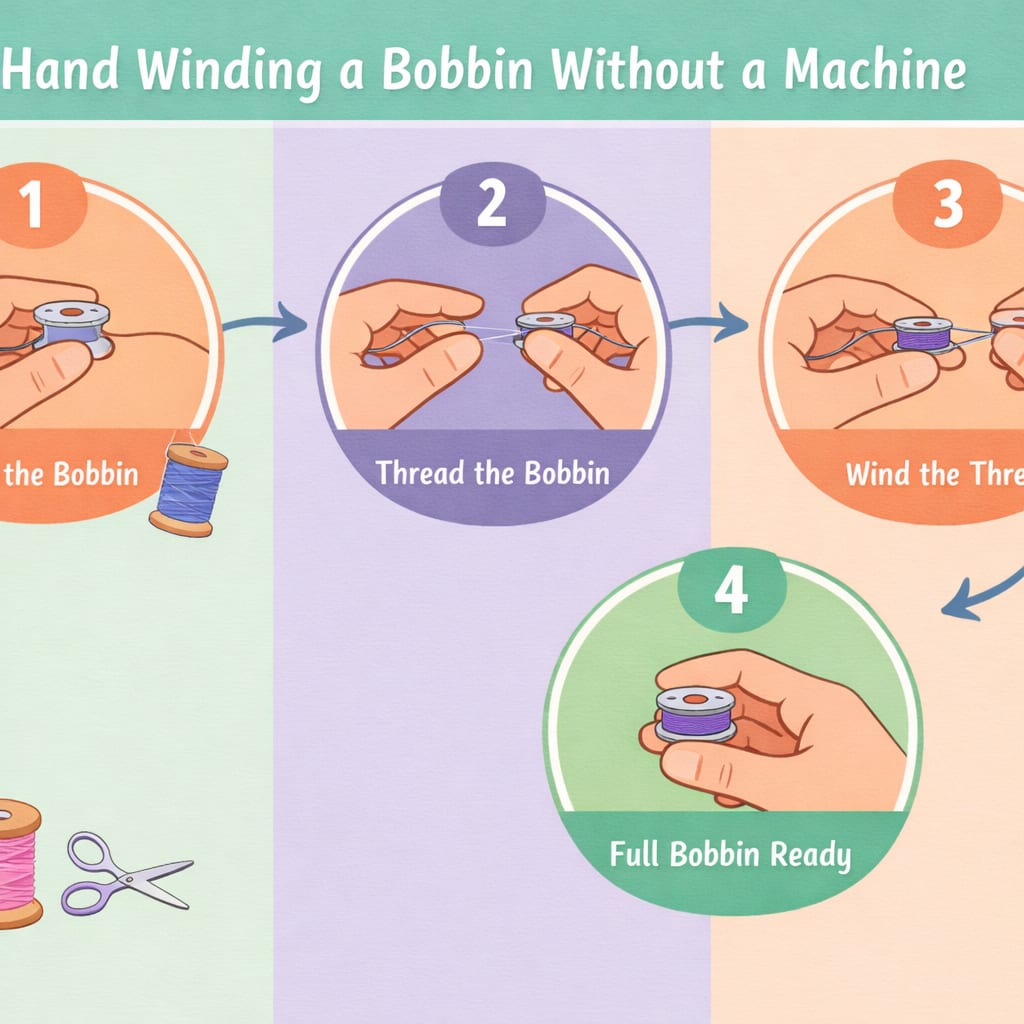
How to Wind a Bobbin Without a Sewing Machine
Wind a bobbin by hand by securing the thread end through the bobbin’s hole, holding the bobbin in your non-dominant hand, and rotating it clockwise while guiding the thread with your other hand to create even layers. This method works for emergency repairs but produces less consistent tension than machine winding.
Hand-winding technique:
- Secure the thread by pushing the end through a bobbin hole from inside to outside, leaving a 4-inch tail
- Hold the bobbin in your non-dominant hand with your thumb on one side and fingers on the other
- Pinch the thread between your dominant hand’s thumb and forefinger about 6 inches from the bobbin
- Rotate the bobbin clockwise (when viewed from the side with the thread hole) while maintaining light tension on the thread
- Guide the thread side to side as you wind to create even layers across the bobbin width
- Trim the tail after 10-15 wraps secure the thread
- Continue winding until the bobbin is about 70-80% full, hand winding tends to be less even, so don’t overfill
- Secure the end by tucking it under the last few wraps or leaving a 3-inch tail for threading
Maintaining tension while hand-winding:
Keep consistent pressure on the thread as you wind, not too tight (which stretches the thread) and not too loose (which creates gaps). The thread should feel like you’re gently restraining it, not pulling hard. Practice on a spare bobbin until you develop a feel for the right tension.
Hand-winding alternatives:
- Pencil method: Push a pencil through the bobbin hole and spin the pencil while guiding thread, faster than pure hand rotation
- Drill method: Use a power drill on low speed with a pencil or dowel through the bobbin, requires careful speed control
- Portable bobbin winder: Small hand-crank devices designed for travel sewing, available for $10-20
Decision rule: Hand-wind only when your machine’s bobbin winder is broken or you’re away from your machine. For regular sewing, machine winding produces more consistent results and saves time.

SIZE & QUANTITY: Floss bobbin is approximately 92mm in length, 25mm in width or 3.7 inch x 1 inch. Each packs contains 1pc bobbin winder.

Plastic winder used to wind floss, ribbon, threads and yarns onto cardboard

Bobbin tube: the winding machine bobbin tube is engineered for precision, ensuring manual winding tool performance that delivers consistently beautiful yarn balls every time,wool ball winder tube,yarn ball winder bobbin
Why Is My Bobbin Winding Unevenly on One Side?
A bobbin that winds unevenly with more thread on one side indicates the bobbin isn’t seated correctly on the winder spindle, the thread guide is bent or misaligned, or the bobbin itself is damaged or warped. The bobbin must sit perfectly perpendicular to the spindle for even winding.
Diagnosing uneven winding:
- Thread piles up on the left: Bobbin is tilted right or thread guide pushes thread left
- Thread piles up on the right: Bobbin is tilted left or thread guide pushes thread right
- Thread bunches in the middle: Thread guide isn’t moving side to side (if your machine has an automatic guide)
- Random uneven spots: Bobbin is warped, damaged, or has debris stuck to it
Fixes for uneven winding:
- Reseat the bobbin: Remove it completely and push it back onto the spindle firmly until it clicks or locks, it should sit flush against the spindle base
- Check the spindle: Make sure it’s clean and free of lint or thread bits that prevent the bobbin from sitting flat
- Inspect the thread guide: The small metal guide that moves back and forth should be centered and move smoothly, if it’s bent, gently straighten it
- Try a different bobbin: A warped or damaged bobbin won’t wind evenly no matter what you do
- Clean the mechanism: Lint buildup around the winder can interfere with the bobbin’s position
Common mistake: Forcing the bobbin onto the spindle without ensuring it’s properly aligned. The bobbin should slide on easily and sit perpendicular to the spindle, if you have to force it, something’s wrong.
When to call a technician:
If you’ve tried all these fixes and bobbins still wind unevenly, your bobbin winder mechanism may be out of alignment or damaged. This requires professional adjustment, don’t try to force or bend machine parts yourself.
Do All Sewing Machines Wind Bobbins the Same Way?
No, sewing machines use different bobbin winding systems depending on the brand, model, and age. The three main types are top-loading horizontal winders (most common on modern machines), front-loading vertical winders (common on older machines), and drop-in winders where the bobbin winds in place in the machine.
Common bobbin winding systems:
Top-loading horizontal winder:
- Bobbin winder is on top of the machine, usually to the right of the needle
- Spindle slides horizontally to engage/disengage
- Thread path includes a separate tension disc for winding
- Found on most Brother, Singer, Janome, and Babylock home machines made after 2000
Front-loading vertical winder:
- Bobbin winder is on the front or side of the machine
- Spindle pops up or out to engage
- May share the main thread tension system
- Common on vintage machines and some industrial models
In-place winding:
- Bobbin winds while sitting in the bobbin case inside the machine
- Thread path goes through the needle
- Less common, found on some vintage and specialty machines
- Requires different threading sequence
Drop-in bobbin systems:
- Bobbin sits in a clear case on top of the machine bed
- Winder is usually on the machine top
- Easy to monitor thread level while sewing
- Standard on most modern computerized machines
Brand-specific differences:
- Singer: Most models use top horizontal winders with automatic stop
- Brother: Top horizontal winders, often with quick-set bobbin winding
- Janome: Top horizontal winders, some models have separate winding motors
- Bernina: Front vertical winders on older models, top horizontal on newer
- Vintage machines: Highly variable, always consult your specific manual
Decision rule: Always check your machine’s manual for the exact winding procedure. While the basic principle (thread goes from spool through tension to bobbin) is universal, the specific steps and thread path vary enough that following generic instructions can lead to problems.
Common Mistakes When Winding a Bobbin for Beginners
The most common beginner mistakes are skipping the bobbin winder tension disc (causing loose, uneven winding), overfilling the bobbin past its rim, winding too fast, and forgetting to disengage the needle before winding. Each of these creates specific problems that frustrate new sewers.
Top 10 bobbin winding mistakes:
- Skipping the tension disc: Results in loose, sloppy winding that unravels and causes bird’s nesting
- Overfilling the bobbin: Thread catches on bobbin case edges, causing jams and breaks
- Not securing the thread tail: First layers slip and bunch, creating an unstable base
- Winding at full speed: Stretches thread and creates uneven tension
- Using the wrong bobbin type: Causes poor fit in bobbin case and tension problems
- Forgetting to engage the winder: Needle moves while winding, potentially breaking or bending it
- Threading the bobbin backward: Thread end is trapped under wound layers
- Not trimming the tail: Tail gets wound into layers, creating bumps and uneven spots
- Reusing old, brittle thread: Breaks during winding or sewing
- Not checking the wound bobbin: Assumes it’s fine without visual inspection, then discovers problems mid-project
How to avoid these mistakes:
- Create a checklist: Write down your machine’s specific winding steps and keep it near your machine until the process becomes automatic
- Wind slowly at first: Use 50% speed until you’re confident in the process
- Inspect every bobbin: Make it a habit to look at the wound bobbin before threading it into your machine
- Keep the manual handy: Reference the threading diagram until you’ve memorized it
- Practice with cheap thread: Wind and rewind practice bobbins with inexpensive thread until you can do it perfectly
The 5-second check:
Before you start sewing with a newly wound bobbin, hold it up and look at it from the side. You should see smooth, even layers with no gaps, bulges, or crossed threads. If anything looks off, rewind it, those 30 seconds save hours of frustration.
How to Thread the Bobbin Winder on My Machine Correctly
Threading the bobbin winder correctly means running the thread from your spool pin through the bobbin winder tension disc (not your main sewing tension discs) and then to the bobbin. The bobbin winder has its own separate thread path that’s usually marked with arrows or a “B” symbol on your machine.
Standard bobbin winder threading path:
- Place thread on spool pin at the top of your machine
- Pull thread to the bobbin winder tension disc,this is separate from your main threading path and is usually a small disc or guide near the bobbin winder
- Wrap thread around or through the tension disc according to your machine’s design (some wrap around, others thread through a slot)
- Bring thread to the bobbin and thread it through one of the bobbin’s holes from inside to outside
- Leave a 4-5 inch tail for holding during the first few rotations
Finding your bobbin winder tension disc:
Look for a small disc, hook, or guide between your spool pin and bobbin winder, often marked with “B” or a bobbin icon. On most machines, it’s silver or black metal, about the size of a dime, and separate from the larger tension discs used for regular sewing.
Common locations:
- Top-loading machines: Usually on the machine top between the spool pin and bobbin winder
- Front-loading machines: Often on the front panel near the bobbin winder
- Computerized machines: May be integrated into the thread path with clear markings
What if I can’t find the tension disc?
Check your manual’s threading diagram, it will show the exact location. If you’ve lost your manual, search “[your machine brand and model] bobbin winding” online for diagrams or videos. Some machines have the tension disc hidden under a thread guide or integrated into the bobbin winder assembly.
Common mistake: Using the main sewing tension discs for bobbin winding. This creates incorrect tension and can damage your machine’s timing. The bobbin winder has its own tension system designed specifically for winding.
Is It Better to Wind Bobbins Slowly or Does Speed Matter?
Winding bobbins at moderate speed (50-70% of your machine’s maximum) produces the most consistent results with even tension and smooth layers. Winding too fast stretches the thread and creates tight spots that later relax into loose areas, while winding too slowly doesn’t maintain enough tension for firm, even layers.
How speed affects bobbin quality:
Too fast (80-100% speed):
- Thread stretches under tension
- Creates tight winding that later loosens
- Higher risk of thread breaks
- Uneven layers from inconsistent tension
- Thread may overheat from friction
Optimal speed (50-70%):
- Consistent tension throughout winding
- Even, smooth layers
- Thread doesn’t stretch or stress
- Easy to control and monitor
- Produces professional results
Too slow (below 30%):
- Insufficient tension for firm winding
- Loose, spongy layers
- Takes unnecessarily long
- Easy to create uneven spots
Practical speed guidelines:
Most sewers find that winding at about the speed you’d use for regular sewing produces good results. If your machine has a speed control slider, set it to medium. If you control speed only with the foot pedal, press it about halfway down, enough to maintain steady rotation but not racing.
When to adjust speed:
- Delicate threads (silk, rayon): Wind slightly slower to prevent stretching or breaking
- Heavy threads (topstitching, denim): Wind at moderate speed with attention to even layering
- Metallic threads: Wind slowly, these threads are fragile and break easily at high speed
- All-purpose polyester: Standard moderate speed works perfectly
The sound test: A bobbin winding at the right speed makes a steady, consistent humming sound. If you hear the pitch change or the sound becomes strained, you’re going too fast. If the sound is intermittent or stuttering, you’re going too slow.
Decision rule: When in doubt, wind slower rather than faster. A bobbin that takes 45 seconds instead of 30 will still work perfectly, but a bobbin wound too fast will cause problems that waste much more time.
Frequently Asked Questions
How many bobbins should I wind before starting a project?
Wind 2-3 bobbins before starting a large project like a quilt or garment. A standard bobbin holds enough thread for approximately 8-12 yards of seaming, so estimate based on your project size. It’s better to have extra wound bobbins than to stop mid-seam.
Can I leave thread on a bobbin for months between projects?
Yes, wound bobbins can sit for months or even years if stored properly in a closed container away from sunlight and humidity. However, always check the bobbin before using it, thread can loosen over time, and you may need to rewind if the layers look uneven or loose.
Should I wind bobbins with the same thread as my top thread?
For most projects, yes, using the same thread type and weight on top and bottom creates balanced stitches. However, some techniques (like machine quilting or decorative stitching) intentionally use different threads. When in doubt, match your threads.
Why does my bobbin rattle in the bobbin case?
A rattling bobbin usually means you’re using the wrong bobbin type for your machine, the bobbin is underfilled, or the bobbin case itself is damaged. Check that your bobbin matches your machine’s specifications and is filled to 80-90% capacity.
Can I wind a bobbin while sewing?
No, you must disengage the needle mechanism before winding a bobbin. Most machines do this automatically when you engage the bobbin winder, but always check, sewing with the bobbin winder engaged can damage your machine’s timing.
How do I know when to replace old bobbins?
Replace bobbins when they show cracks, warping, rough edges around the holes, or discoloration. Plastic bobbins typically last 5-10 years with regular use, while metal bobbins can last decades. If a bobbin causes consistent tension problems even when wound correctly, replace it.
What’s the difference between plastic and metal bobbins?
Plastic bobbins are lighter, quieter, and required by some computerized machines to avoid magnetic interference. Metal bobbins are more durable, better for heavy-duty sewing, and preferred for vintage machines. Always use the type specified in your machine’s manual.
Can I use pre-wound bobbins instead of winding my own?
Yes, pre-wound bobbins are convenient and wound with consistent tension. However, they’re more expensive per yard of thread, come in limited colors, and you must verify they’re the correct type for your machine. They’re ideal for travel or quick projects.
Why does my bobbin thread show on top of my fabric?
Bobbin thread showing on top usually indicates your upper thread tension is too tight, not a bobbin winding problem. However, a loosely wound bobbin can contribute to this issue. Check both your upper tension setting and rewind the bobbin if it looks loose.
How tight should the thread feel when I pull it from a wound bobbin?
Thread should pull from a wound bobbin with slight resistance, not so loose it unwinds freely, but not so tight you have to tug hard. Think of it like pulling paper towels from a roll, smooth and controlled, not floppy or stuck.
Should I remove the bobbin from my machine between projects?
It’s not necessary to remove the bobbin between projects, but it’s good practice to remove it if you won’t sew for several weeks. This prevents the bobbin case spring from staying compressed and losing tension over time.
Can I rewind a partially used bobbin with different thread?
It’s better to fully unwind and start fresh rather than layering different threads on one bobbin. Different threads have different tensions and thicknesses, creating an uneven base that causes winding and sewing problems.
Conclusion
Winding a bobbin correctly is one of those fundamental sewing skills that prevents about 60% of common frustration. The key elements, using the right bobbin type, threading through the tension disc, filling to 80-90% capacity, and winding at moderate speed, take just 30 seconds to execute but save hours of troubleshooting tangled thread, broken stitches, and puckered seams.
Your next steps:
- Identify your bobbin type by checking your manual or measuring your current bobbins, then stock up on 10-12 of the correct type
- Practice winding three bobbins right now using the steps in this guide, inspecting each one for smooth, even layers
- Create a quick-reference card with your machine’s specific bobbin winding steps and tape it near your machine
- Wind 2-3 bobbins before starting your next project so you never have to stop mid-seam
- Inspect every bobbin before threading it into your machine, make the 5-second visual check a habit
Remember that a well-wound bobbin looks smooth and even from all angles, with thread layers that lie flat and a small gap at the top rim. If your bobbin doesn’t look right, rewind it. Those 30 seconds of prevention beat 30 minutes of seam-ripping every time.
The difference between frustrating sewing sessions and enjoyable ones often comes down to the basics. Master bobbin winding, and you’ll spend more time creating and less time troubleshooting. Now grab a few empty bobbins and practice, your future sewing self will thank you.


