


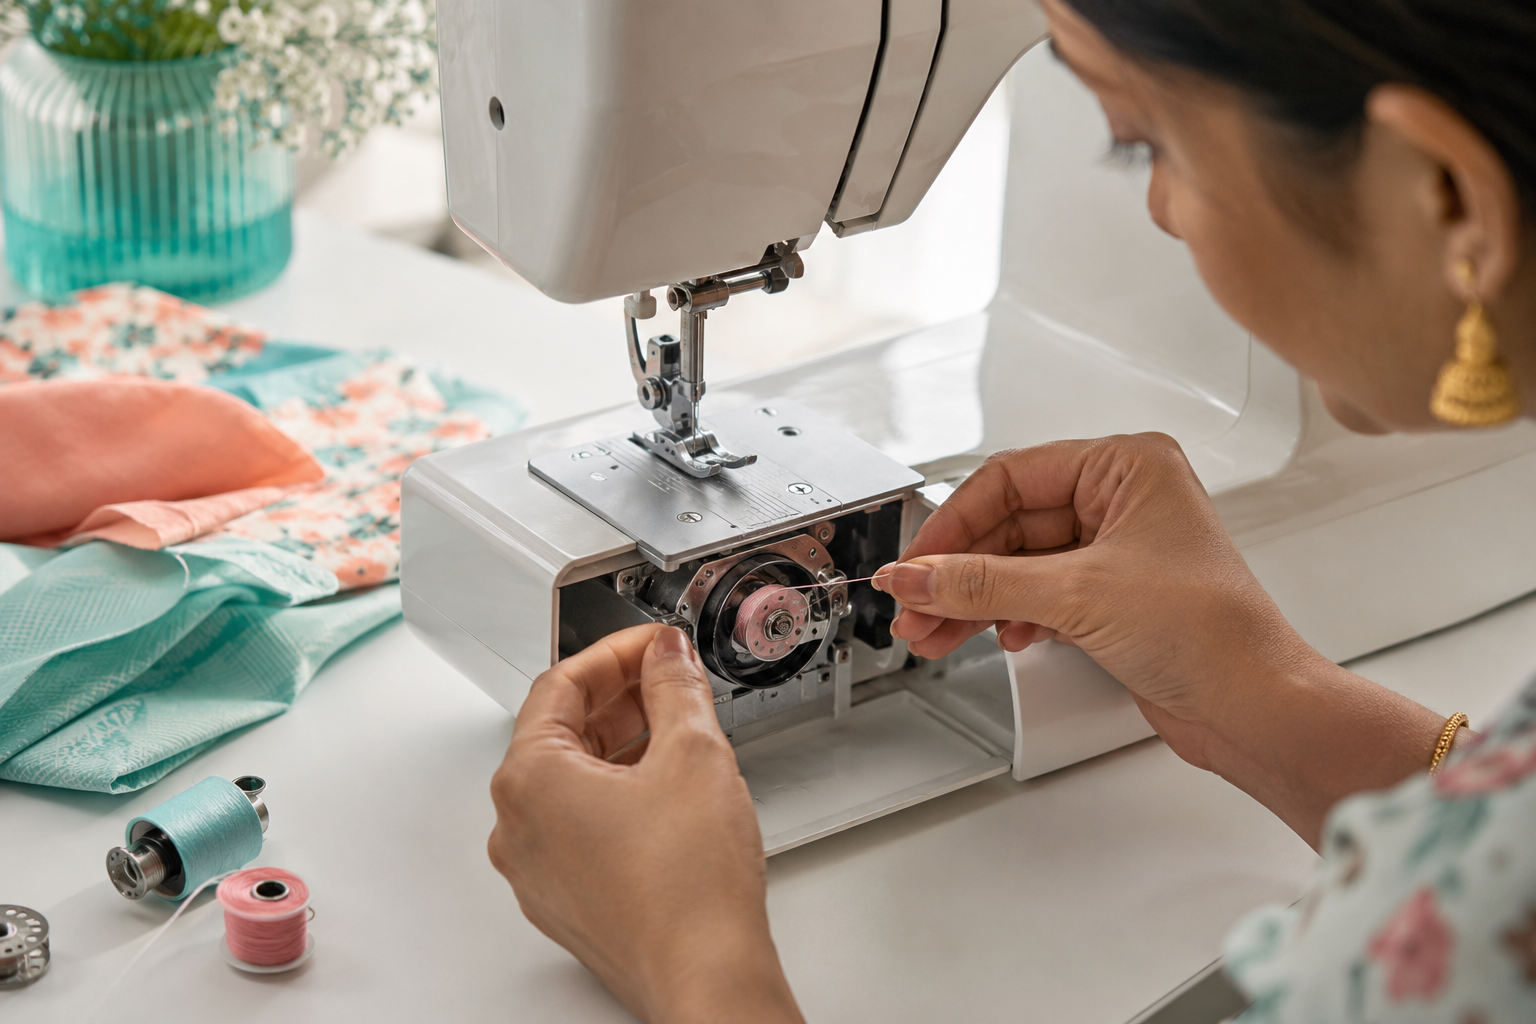
Quick Answer: Your sewing machine won’t pick up the bobbin thread usually because of incorrect threading, improper bobbin insertion, timing issues, or lint buildup in the bobbin area. The most common culprits are threading the upper thread incorrectly (especially missing the take-up lever), inserting the bobbin backwards, or having the presser foot up during threading. These issues prevent the needle from catching the bobbin thread loop during the pickup cycle.
Key Takeaways
- Threading order matters: Always thread with the presser foot up and pull thread through the take-up lever completely
- Bobbin direction is critical: Most machines require the thread to unwind counterclockwise, but check your manual
- Timing can drift: If your machine worked yesterday but fails today without rethreading, timing may have shifted
- Lint is a silent killer: Even small amounts of debris in the bobbin case can prevent proper thread pickup
- Tension affects pickup: Bobbin tension that’s too tight can prevent the needle from catching the loop
- Needle condition counts: A bent, dull, or wrong-size needle can miss the bobbin thread entirely
- Presser foot position: Threading with the foot down prevents proper tension disc engagement
- Bobbin case seating: An improperly seated bobbin case (in drop-in or front-load systems) blocks thread pickup
- Thread quality impacts performance: Old, cheap, or wrong-weight thread causes frequent pickup failures
- Professional help has a place: Timing issues and internal mechanical problems need expert repair
Why Is My Sewing Machine Not Catching the Bobbin Thread?
Your sewing machine fails to catch the bobbin thread when the needle can’t form and grab the thread loop during its downward-upward cycle. This happens because the upper thread isn’t properly tensioned, the bobbin isn’t positioned correctly, or mechanical components are out of alignment. The needle must pass close enough to the bobbin case hook to create a loop that the hook can catch and pull around the bobbin.
The pickup mechanism works through precise timing. When the needle descends through the fabric and reaches its lowest point, it creates a small loop of upper thread behind the needle. The rotating hook (or oscillating shuttle) must catch this loop at exactly the right moment and pull it around the bobbin case. If any part of this sequence is off by even a millimeter, the thread won’t pick up.
Common reasons the catch fails:
- Upper thread not seated in the tension discs (presser foot was down during threading)
- Take-up lever missed during threading, creating slack in the thread path
- Bobbin inserted backwards or upside down, changing the thread direction
- Bobbin case not fully seated in its housing
- Hook timing shifted due to impact, jam, or wear
- Needle bent or installed incorrectly (flat side facing wrong direction)
- Thread caught under the bobbin case or wrapped around internal parts
Choose this troubleshooting path if: Your machine has been working normally and suddenly stopped picking up thread. Start with rethreading (both upper and bobbin) before assuming mechanical failure.
How Does a Sewing Machine Pick Up Bobbin Thread?
A sewing machine picks up bobbin thread through a precisely timed mechanical dance between the needle, upper thread, and rotating hook. When the needle descends and begins to rise, it creates a loop of upper thread behind the needle shaft. The hook (or shuttle) rotates past at exactly that moment, catches the loop, and carries it around the bobbin case. This wraps the upper thread around the bobbin thread, creating a lockstitch when the take-up lever pulls everything tight.
The entire process happens in milliseconds and requires perfect timing. The hook must arrive at the needle’s loop within a 2-3 millimeter window. If the needle is too high when the hook passes, no loop forms. If it’s too low, the hook misses the loop entirely.
The pickup sequence step-by-step:
- Needle descends through fabric with upper thread
- Needle reaches its lowest point and begins rising
- Upper thread forms a small loop behind the needle (about 3-4mm above the needle’s lowest point)
- Rotating hook catches this loop with its point
- Hook carries the loop around the bobbin case in a full or partial rotation
- Upper thread wraps around bobbin thread
- Take-up lever rises, pulling both threads up and locking the stitch
- Cycle repeats for the next stitch
Common mistake: Pulling the bobbin thread up manually before starting to sew. Modern machines don’t always require this. Many will pick up the thread automatically on the first stitch if everything is threaded correctly.
Bobbin Thread Not Coming Up Through the Needle Plate
When bobbin thread stays below the needle plate instead of coming up, the needle isn’t catching the bobbin thread loop at all, or the thread is caught on something underneath. This specific symptom usually points to incorrect upper threading, a bobbin inserted backwards, or thread trapped under the bobbin case. The thread physically exists below but can’t be pulled to the surface.
Immediate fixes to try:
- Rethread the upper thread completely with the presser foot UP (this is critical)
- Remove the bobbin, check for thread tails caught under the case, and reinsert
- Hold the upper thread tail and manually turn the handwheel toward you one full rotation
- Watch for the upper thread to catch and pull up a loop of bobbin thread
- Pull both thread tails to the back before starting to sew
If the thread still won’t come up:
- Check that the bobbin is inserted with thread unwinding in the correct direction (usually counterclockwise for drop-in bobbins)
- Verify the bobbin case is fully seated and the finger/latch is engaged
- Look for thread wrapped around the hook race or caught in the tension spring
- Confirm the needle is inserted all the way up into the needle clamp with the flat side facing the correct direction
Edge case: Some machines require you to hold the upper thread tail while turning the handwheel. If you let go, the thread retracts and won’t catch the bobbin thread. Check your manual for the specific pickup procedure.
Difference Between Bobbin Tension Problems and Threading Problems
Bobbin tension problems and threading problems create different symptoms, though both can prevent proper stitching. Threading problems usually mean the machine won’t pick up the bobbin thread at all or creates loose, loopy stitches on top. Tension problems show up as uneven stitches, thread bunching on one side, or thread that picks up but doesn’t lock properly. Threading issues are about the thread path; tension issues are about how tightly the thread is held.
Threading problem symptoms:
- No bobbin thread pickup whatsoever
- Upper thread pulls out of the needle easily
- Loops of thread on the top surface of fabric
- Thread bunching in massive clumps underneath (bird’s nesting)
- Machine skips stitches entirely
Tension problem symptoms:
- Bobbin thread visible on top of fabric (bobbin tension too loose or upper too tight)
- Upper thread visible on bottom of fabric (upper tension too loose or bobbin too tight)
- Stitches look uneven but the machine is sewing
- Thread breaks frequently but pickup works
- Puckered fabric along the seam line
Quick diagnostic: If you can’t get the bobbin thread to come up at all, it’s a threading problem. If the thread comes up but the stitches look wrong, it’s likely tension. Fix threading first, then adjust tension.
Choose tension adjustment if: The machine picks up thread and sews, but stitches are unbalanced. Choose rethreading if the machine won’t pick up thread or creates massive thread nests.
How to Rethread a Bobbin on a Sewing Machine Correctly
Rethreading a bobbin correctly requires following the exact thread path for your machine type and ensuring the bobbin is oriented properly. For drop-in bobbins, the thread typically unwinds counterclockwise and passes through a tension slot or under a finger. For front-loading bobbin cases, thread the bobbin first, then insert the entire case with the thread tail pulled through the tension spring.
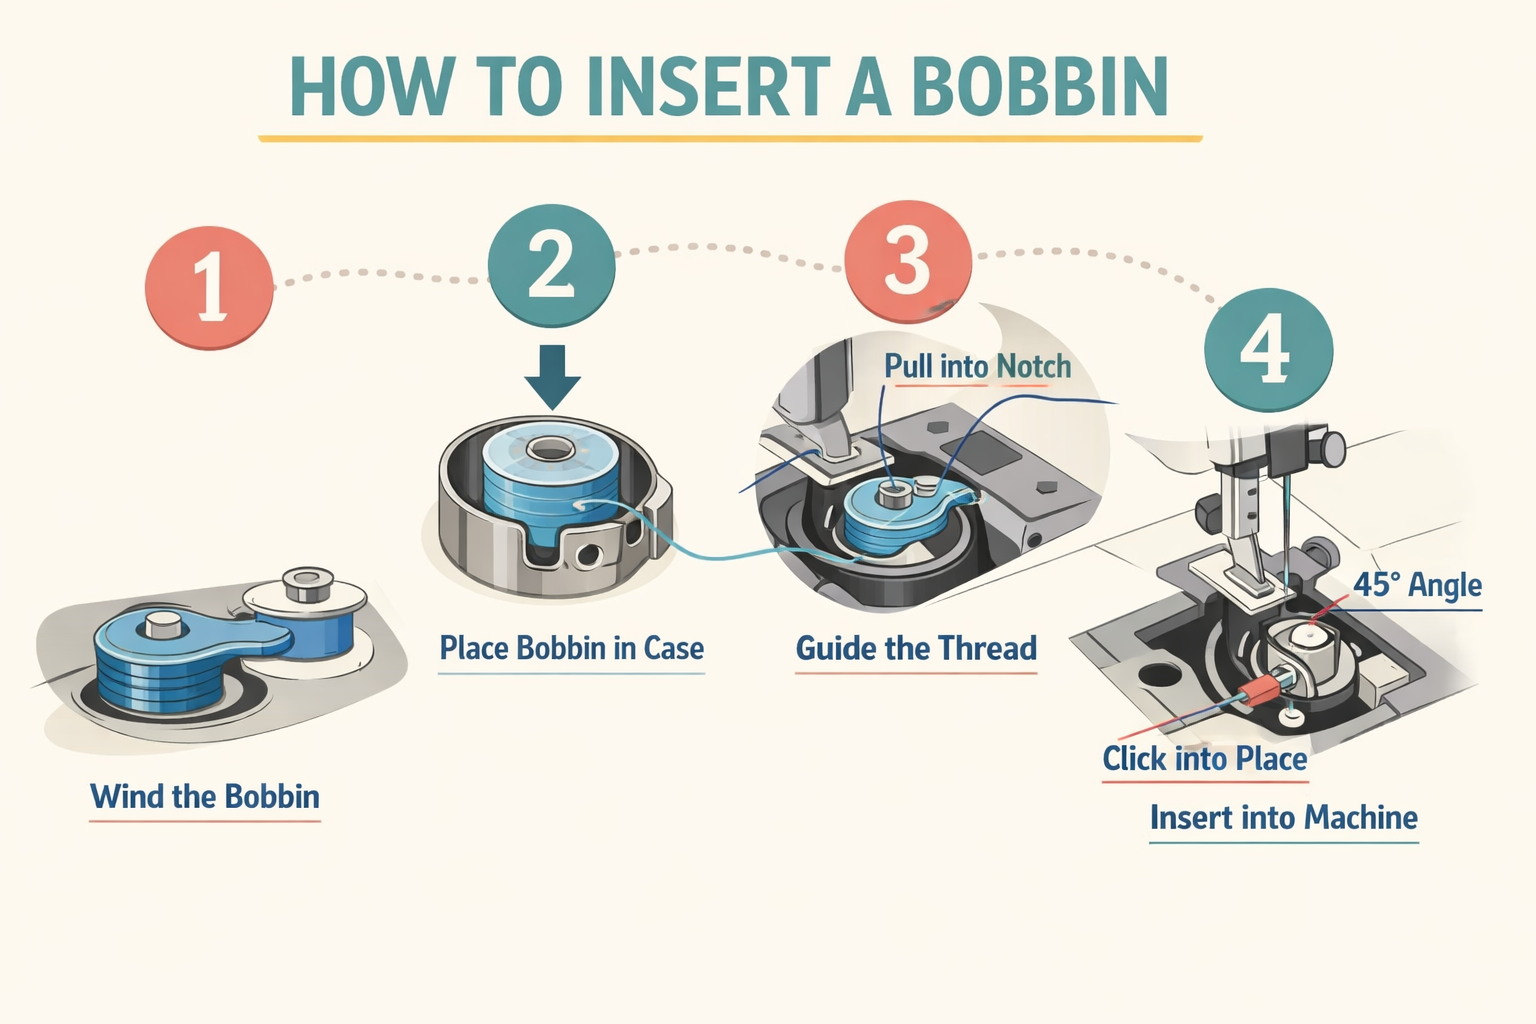
Drop-in bobbin threading (most common):
- Remove the bobbin case cover or slide plate
- Place the bobbin in the case so thread unwinds counterclockwise (check your manual)
- Pull thread through the slot or notch in the bobbin case
- Leave a 4-6 inch tail extending past the needle plate
- Replace the cover, ensuring it clicks into place
- Thread the upper thread with presser foot UP
- Hold upper thread and turn handwheel one full rotation toward you
- Pull up the bobbin thread loop with a pin or your finger
- Pull both threads to the back, leaving 4-6 inch tails
Front-loading bobbin case threading:
- Hold the bobbin case in your left hand with the tension spring visible
- Insert bobbin so thread unwinds to the left (usually)
- Pull thread through the slot and under the tension spring
- Leave a 4-inch tail hanging from the case
- Hold the case by the finger latch and insert into the machine
- Push until it clicks or locks into place
- Thread upper thread and pull up bobbin thread as above
Common mistakes that prevent pickup:
- Threading with the presser foot down (tension discs don’t engage)
- Bobbin inserted upside down or backwards
- Skipping the bobbin case tension slot entirely
- Not pulling enough thread tail through (it retracts during pickup)
- Bobbin case not fully seated or rotated incorrectly

421325 plastic Singer Bobbin Case; Rotating Hook Bobbin Case for top-loading bobbins

Wide Compatibility for Brother & Babylock Machines:This bobbin case is designed to directly replace part #XC3152221 and fits a wide range of popular Brother models—including CE1100PRW, CS6000I, CE2000, CE5000, PE770, SE400, SE700,SE600,SQ9185, and many more—as well as Babylock models such as BL80B Jubilant, Sofia BL137A, Grace BL40A, Rachel BL50A, and Ellure Plus BLR2. Refer to the full list in the description for additional compatible machines.
MULTI-QUANTITY: The bobbins for brother sewing machine package includes 50 transparent plastic bobbins, two transparent storage sewing bobbins case, great sewing machine accessories.
Is My Bobbin Inserted Upside Down or Backwards?
Your bobbin is likely inserted incorrectly if the thread won’t pick up and you’ve already rethreaded the upper thread. Most drop-in bobbins should have the thread unwinding counterclockwise (to the left) when viewed from above. Front-loading bobbin cases usually require the thread to unwind to the left as you hold the case. Inserting the bobbin backwards changes the thread path and prevents the hook from catching it.
How to check drop-in bobbin orientation:
- Look at the bobbin from above with the thread tail pulled out
- The thread should unwind counterclockwise (rotating left) in most machines
- Some machines have a diagram on the bobbin case cover showing the correct direction
- If your manual shows clockwise, follow that instead (a few brands differ)
How to check front-loading bobbin case:
- Hold the case with the tension spring facing you
- The thread should pull to the left and pass under the tension spring
- When you pull the thread tail, the bobbin should rotate counterclockwise
- The thread tail should exit from the left side of the case
Quick test: If you’re not sure which direction is correct, try both. Insert the bobbin one way, attempt to pick up thread. If it fails, flip the bobbin 180 degrees and try again. One direction will work; the other won’t.
Edge case: A few vintage machines and some industrial models use clockwise bobbin rotation. Always check your manual if you have an unusual machine.
Bobbin Thread Bunching Underneath Fabric Instead of Picking Up
Bobbin thread bunching underneath the fabric (bird’s nesting) happens when the upper thread has no tension and pulls excessive bobbin thread to the underside. This is almost always caused by threading the upper thread with the presser foot down, which leaves the tension discs open. The needle pulls loose upper thread down, which then pulls yards of bobbin thread up, creating a tangled mess under the fabric.
Why the presser foot position matters: When the presser foot is up, the tension discs spring open, allowing thread to slip between them. When you lower the foot, the discs close and grip the thread. If you thread with the foot down, the thread sits on top of the closed discs instead of between them, creating zero tension.
Immediate fix:
- Stop sewing and cut the thread tangle away
- Remove the fabric carefully
- Clean out all thread from the bobbin area
- Raise the presser foot
- Completely rethread the upper thread, ensuring it passes through every guide
- Pay special attention to the take-up lever (the wire loop that moves up and down)
- Lower the presser foot
- Test on scrap fabric
Other causes of bunching underneath:
- Upper thread caught on the spool (not unwinding freely)
- Thread wrapped around the spool pin or caught on a notch
- Bobbin wound unevenly or too loosely
- Wrong thread weight (too heavy for the needle size)
- Needle inserted backwards or bent
Common mistake: Assuming bunching means the bobbin tension is wrong. It almost never is. The bobbin tension is set at the factory and rarely needs adjustment. Bunching is an upper thread problem 95% of the time.
Do I Need to Replace My Bobbin Case If Thread Won’t Catch?
You rarely need to replace a bobbin case just because thread won’t catch. Bobbin cases are durable metal or plastic components that last for years unless physically damaged. Thread pickup failure is almost always a threading, timing, or maintenance issue rather than a worn bobbin case. Replace the case only if it’s cracked, the tension spring is broken, or the case doesn’t seat properly in the machine anymore.
Signs you actually need a new bobbin case:
- Visible cracks in the plastic or metal body
- Tension spring is bent, broken, or missing
- Case doesn’t click or lock into position when inserted
- Case rattles or moves when the machine runs
- Metal case has deep scratches or burrs that catch thread
- Drop-in case cover won’t close or stay closed
Signs the case is fine:
- Thread won’t pick up but the case looks normal
- Case seats properly and doesn’t move
- Tension spring is intact and springy
- No visible damage or wear
What to try before replacing:
- Clean the case thoroughly with a brush and rubbing alcohol
- Check that the tension spring moves freely
- Verify the case is inserted correctly (front-load cases can go in backwards)
- Test with a different bobbin (the bobbin itself might be damaged)
- Check the hook race for burrs or damage (this is more likely than case damage)
Cost consideration: Bobbin cases cost $8-$30 depending on the machine. If you’re unsure whether the case is the problem, buy a spare to test. If a new case doesn’t fix the issue, you’ve ruled out that variable and can return it or keep it as a backup.

✅ WIDE COMPATIBILITY: Fits most low-shank SINGER machines – Heavy Duty, Talent, Tradition, Simple, Promise, Brilliance, Quantum, Stylist, Confidence, Curvy, One, Athena & Futura. Not for C7250, C7220, C7200, 6600C, 6800C, HD6600/HD6800.

What you get: the package includes 4 pieces sewing machine bobbin case, you can change and replace according to your own interest, or share with others

Package comes with 2 pieces sewing machine bobbin cases, 20 pieces metal sewing machine bobbins, enough quantity to meet your long time use and replacements, you can take them as backup or share with others
What Tension Setting Should Bobbin Be for Thread Pickup?
Bobbin tension should be set to the manufacturer’s specification, typically requiring 4-6 inches of thread to slowly pull from the bobbin case under its own weight when you hold the thread tail. Most machines have bobbin tension pre-set at the factory and don’t require adjustment for thread pickup. If the bobbin tension is so tight that thread won’t pull at all, or so loose that the bobbin freewheels, pickup can fail. But tension is rarely the cause of complete pickup failure.
How to test bobbin tension:
- Thread the bobbin and insert it in the case (or thread the front-load case)
- Hold the thread tail and let the case (or bobbin) dangle
- The case should drop slowly under its own weight, pulling thread
- If it drops fast, tension is too loose
- If it doesn’t drop at all, tension is too tight
- Ideal: case drops 4-6 inches in about 2 seconds
Adjusting drop-in bobbin tension:
- Most drop-in cases have a small screw on the tension spring
- Turn clockwise to tighten (very small increments, 1/8 turn at a time)
- Turn counterclockwise to loosen
- Test after each tiny adjustment
Adjusting front-load bobbin case tension:
- Locate the small screw on the side of the case (near the tension spring)
- Use a small screwdriver (often a tiny flathead)
- Turn clockwise to tighten, counterclockwise to loosen
- Adjust in 1/8 turn increments and test
Important: Don’t adjust bobbin tension to fix pickup problems unless you’ve ruled out threading issues first. Over-tightening can damage the tension spring. Under-tightening creates loose stitches but usually doesn’t prevent pickup entirely.
Choose bobbin tension adjustment if: The machine picks up thread but stitches are unbalanced, with bobbin thread showing on top or upper thread showing on bottom. Don’t adjust tension if the thread won’t pick up at all.
Common Mistakes When Loading a Bobbin That Prevent Pickup
The most common bobbin-loading mistakes are inserting the bobbin backwards, skipping the tension slot, not seating the bobbin case fully, and leaving insufficient thread tail. These errors change the thread path or prevent the hook from accessing the bobbin thread. Even experienced sewers make these mistakes when switching between machines or working in poor lighting.
Top 5 bobbin loading errors:
- Bobbin orientation wrong: Thread unwinding clockwise instead of counterclockwise (or vice versa for your machine)
- Skipping the tension slot: Thread not pulled through the slot or under the finger in the bobbin case
- Insufficient thread tail: Less than 4 inches of thread extending from the case (thread retracts during pickup)
- Bobbin case not seated: Front-load case not pushed in until it clicks; drop-in case cover not closed properly
- Wrong bobbin type: Using a bobbin that’s too tall, too short, or the wrong diameter for your machine
Less obvious mistakes:
- Thread caught under the bobbin instead of coming off the top
- Bobbin wound too full (thread extends past the bobbin edges)
- Bobbin wound unevenly with thread piled on one side
- Using a metal bobbin in a machine designed for plastic (or vice versa)
- Thread wrapped around the bobbin case exterior before insertion
Prevention checklist:
- Always check the diagram on your machine or in the manual
- Pull 4-6 inches of thread tail before closing the case
- Tug gently on the thread after inserting the bobbin to ensure it moves freely
- Listen for a click when inserting front-load cases
- Verify the bobbin case cover closes flush on drop-in systems
Edge case: Some machines have a small metal finger or guide that must sit in a specific notch. If this finger isn’t aligned, the case won’t seat properly even though it looks correct.

Tough polypropylene bobbin box organizes those loose bobbins,can be reused many times.

COMPLETE SET: Package includes 4 stainless steel bobbin cases for front-loading 15 class sewing machines, providing replacements and spares for uninterrupted sewing projects

The premium quality transparent plastic allows you to easily see when your bobbin thread is running low, can be reused many times.
My Machine Worked Yesterday But Now Won’t Grab Bobbin Thread
When a machine that worked fine suddenly won’t grab bobbin thread, the most likely causes are timing shift, thread jam debris, or a threading error you didn’t notice. Timing can shift if you pulled fabric out forcefully, ran over a pin, or the machine jammed and you kept running it. Less commonly, a thread or lint buildup from yesterday’s project is blocking the hook. Rethread everything first, then check for debris.
Troubleshooting sequence:
- Rethread both upper and bobbin (fixes 60% of sudden failures)
- Clean the bobbin area with a brush and compressed air
- Check for broken needle or bent needle (replace if in doubt)
- Verify bobbin orientation (easy to insert backwards when rushing)
- Inspect the hook race for thread wrapped around it
- Test with new thread (old thread can break invisibly inside the machine)
Timing shift symptoms:
- Machine makes a different sound (clicking, knocking)
- Needle hits the bobbin case or needle plate
- Thread pickup worked, then suddenly stopped mid-project
- You recently sewed over thick layers or a pin
If timing has shifted: Stop using the machine immediately. Continuing to sew with bad timing can damage the hook, needle bar, or other internal parts. Take it to a repair shop. Timing adjustment requires special tools and expertise.
Common scenario: You finished a project, put the machine away, and when you started the next day it wouldn’t pick up thread. Usually this is just a threading error or the bobbin got bumped out of position. Rethread and try again before assuming mechanical failure.
Is Bobbin Pickup Issue Caused by Wrong Needle Type?
Wrong needle type or size can prevent bobbin thread pickup if the needle is too small for the thread, too large for the fabric, or the wrong point style for the material. A needle that’s too small won’t create a large enough loop for the hook to catch. A bent or dull needle deflects away from the hook, missing the catch point entirely. Using a ballpoint needle on woven fabric (or a sharp needle on knits) can also cause skipped stitches and pickup problems.
How needle size affects pickup:
- Too small: Needle deflects under thread tension, missing the hook timing
- Too large: Needle creates oversized holes, allowing thread to slip
- Bent: Needle doesn’t descend straight, loop forms in the wrong position
- Dull: Needle pushes fabric down instead of piercing, changing the loop position
Needle type and point style:
- Universal (sharp): Woven fabrics, general sewing
- Ballpoint: Knits and stretch fabrics (rounded point slips between fibers)
- Stretch: High-stretch knits (special scarf design prevents skipped stitches)
- Denim/Jeans: Heavy fabrics (reinforced shaft resists deflection)
- Microtex: Delicate fabrics (very sharp, fine point)
Quick needle check:
- Remove the needle and look at it against a light background
- Check for bends (even slight curves cause problems)
- Run your finger gently over the point (dull needles feel rounded)
- Verify the needle size matches your thread weight (size 80/12 for medium thread, 90/14 for heavy)
- Replace the needle if you’ve sewn more than 8 hours or completed 2-3 projects
Common mistake: Using the same needle for months. Needles dull quickly, especially on synthetic fabrics. A dull needle is the hidden cause of many “mysterious” thread pickup failures.
Choose needle replacement if: You’ve rethreaded everything, cleaned the machine, and the thread still won’t pick up. A fresh needle fixes the problem more often than you’d expect.
How to Clean the Bobbin Area to Fix Thread Pickup Problems

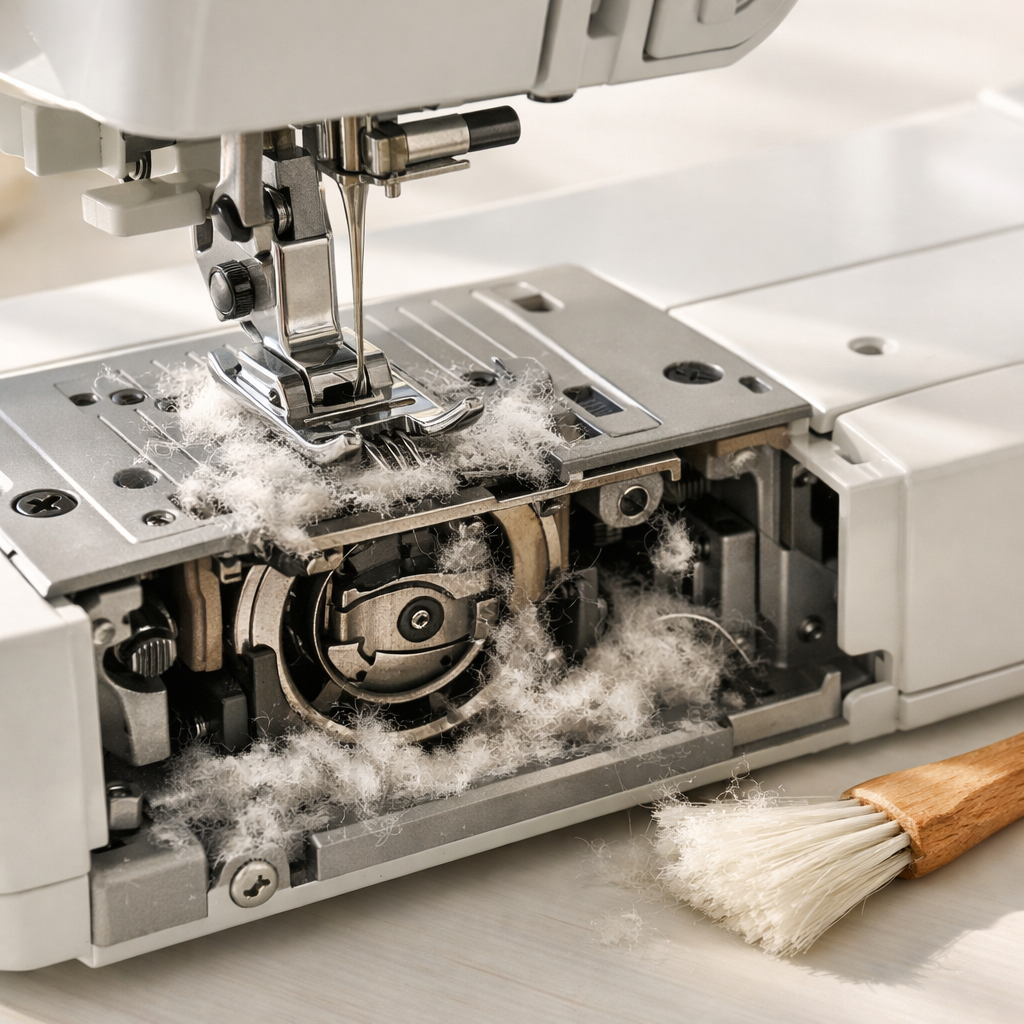
Cleaning the bobbin area removes lint, thread fragments, and dust that block the hook’s movement or prevent proper thread catch. Even a small amount of debris can throw off the precise timing needed for pickup. Clean the bobbin area every 8-10 hours of sewing, or more often when working with fleece, flannel, or other high-lint fabrics. Use a brush, not compressed air alone, to avoid pushing lint deeper into the machine.
Step-by-step cleaning process:
- Unplug the machine (safety first)
- Remove the needle and presser foot
- Take out the bobbin and bobbin case (or open the drop-in cover)
- Brush the bobbin case area with a small stiff brush (old toothbrush works)
- Remove the needle plate if possible (usually 1-2 screws)
- Brush the feed dogs and hook race thoroughly
- Use compressed air to blow debris out (hold can upright, use short bursts)
- Wipe the hook race with a lint-free cloth
- Add one drop of sewing machine oil to the hook race (check manual first)
- Reassemble everything and test
Tools you need:
- Small stiff brush (dedicated sewing machine brush or clean toothbrush)
- Compressed air (optional but helpful)
- Lint-free cloth or microfiber towel
- Sewing machine oil (only if your manual recommends it)
- Small screwdriver to remove needle plate
What to look for while cleaning:
- Thread wrapped around the hook or shuttle
- Lint packed into the tension spring area
- Thread fragments caught in the feed dogs
- Dust or lint on the bobbin case itself
- Oil residue mixed with lint (creates sticky buildup)
How often to clean:
- Light use (1-2 hours/week): Monthly
- Moderate use (5-10 hours/week): Every 2 weeks
- Heavy use (20+ hours/week): Weekly
- After high-lint projects: Immediately (fleece, flannel, terry cloth)
Common mistake: Using compressed air without brushing first. This pushes lint deeper into the machine instead of removing it. Always brush first, then blow out loosened debris.
When to Take Your Sewing Machine to a Repair Shop for Bobbin Issues
Take your sewing machine to a repair shop when you’ve exhausted all user-level troubleshooting and the thread still won’t pick up, or when you hear unusual sounds indicating internal damage. Timing issues, hook damage, and internal mechanical problems require professional tools and expertise. If rethreading, cleaning, and replacing the needle don’t fix the problem, the issue is likely beyond home repair.
Clear signs you need professional repair:
- Needle hits the bobbin case or needle plate (timing is off)
- Loud clicking, grinding, or knocking sounds
- Hook doesn’t rotate smoothly when you turn the handwheel
- Visible damage to the hook, shuttle, or hook race
- Thread pickup worked, then failed after a major jam
- You sewed over a pin and heard a loud bang
- Machine is more than 10 years old and has never been serviced
What a repair shop will check:
- Hook timing (relationship between needle and hook position)
- Hook race condition (burrs, scratches, wear)
- Needle bar height and alignment
- Feed dog timing and height
- Internal lubrication
- Motor belt condition (on older machines)
- Electrical issues (computerized machines)
Cost expectations (2026 estimates):
- Basic service/cleaning: $50-$80
- Timing adjustment: $80-$150
- Hook replacement: $100-$200
- Major repair: $150-$300+
When to repair vs. replace:
- Repair if: Machine is high-quality, less than 15 years old, or has sentimental value
- Replace if: Repair cost exceeds 50% of a new machine’s price, machine is low-end and old, or multiple systems are failing
How to find a good repair shop:
- Ask at local fabric stores for recommendations
- Check if your machine brand has authorized service centers
- Read online reviews (look for mentions of timing and tension expertise)
- Avoid shops that push new machine sales instead of repairs
What to bring to the shop:
- The machine (obviously)
- Power cord and foot pedal
- Bobbins and thread you’ve been using
- A description of what happened before the problem started
Common mistake: Continuing to sew after hearing unusual sounds. This often turns a minor timing issue into major damage requiring expensive parts replacement.
Frequently Asked Questions
Why does my bobbin thread keep breaking?
Bobbin thread breaks when bobbin tension is too tight, the thread is old or poor quality, or the bobbin case has burrs or rough spots. Check the bobbin case for damage, reduce tension slightly, and try fresh thread. Also verify the bobbin is wound evenly without gaps or overlapping thread.
Can I use any bobbin in my sewing machine?
No, you must use the correct bobbin type and size for your specific machine. Bobbins vary in height, diameter, and whether they have holes or are solid. Using the wrong bobbin prevents proper thread pickup and can damage your machine. Check your manual or bring your bobbin to a fabric store for matching.
How do I know if my sewing machine timing is off?
Timing is off if the needle hits the bobbin case or needle plate, the machine makes loud clicking sounds, or thread pickup suddenly fails after a jam. You may also see the needle and hook arriving at the same spot at the wrong moment when you turn the handwheel slowly. Timing issues require professional repair.
Should I oil my sewing machine bobbin area?
Only if your manual specifically recommends it. Modern machines often have sealed, self-lubricating systems that don’t require oil. Older mechanical machines typically need one drop of sewing machine oil on the hook race every 8-10 hours of sewing. Never use household oil (WD-40, 3-in-1, etc.) as it attracts lint and gums up the mechanism.
Why does my thread nest underneath the fabric?
Thread nesting (bird’s nesting) underneath happens when the upper thread has no tension, usually because you threaded with the presser foot down. The loose upper thread pulls excessive bobbin thread to the underside. Rethread the upper thread with the presser foot raised, ensuring thread passes between the tension discs.
Can a bent needle cause bobbin pickup problems?
Yes, a bent needle deflects away from the hook and won’t form a loop in the correct position for the hook to catch. Even a slight bend (invisible to casual inspection) causes problems. Replace the needle if you’ve hit a pin, sewn over thick seams, or used the same needle for more than 8 hours of sewing.
How tight should my bobbin case be when inserted?
A front-loading bobbin case should click or lock firmly into place and not rattle when the machine runs. A drop-in bobbin should sit flat in the case with the cover closing smoothly. If the case moves or rattles, it’s not seated properly. Remove and reinsert until it locks securely.
What does it mean when my machine skips stitches?
Skipped stitches mean the hook is missing the upper thread loop entirely. This happens with wrong needle type (ballpoint on woven fabric or sharp on knits), dull or bent needles, incorrect threading, or timing issues. Try a new needle first, then rethread. If skipping continues, check timing.
Why won’t my bobbin thread show on top of the fabric?
If bobbin thread won’t come to the surface, the needle isn’t catching the bobbin thread loop. Rethread the upper thread with the presser foot up, verify the bobbin is inserted correctly, and manually turn the handwheel one full rotation while holding the upper thread tail. The upper thread should catch and pull up a loop of bobbin thread.
How often should I replace my sewing machine needle?
Replace your needle every 8-10 hours of sewing, after completing 2-3 projects, or immediately if you hit a pin or hear a popping sound. Needles dull quickly on synthetic fabrics and batting. A dull needle is a common hidden cause of thread pickup problems and skipped stitches.
Can thread quality affect bobbin pickup?
Yes, old, cheap, or wrong-weight thread causes frequent pickup problems. Old thread becomes brittle and breaks easily. Cheap thread has uneven thickness and excessive lint. Thread that’s too heavy for your needle size won’t form proper loops. Use fresh, quality thread matched to your needle size for best results.
What should I do if my machine won’t pick up thread after cleaning?
If thread won’t pick up after cleaning, you may have dislodged something or not reassembled correctly. Verify the bobbin case is fully seated, the needle plate is screwed down tight, and you haven’t accidentally moved the hook. Rethread everything and try again. If it still fails, take the machine to a repair shop.
Conclusion
Bobbin thread pickup problems frustrate even experienced sewers, but they’re usually simple to fix once you understand the mechanics. The vast majority of pickup failures come down to incorrect threading (especially with the presser foot down), improper bobbin insertion, or lint buildup in the bobbin area. These are all issues you can resolve at home in less than five minutes.
Start your troubleshooting with the basics: rethread the upper thread with the presser foot raised, verify the bobbin is inserted in the correct direction, and clean the bobbin area thoroughly. Replace your needle if you haven’t done so recently. These three steps solve about 90% of bobbin pickup problems.
If basic troubleshooting doesn’t work, check for timing issues by listening for unusual sounds and watching the needle-hook relationship as you turn the handwheel. Timing problems require professional repair, so don’t keep sewing if you suspect timing has shifted.
Your next steps:
- Raise the presser foot and completely rethread the upper thread
- Remove and reinsert the bobbin, checking orientation
- Clean the bobbin area with a brush
- Replace the needle with a fresh one
- Test on scrap fabric
- If the problem persists, consult a repair professional
Remember that regular maintenance prevents most bobbin pickup issues. Clean your machine every 8-10 hours of sewing, replace needles frequently, and use quality thread. These simple habits keep your machine running smoothly and save you from frustrating troubleshooting sessions in the middle of projects.


