


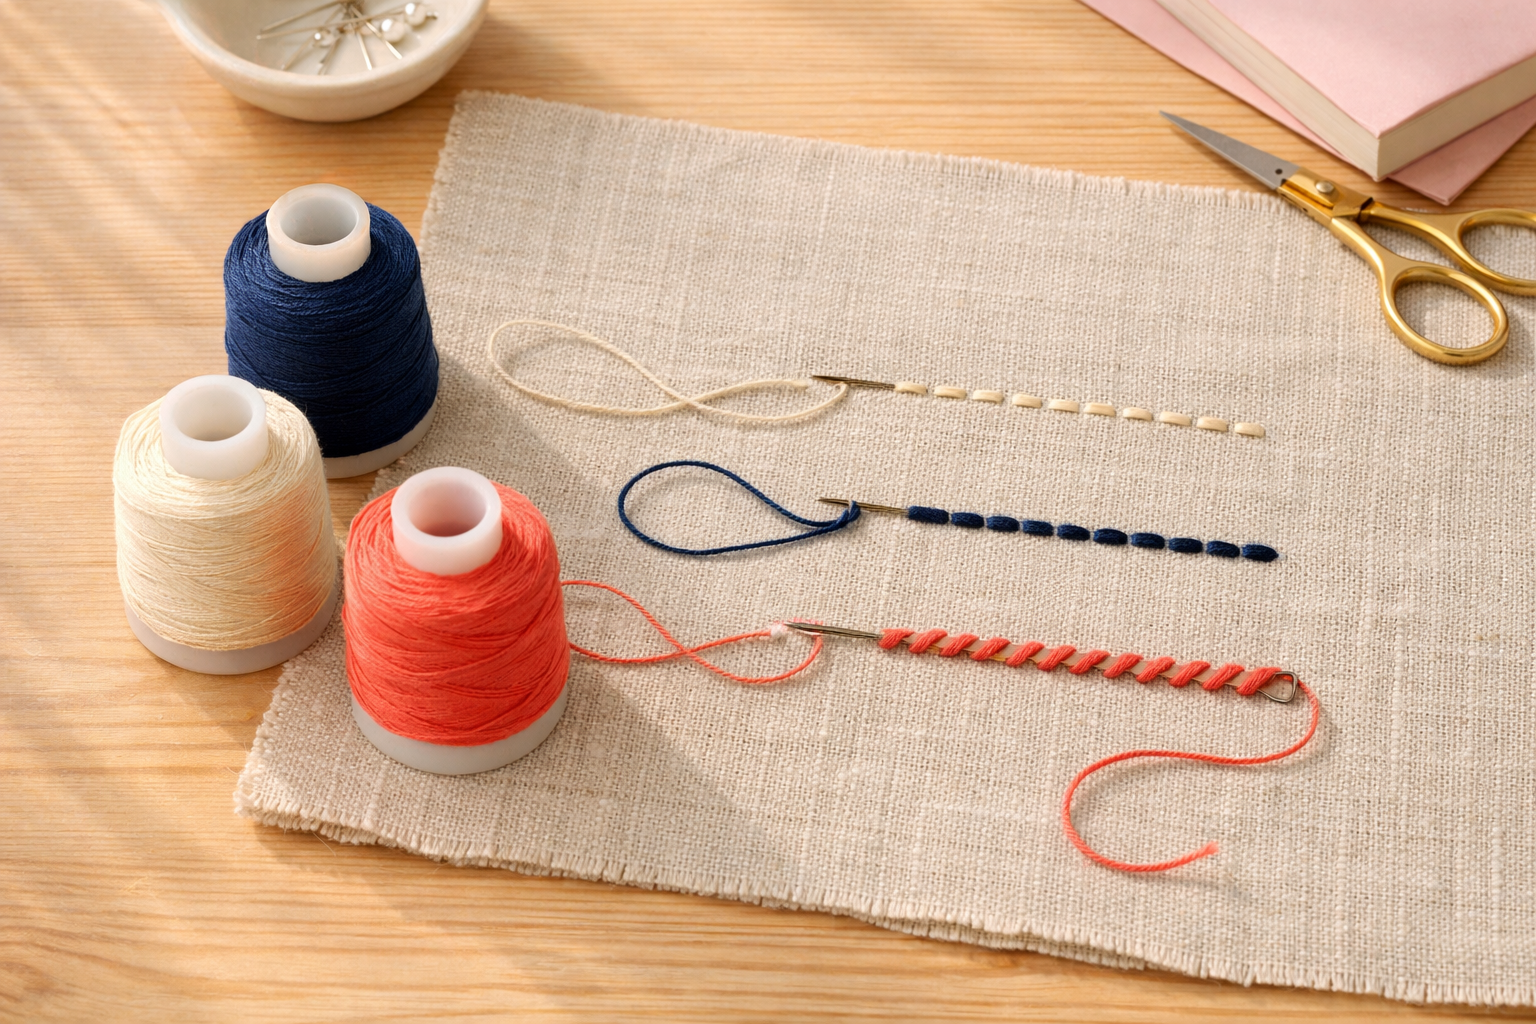
Most sewing enthusiasts own dozens of stitch guides and spend hours watching tutorials, but professional tailors rely on just three hand stitches for 90% of their work. The running stitch, backstitch, and whip stitch form the foundation of nearly every hand-sewing project, from quick mends to couture garments. Learning these three stitches well beats knowing twenty stitches poorly.
Key Takeaways
- Three core stitches (running stitch, backstitch, whip stitch) handle most hand-sewing tasks including seams, hems, repairs, and finishing work
- Running stitch works best for basting, gathering, and quick temporary seams where speed matters more than strength
- Backstitch creates the strongest hand-sewn seam, comparable to machine stitching, ideal for permanent construction and repairs
- Whip stitch joins two finished edges invisibly and works perfectly for ladder-stitching openings closed
- You don’t need a sewing machine for basic mending, alterations, and small projects if you master these three stitches
- Stitch choice depends on fabric weight, stress points, and visibility rather than complexity or difficulty
- Common mistakes include inconsistent stitch length, pulling thread too tight, and using the wrong stitch for the fabric type
- Professional tailors use these same three stitches for most hand-finishing work on high-end garments
- Embroidery uses different stitches designed for decoration rather than construction, though the basic mechanics overlap
- Practice on scrap fabric with contrasting thread to see your stitch formation clearly before working on actual projects
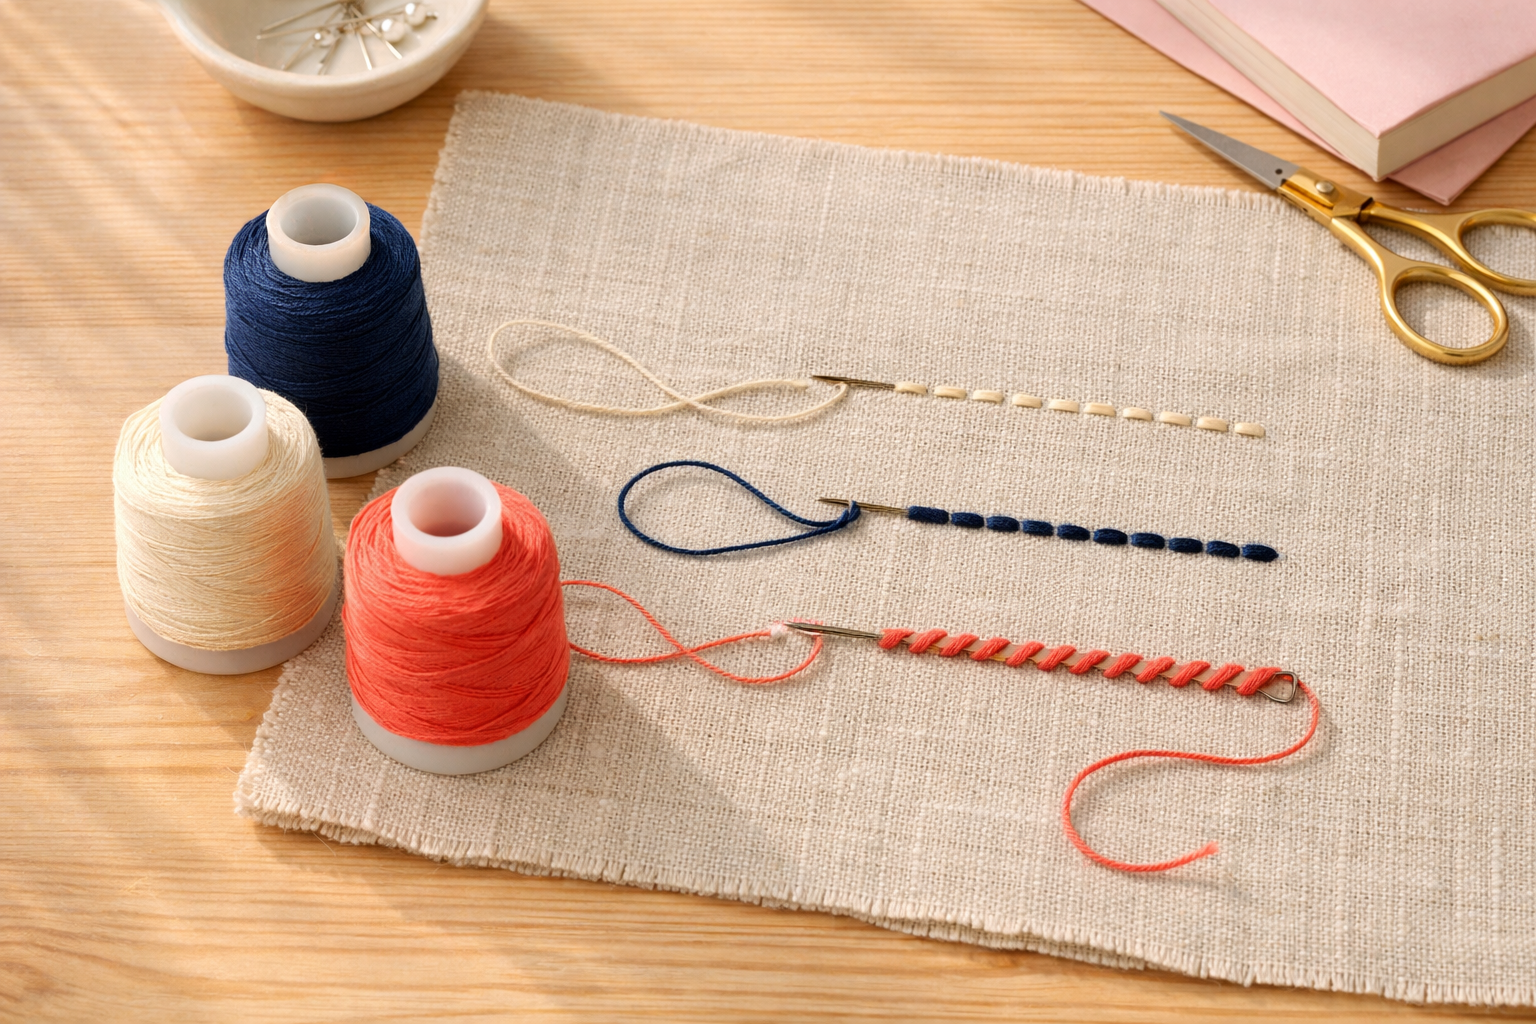
What Are the Three Basic Stitches Every Beginner Needs to Know?
The three essential hand stitches are the running stitch, backstitch, and whip stitch. These stitches cover nearly every hand-sewing scenario from construction to finishing, and professional sewers use them daily for both quick repairs and detailed tailoring work.
Running Stitch creates a simple in-and-out line of stitches that moves quickly across fabric. It’s the first stitch most people learn and works well for basting (temporary stitching), gathering fabric, and quilting. The stitch shows on both sides of the fabric as a dashed line.
Backstitch produces the strongest hand-sewn seam by doubling back on itself with each stitch. It creates a continuous line of stitching on the top side and overlapping stitches on the back. Tailors use backstitch when they need seam strength comparable to machine stitching.
Whip Stitch (also called overcast stitch) wraps thread over the edge of fabric or joins two finished edges together. It’s perfect for finishing raw edges to prevent fraying, closing stuffed toys, and creating invisible seams when done carefully.
These three stitches work together as a complete toolkit:
- Use running stitch when you need speed or temporary stitching
- Choose backstitch when you need strength and permanence
- Pick whip stitch when joining edges or finishing seams
Common mistake: Beginners often try to learn decorative stitches before mastering these three basics. Decorative stitches add visual interest but won’t help you repair a torn seam or hem a pair of pants. Build your foundation first.
Running Stitch vs Backstitch vs Whip Stitch: Key Differences
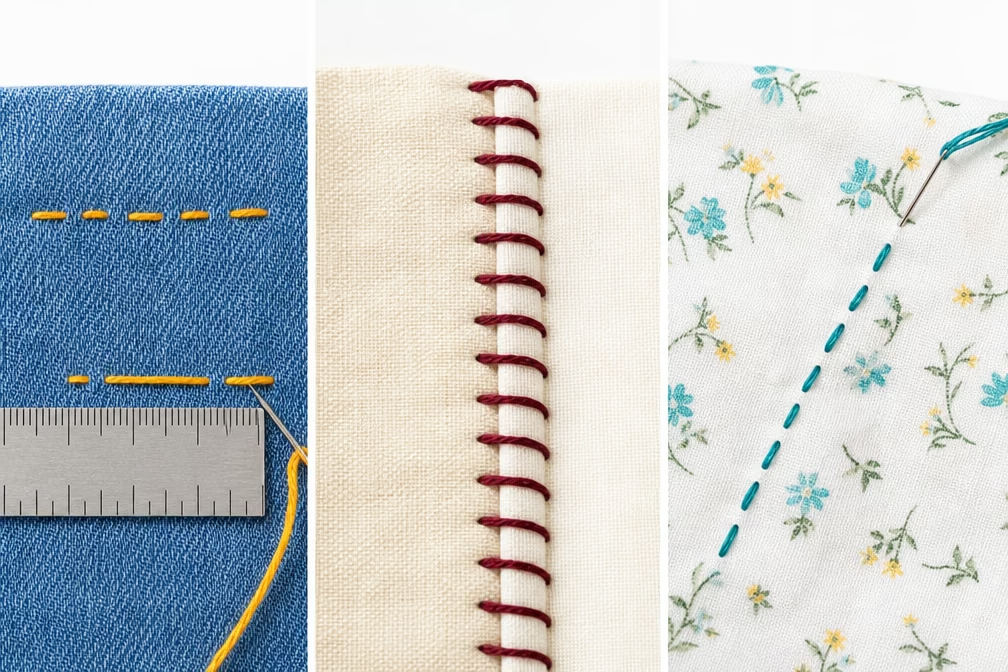
Running stitch moves forward continuously, backstitch doubles back for strength, and whip stitch wraps over edges. Each stitch serves different purposes based on whether you need speed, strength, or edge finishing.
Here’s how they compare in practical use:
| Stitch Type | Strength | Speed | Best For | Visibility |
|---|---|---|---|---|
| Running Stitch | Low | Fast | Basting, gathering, quilting | Shows on both sides |
| Backstitch | High | Moderate | Seams, repairs, permanent construction | Continuous line on top |
| Whip Stitch | Moderate | Fast | Edge finishing, joining edges, closing openings | Minimal when done well |
Running stitch works by weaving the needle in and out of the fabric in one continuous motion. You can load multiple stitches onto the needle before pulling the thread through, making it the fastest option. The trade-off is strength, running stitches pull apart easily under stress.
Backstitch creates strength by overlapping each stitch. After moving forward one stitch length, you bring the needle back to the end of the previous stitch, then forward again past your starting point. This doubling-back creates a seam that rivals machine stitching in durability.
Whip stitch wraps thread around the edge of fabric at an angle, either to prevent fraying or to join two pieces. When joining edges, you can make it nearly invisible by catching just a few threads from each side and keeping stitches small and evenly spaced.
Choose running stitch if: You’re basting a hem to try the length, gathering fabric for ruffles, or quilting layers together where the stitching adds decorative value.
Choose backstitch if: You’re repairing a split seam, sewing a seam that will bear weight or stress, or attaching a patch that needs to stay put through washing.
Choose whip stitch if: You’re closing the opening on a stuffed pillow, finishing a raw edge by hand, or joining two folded edges invisibly.

𝑩𝒊𝒓𝒕𝒉𝒅𝒂𝒚 𝑮𝒊𝒇𝒕𝒔 𝑰𝒅𝒆𝒂𝒔: This sewing kit is terrific gifts for people who travel frequently, mother, grandmother, backpacker, adults, kids and teen girls! The emergency kit is also suitable for both men and women, beginners and professionals alike, and it is definitely something that everyone needs in their life

【Complete Sewing Needles Set】 The FIVEIZERO Hand Sewing Needles Set includes 30 assorted hand sewing needles and 2 needle threaders for hand sewing (random colors), perfect for all your hand sewing, embroidery, and DIY craft projects. Needles come in a convenient round plastic compact for easy storage.

[Leather Needles for Hand Sewing]: The leather sewing needle set includes 9pcs needles of various sizes and shapes. Each type needle has a unique purpose, which are suitable for various sewing or maintenance projects to meet your different sewing and repair needs.
Can You Sew Everything with Just Three Stitches?
You can complete most hand-sewing projects with just these three stitches, including garment construction, repairs, alterations, and home décor items. While specialized projects may benefit from additional stitches, these three handle the vast majority of practical sewing tasks.
What you can make with three stitches:
- Mend torn seams, ripped pockets, and split hems
- Hem pants, skirts, and curtains
- Take in or let out garments at the seams
- Sew simple garments like drawstring bags, pillowcases, and aprons
- Attach buttons, patches, and appliqués
- Repair stuffed toys and cushions
- Create basic quilts and patchwork projects
- Finish raw edges to prevent fraying
What requires additional stitches:
- Buttonholes (need buttonhole stitch or blanket stitch)
- Decorative embroidery (uses satin stitch, chain stitch, French knots, etc.)
- Professional-level tailoring details (may use pad stitching, fell stitch, or catch stitch)
- Leather work (often requires saddle stitch)
- Visible decorative seams (may use blanket stitch or feather stitch)
The key is understanding that construction stitches and decorative stitches serve different purposes. If your goal is to join fabric, repair damage, or alter fit, these three stitches cover your needs. If you want to add embellishment or create specific decorative effects, you’ll expand your stitch vocabulary over time.
Practical example: A tailor repairing a suit jacket uses backstitch to reattach a pocket lining, running stitch to baste the sleeve before setting it, and whip stitch to close the lining after turning. The same three stitches handle a $2,000 suit and a $20 repair.
What Stitch Is Strongest for Hand Sewing Seams?
Backstitch creates the strongest hand-sewn seam, with durability comparable to straight machine stitching. The overlapping stitch structure prevents the seam from pulling apart under stress, making it the go-to choice for permanent construction and repairs that need to withstand wear and washing.
Why backstitch is strongest:
- Each stitch overlaps the previous one, creating a continuous line with no gaps
- If one stitch breaks, the overlapping structure prevents the entire seam from unraveling
- The doubled thread path distributes stress across more thread length
- The stitch locks itself in place without relying on knots alone
When to use backstitch for strength:
- Repairing split seams in pants, especially the crotch seam
- Attaching straps or handles to bags
- Sewing seams in garments that will be worn frequently
- Repairing tears in upholstery or heavy fabrics
- Any seam that will bear weight or experience pulling
Technique tips for maximum strength:
Keep your stitches small and even (about 1/8 inch or 3mm long). Smaller stitches create more overlap and distribute stress better than long stitches. Use thread that matches your fabric weight, heavy-duty thread for denim or canvas, regular thread for cotton or linen.
Start and end with a secure knot or several backstitches in place. The strongest seam in the world fails if the thread pulls out at the beginning or end.
Common mistake: Pulling the thread too tight while backstitching. This creates puckering and actually weakens the seam by putting constant stress on the thread. Pull just tight enough to bring the fabric edges together smoothly.
Alternative for extra strength: Double your thread (thread the needle and pull the thread through until both ends meet, then knot them together). This creates a four-strand backstitch that’s even stronger, though it’s bulkier and shows more on lightweight fabrics.

How to Do a Running Stitch Step by Step
Thread your needle, knot the end, bring the needle up from the back of the fabric, then weave it in and out in a straight line with evenly spaced stitches before pulling the thread through. Running stitch is the simplest and fastest hand stitch, making it perfect for beginners.
Step-by-step instructions:
- Thread the needle with about 18-24 inches of thread (longer gets tangled, shorter means constant rethreading)
- Tie a knot at the end by wrapping the thread around your finger, rolling it off, and pulling tight
- Start from the back by pushing the needle up through the fabric where you want your stitching to begin
- Push the needle down about 1/4 inch (6mm) away, creating your first stitch
- Bring the needle back up another 1/4 inch ahead, then down again, creating a dashed line
- Load multiple stitches onto the needle before pulling the thread through, this speeds up the process
- Keep tension even by pulling the thread snug but not tight after each pull-through
- End with a knot by making a tiny stitch in place, passing the needle through the loop before tightening
Tips for neat running stitches:
- Mark your line with a fabric pen or chalk if you’re new to sewing straight
- Keep stitch length consistent,use the width of your fingernail as a guide if you don’t have a ruler
- Match stitch length to purpose,shorter stitches (1/8 inch) for gathering, longer stitches (1/2 inch) for basting
- Practice on scrap fabric with contrasting thread so you can see your stitches clearly
When running stitch works best:
- Basting hems or seams before machine sewing or final hand stitching
- Gathering fabric for ruffles or elastic casings
- Quilting layers together (often called a quilting stitch)
- Sashiko embroidery (decorative Japanese stitching)
- Temporary repairs when you need a quick fix
Common mistakes to avoid:
Don’t pull the thread so tight that the fabric puckers. The fabric should lie flat with just a slight dimple at each stitch. Don’t make stitches so long that they catch on things or create gaps in the seam. Don’t forget to secure your starting and ending knots, running stitch pulls out easily if the thread isn’t anchored.

【Heavy Duty Sewing Kit】- This comprehensive sewing kit includes 32 leather sewing needles, 10 leather sewing threads (30 m/color), a needle bottle, an awl, a tape measure, scissors, and a sewing thimble.


Perfect Heavy Duty Sewing Kit: This fully-packed sewing kit contains all the necessary tools to sew for most of your sewing needs. You will get: 25* Hand Sewing Needles, 12* Upholstery Thread, 1* Inch Ruler, 1* Scissors, 1* Thimble, 3* Awl Tool, 2* Seam Ripper, 1* Threader.
When to Use Backstitch Instead of Running Stitch
Use backstitch when you need a permanent, strong seam that won’t pull apart with wear or washing. Choose running stitch for temporary stitching, gathering, or situations where speed matters more than durability.
Backstitch is the right choice when:
- Sewing a seam that will experience stress (side seams, crotch seams, armholes)
- Repairing a tear or split seam permanently
- Attaching something that needs to stay secure (patches, pockets, straps)
- You don’t have access to a sewing machine but need machine-quality strength
- Working with fabric that frays easily and needs a secure seam
- Sewing something that will be washed frequently
Running stitch is the right choice when:
- Basting a hem to check the length before permanent stitching
- Gathering fabric for ruffles, shirring, or elastic casings
- Quilting layers together where the stitch is decorative
- Making temporary repairs until you can do a proper fix
- Sewing something that won’t experience stress or pulling
- Speed is more important than strength
Real-world decision example: You’re hemming pants. Use running stitch to baste the hem in place, try on the pants to check the length, then use backstitch to sew the hem permanently. The running stitch lets you adjust easily; the backstitch ensures the hem stays put through washing.
Fabric weight matters: On very lightweight fabrics like silk or chiffon, backstitch can create too much bulk and show through to the right side. Running stitch or a specialized slip stitch might be better choices. On heavy fabrics like denim or canvas, backstitch is almost always the better option because running stitch won’t hold.
Time investment: Backstitch takes roughly twice as long as running stitch because you’re covering the same distance with more needle movements. If you’re basting something you’ll remove later, the time investment doesn’t make sense. If you’re creating a permanent seam, the extra time pays off in durability.

√GREAT VALUE 30PCS HAND SEWING NEEDLES IN 6 SIZES: JekiiNova Hand Sewing Needles, contains 30 sewing needles in 6 lengths, 8x 1-1/5", 8x 1-2/5", 8x 1-3/5", 3x 1-4/5", 2x 2", 1x 1-4/5" embroidery needle, with these quality needles for sewing in different lengths, you can be comfortable in all scenarios, whether you want to do sewing or repairing, you can always find the right one in this amazing needle box. With the 2 free needle threader, you will no longer be anxious about threading needles.
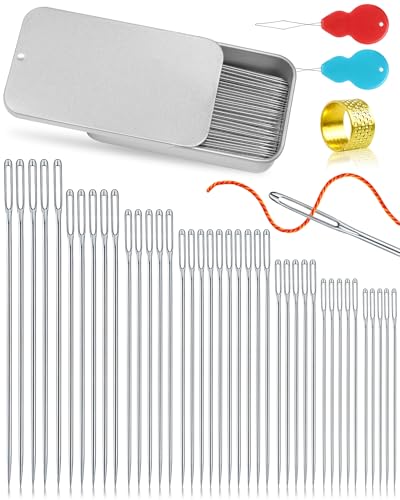
【Material】Our large eye pointed stitching needles are made of high quality stainless steel, with sharp needles, smooth surface, durable and not easy to bend, not easy to rust, corrosion resistant, the resistance through the cloth is small, it is easier to slip through.

Durable Stainless Steel Sewing Needles: Made of Premium stainless steel, these large eye needles are rustproof, durable, and designed to maintain their shape even after repeated use. They won't bend or break easily when piercing thick materials, Ensures it will not deform during frequent sewing and long-term handcrafting.
What Stitches Do Tailors Use Most Often?
Professional tailors rely primarily on backstitch, slip stitch (a variation of whip stitch), and pad stitch for most hand-finishing work on garments. Backstitch handles structural seams, slip stitch creates invisible hems and linings, and pad stitch shapes lapels and collars in tailored jackets.
Backstitch in tailoring:
Tailors use backstitch for any seam that needs to be permanent and strong but can’t be machine-sewn easily. This includes attaching linings in tight spaces, repairing split seams, and reinforcing stress points. The stitch is identical to the basic backstitch but often done with smaller, more precise stitches (1/16 inch or 1-2mm).
Slip stitch (invisible hemming):
This is a variation of whip stitch where the needle slides through the folded edge of the fabric, then catches just one or two threads of the garment fabric before sliding back into the fold. When done correctly, it’s nearly invisible from the outside. Tailors use this for hems, attaching linings, and any finishing work that shouldn’t show.
Pad stitch (specialized):
This stitch builds structure into jacket lapels and collars by stitching through the fashion fabric and canvas interlining in a specific pattern. It’s more specialized than the three basic stitches but uses similar mechanics. Most home sewers don’t need pad stitch unless they’re making tailored jackets.
Other stitches tailors use occasionally:
- Catch stitch for hemming heavy fabrics with some give
- Fell stitch for attaching linings flat against seams
- Buttonhole stitch for hand-worked buttonholes
- Bar tack for reinforcing stress points
The 80/20 rule in tailoring: About 80% of hand-sewing in professional tailoring uses backstitch and slip stitch. The remaining 20% includes specialized stitches for specific applications. A home sewer can achieve professional-looking results by mastering backstitch and whip stitch (which is very similar to slip stitch) without learning the more specialized techniques.
What this means for you: If you can backstitch neatly with small, even stitches and whip stitch invisibly, you can handle most garment repairs and alterations that a tailor would charge for. The difference between amateur and professional work often comes down to stitch size and consistency rather than knowing exotic stitches.
Do I Really Need a Sewing Machine If I Know Basic Stitches?
You don’t need a sewing machine for mending, alterations, and small projects if you’re comfortable with hand sewing, though machines save significant time on large projects and long seams. Hand sewing with the three basic stitches handles most repairs and many construction projects effectively.
What you can do without a machine:
- All clothing repairs (split seams, torn pockets, loose hems)
- Hemming pants, skirts, and curtains
- Taking in or letting out garments at the seams
- Sewing simple items like pillowcases, tote bags, and drawstring pouches
- Attaching patches, buttons, and decorative elements
- Creating small quilted projects
- Making repairs to upholstery and home goods
When a machine makes sense:
- Sewing long seams on large projects (curtains, quilts, garments)
- Working with very heavy fabrics that are hard to push a needle through
- Creating professional-looking topstitching
- Sewing stretchy knit fabrics (machines have stretch stitches)
- Making multiple items or sewing regularly
- Working on time-sensitive projects
Time comparison: Hand-sewing a simple seam with backstitch takes about 10-15 minutes per yard. A sewing machine covers the same distance in under a minute. For a single repair, the setup time for the machine might equal the hand-sewing time. For a full garment with multiple long seams, the machine saves hours.
Quality comparison: A well-executed backstitch creates a seam as strong as machine stitching. The difference is speed and consistency, not strength. Machine stitching looks more uniform because the stitch length is mechanically controlled, but hand stitching can be just as durable.
Cost consideration: A basic sewing machine costs $100-300, while a needle and thread cost under $5. If you’re only mending clothes occasionally, hand sewing makes financial sense. If you’re making garments regularly or sewing for others, the time savings justify the machine cost.
The hybrid approach: Many experienced sewers use machines for long seams and construction, then hand-finish with slip stitch for hems and linings. This combines the speed of machine sewing with the invisible finish of hand sewing.
Common Mistakes When Learning Basic Hand Stitches
The most common mistakes include inconsistent stitch length, pulling thread too tight, using thread that’s too long, and choosing the wrong stitch for the task. These errors make stitching look messy, cause fabric puckering, and create weak seams that fail quickly.
Inconsistent stitch length:
Stitches that vary from 1/8 inch to 1/2 inch look sloppy and create uneven tension in the seam. The fabric puckers at short stitches and gaps at long ones. Fix it: Mark your stitching line and use a ruler or your fingernail width as a consistent guide. Practice on scrap fabric until your muscle memory develops.
Pulling thread too tight:
Over-tightening creates puckering, makes the fabric bunch up, and actually weakens the seam by putting constant stress on the thread. Fix it: Pull just tight enough to bring the fabric edges together smoothly. The fabric should lie flat without dimples or gathers unless you’re intentionally gathering.
Using thread that’s too long:
Thread longer than 24 inches tangles, knots on itself, and wears thin from being pulled through fabric repeatedly. The end of the thread may fray before you finish using it. Fix it: Cut thread no longer than your forearm (about 18-24 inches). Yes, you’ll rethread more often, but you’ll spend less time untangling knots.
Skipping the knot or backstitch at the start:
Starting without securing the thread means your first few stitches pull out as soon as you put tension on the seam. Fix it: Always knot the end of your thread or make 2-3 tiny backstitches in place before starting your seam.
Using the wrong stitch for the job:
Running stitch on a stress seam fails quickly. Backstitch for basting wastes time. Whip stitch on a seam that needs to lie flat creates bulk. Fix it: Match the stitch to the purpose, backstitch for strength, running stitch for speed or gathering, whip stitch for edges.
Not matching thread to fabric:
Heavy thread on lightweight fabric shows through and creates puckering. Lightweight thread on heavy fabric breaks under stress. Fix it: Use all-purpose thread for most projects, heavy-duty thread for denim and canvas, and fine thread for silk and chiffon.
Sewing without a thimble on tough fabric:
Pushing a needle through denim or canvas repeatedly without a thimble causes painful finger indents and can actually injure your finger. Fix it: Use a thimble on your middle finger (the one that pushes the needle) when working with heavy fabrics.
Are Three Stitches Enough for Mending Clothes?
Three basic stitches (running stitch, backstitch, and whip stitch) are completely sufficient for all common clothing repairs including split seams, torn fabric, loose hems, and holes. Professional alterations shops use these same stitches for most repair work.
Split seams: Use backstitch to re-sew the seam from the inside, matching the original seam line. This repair is as strong as the original machine stitching and will last through normal wear and washing.
Torn fabric: If the fabric itself has torn (not just the seam), use backstitch to close the tear from the wrong side, then apply a patch on the inside for reinforcement. Whip stitch the patch edges to prevent fraying.
Loose hems: Use whip stitch or slip stitch (a variation of whip stitch) to reattach a fallen hem invisibly. The repair won’t show from the outside if you catch just a few threads with each stitch.
Holes in knit fabric: Use whip stitch to close small holes by carefully bringing the edges together. For larger holes, you’ll need to patch from behind and whip stitch around the edges.
Buttons: While not technically one of the three stitches, attaching buttons uses a simple in-and-out stitch (similar to running stitch) through the button holes and fabric.
Pockets: Use backstitch to reattach pocket corners or repair split pocket seams. These are high-stress areas that need the strength of backstitch.
What you can’t repair with basic stitches:
- Buttonholes (need buttonhole stitch or a machine)
- Zippers (need specialized zipper installation techniques)
- Invisible mending on visible areas (needs weaving techniques)
- Leather or vinyl (needs special needles and often different stitches)
Repair durability: Clothing repairs done with proper stitch choice (backstitch for seams, whip stitch for hems) last as long as the original construction. The repair often outlasts the surrounding fabric because you’re using fresh thread and paying close attention to stitch quality.
What Stitch Should I Use for Hemming Pants by Hand?
Use whip stitch or slip stitch (a nearly invisible variation of whip stitch) for hemming pants by hand. These stitches secure the hem while remaining invisible from the outside, creating a professional-looking finish that holds up through washing and wearing.
Slip stitch technique for invisible hems:
- Fold the hem to the desired length and press with an iron
- Fold the raw edge under 1/4 inch and press again (or use hem tape)
- Thread your needle with thread matching the pants color
- Knot the end and hide the knot inside the hem fold
- Slide the needle through the folded edge for about 1/4 inch
- Catch 1-2 threads from the pants fabric (not through to the outside)
- Slide the needle back into the hem fold and repeat
- Keep stitches about 1/4 inch apart
- Don’t pull tight, the hem should lie flat without puckering
Why slip stitch works best:
The stitch hides inside the hem fold, so only tiny thread dots show on the inside of the pants. From the outside, the hem looks completely smooth with no visible stitching. This is the same technique professional tailors use for hand-hemming dress pants and suit trousers.
When to use whip stitch instead:
If you’re hemming casual pants where a visible stitch line doesn’t matter, regular whip stitch works faster than slip stitch. Bring the needle through both the hem and pants fabric at an angle, spacing stitches about 1/4 inch apart. This shows more but holds just as well.
Backstitch for jeans:
Heavy denim is hard to slip stitch invisibly, and jeans often have visible topstitching anyway. Use backstitch with heavy-duty thread to create a strong hem that matches the casual style of the garment. You can even use contrasting thread to mimic the original topstitching.
Common hemming mistakes:
- Stitches too far apart (more than 1/2 inch) let the hem sag between stitches
- Catching too much fabric creates visible dimples on the outside
- Pulling thread too tight causes puckering
- Not pressing the hem before stitching makes it harder to sew neatly
Quick hem for temporary length adjustment:
Use running stitch to baste a temporary hem if you’re not sure about the length. Wear the pants, check the length, then remove the basting and hem properly with slip stitch once you’re certain.
Do Embroidery and Regular Sewing Use the Same Basic Stitches?
Embroidery and construction sewing use different stitches designed for different purposes, embroidery stitches create decorative surface texture while construction stitches join fabric pieces together. However, both use similar basic mechanics of moving thread through fabric with a needle.
Construction stitches (running, backstitch, whip stitch):
These stitches are designed to be functional and often invisible. They join fabric pieces, create seams, finish edges, and hold garments together. The goal is strength and durability, not visual interest.
Embroidery stitches (satin stitch, chain stitch, French knots, etc.):
These stitches create decorative patterns and texture on the fabric surface. They’re designed to be visible and attractive. While some embroidery stitches are strong, strength isn’t the primary goal, appearance is.
Where they overlap:
- Running stitch appears in both construction and embroidery (especially sashiko and quilting)
- Backstitch creates the outline stitch in embroidery and also serves as a construction stitch
- Whip stitch has decorative cousins like blanket stitch used in embroidery
Can you use embroidery stitches for construction?
Generally no. Decorative stitches like chain stitch or feather stitch aren’t designed to hold seams together under stress. They look beautiful but lack the strength and structure of construction stitches. You could use them for decorative seams on items that won’t experience stress, but they’re not practical for regular garment construction.
Can you use construction stitches for embroidery?
Yes, with limitations. Running stitch creates sashiko embroidery and quilting patterns. Backstitch creates outline embroidery. But you’ll be limited in the decorative effects you can achieve without learning stitches specifically designed for texture and pattern.
The practical takeaway: Learn construction stitches first if your goal is making and mending clothes. Learn embroidery stitches if you want to add decorative elements to finished projects. The skills complement each other but serve different purposes.
Why Does My Hand Stitching Look Messy and Uneven?
Hand stitching looks messy when stitch length varies, thread tension is inconsistent, or the stitching line wanders. These issues come from lack of practice, not marking guidelines, and not paying attention to where the needle enters and exits the fabric.
Inconsistent stitch length:
This is the number one cause of messy-looking stitching. When stitches vary from 1/8 inch to 1/2 inch, the seam looks amateurish even if it’s technically functional. Fix it: Mark your stitching line with chalk or fabric pen. Use a ruler or your fingernail as a consistent spacing guide. Practice making 10-20 stitches in a row on scrap fabric, then measure them, aim for less than 1/16 inch variation.
Wandering stitch line:
Stitches that curve, zigzag, or drift away from the seam line look sloppy. Fix it: Mark your stitching line clearly before you start. Use the edge of the fabric or a previous seam as a guide. Keep your eye on where the needle will exit, not where it’s entering.
Uneven thread tension:
Some stitches pulled tight and others loose creates puckering in some spots and gaps in others. Fix it: Pull each stitch to the same tension, just tight enough to bring the fabric edges together smoothly. The fabric should lie flat without dimples or gaps.
Thread showing on the outside:
On slip stitch or invisible hemming, visible thread means you’re catching too much fabric with each stitch. Fix it: Catch only 1-2 threads of the surface fabric. The needle should barely graze the fabric surface before diving back into the hem fold.
Fabric puckering:
This happens when you pull thread too tight or use thread that’s too heavy for the fabric. Fix it: Use thread appropriate to your fabric weight. Pull just tight enough to close the seam without gathering the fabric. If the fabric puckers, remove the stitching and try again with less tension.
Knots showing on the outside:
Starting and ending knots should hide inside seams or hem folds, not sit on the fabric surface. Fix it: Start from the wrong side or inside a fold so the knot hides. End by making a tiny stitch, passing the needle through the loop to create a knot, then burying the thread end inside the seam or hem.
Practice makes perfect:
Even experienced sewers had messy stitching when they started. The difference is practice. Spend 30 minutes practicing each stitch on scrap fabric with contrasting thread so you can see what you’re doing. Focus on consistency rather than speed. Speed comes naturally once your muscle memory develops.
Use the right tools:
A sharp needle appropriate to your fabric makes a huge difference. Dull needles push fabric aside rather than piercing cleanly, creating uneven holes and messy stitching. Replace needles regularly and use the right size for your fabric weight.
Frequently Asked Questions
How long does it take to learn the three basic stitches?
Most people can learn running stitch, backstitch, and whip stitch in a single afternoon of practice, though developing neat, consistent stitching takes several hours of practice over a few weeks. Expect to spend 30-60 minutes per stitch initially, then practice on real projects to build muscle memory.
Can I use regular thread for hand sewing or do I need special thread?
Regular all-purpose polyester or cotton thread works perfectly for hand sewing the three basic stitches. You don’t need special hand-sewing thread for most projects, though some sewers prefer cotton thread for hand work because it’s less likely to tangle than polyester.
What size needle should I use for basic hand stitching?
Use a size 7 or 8 sharp needle for most hand sewing with medium-weight fabrics like cotton, linen, or lightweight denim. Size 9 or 10 works for lightweight fabrics like silk or chiffon, while size 5 or 6 handles heavy fabrics like canvas or upholstery weight material.
How do I keep my thread from tangling while hand sewing?
Cut thread no longer than 18-24 inches, run it through beeswax or thread conditioner, and let the needle hang freely every few stitches to untwist the thread. Tangling happens when thread is too long or becomes twisted as you sew.
Is hand sewing stronger than machine sewing?
Backstitch creates seams as strong as machine straight stitch, though machine sewing is more consistent and faster. The strength difference is minimal for most projects, the main advantages of machine sewing are speed and uniform stitch length.
What’s the difference between a sharp needle and a ballpoint needle?
Sharp needles have a pointed tip that pierces woven fabrics cleanly, while ballpoint needles have a rounded tip that slides between knit fabric fibers without breaking them. Use sharp needles for the three basic stitches on woven fabrics like cotton, linen, and denim.
Can I hand sew stretchy fabrics like t-shirt material?
You can hand sew knit fabrics, but the seams won’t stretch as much as machine zigzag or stretch stitches. For small repairs on knits, use backstitch with slight tension so the seam has some give. For construction, a machine with stretch stitches works better.
How do I hide the knot at the beginning and end of my stitching?
Start from the wrong side of the fabric or inside a hem fold so the knot sits where it won’t show. End by making a tiny stitch, passing the needle through the loop before tightening to create a knot, then running the needle through the seam or hem to bury the thread tail before cutting.
Why does my thread keep breaking while I’m sewing?
Thread breaks when it’s old and weak, when you’re pulling too hard, when the needle eye is rough or too small, or when you’re sewing through very heavy fabric with regular thread. Use fresh thread, a larger needle, and heavy-duty thread for thick fabrics.
Should I use a thimble for hand sewing?
Use a thimble on your middle finger (the one that pushes the needle) when sewing through heavy fabrics like denim, canvas, or multiple layers. For lightweight fabrics, a thimble is optional but can prevent sore fingers during long sewing sessions.
How far apart should my stitches be?
For backstitch and running stitch, aim for 1/8 to 1/4 inch (3-6mm) spacing for most projects. Smaller stitches (1/16 inch) create stronger seams and neater appearance but take longer. Larger stitches (1/2 inch) work for basting or gathering but aren’t strong enough for permanent seams.
Can I use hand sewing to make an entire garment?
Yes, you can construct entire garments using backstitch for seams and whip stitch for finishing, though it takes significantly longer than machine sewing. Historical garments were entirely hand-sewn before sewing machines existed, and some modern sewers choose hand construction for the meditative quality and portability.
Conclusion
The three essential hand stitches, running stitch, backstitch, and whip stitch, form the foundation of practical sewing skills that every sewing enthusiast should master before moving on to more specialized techniques. These stitches handle the vast majority of mending, alterations, and construction tasks without requiring expensive equipment or years of training.
Start by practicing each stitch on scrap fabric with contrasting thread until you can create consistent, even stitches without thinking about the mechanics. Focus on running stitch first for speed and basic technique, then move to backstitch for strength, and finally whip stitch for finishing work. Spend at least 30 minutes practicing each stitch before attempting real projects.
Apply your new skills to simple repairs first, reattach a button, fix a split seam, or hem a pair of pants. These quick wins build confidence and let you practice on projects that matter without high stakes. As your stitching becomes neater and more consistent, tackle larger projects like simple garments or home décor items.
Remember that professional tailors rely on these same three stitches for most of their hand-finishing work. The difference between amateur and professional results comes down to practice, consistency, and choosing the right stitch for each task. Master these three stitches well, and you’ll have the skills to handle nearly any hand-sewing project that comes your way in 2026 and beyond.


