Quick Answer: A serger (also called an overlock machine) is a specialized sewing machine that trims fabric edges while simultaneously stitching and encasing them with multiple threads, creating professional seam finishes in one pass. Beginners don’t absolutely need a serger to start sewing, but it becomes valuable once you’re working with knit fabrics, making garments regularly, or want store-quality seam finishes without spending hours hand-finishing edges.
Key Takeaways
- Sergers trim, stitch, and finish seams simultaneously using 3-5 thread cones, creating professional edges that won’t fray
- Regular sewing machines can’t replicate true serger stitches, though some offer overlock-style stitches as an approximation
- Most sewists use both machines: sewing machines for construction and topstitching, sergers for seam finishing and knits
- Entry-level sergers start around $200-300 with models like the Brother 1034D and Juki MO654DE popular for beginners
- Threading a serger takes 15-30 minutes the first time but becomes routine with practice and color-coded guides
- Sergers excel with knit fabrics (t-shirts, leggings, activewear) but aren’t essential for woven cotton projects
- Wait to buy a serger if you’re still learning basic sewing skills or only sew a few times per year
- Common beginner mistakes include wrong tension settings, using cheap thread, and not testing on scraps first
What Does a Serger Do That a Regular Sewing Machine Can’t?
A serger performs three operations in one pass that would require multiple steps on a regular sewing machine: it trims the fabric edge with a built-in blade, stitches the seam with multiple threads (typically 3-4), and wraps thread around the raw edge to prevent fraying. Regular sewing machines can’t trim fabric while stitching, and their single or double-thread stitches don’t encapsulate edges the same way.
The key differences in capability:
Serger-exclusive features:
- Differential feed that prevents knit fabrics from stretching or puckering during sewing
- Blade system that cuts a clean edge exactly where the stitch forms
- Looper threads that wrap around the fabric edge (not just through it)
- Stretch seams that move with knit fabrics without popping threads
- Professional rolled hems on lightweight fabrics in seconds
What regular machines do better:
- Topstitching and decorative stitches
- Buttonholes and zipper installation
- Precise pivoting around corners
- Quilting and free-motion work
- Sewing with a single thread color
The serger’s blade is the game-changer. It ensures your seam allowance is perfectly consistent because it cuts away excess fabric right before the needles stitch. On a regular machine, you’re relying on your own accuracy to maintain a consistent seam allowance, and the raw edge still needs finishing afterward.
Serger vs Sewing Machine: Understanding the Core Differences
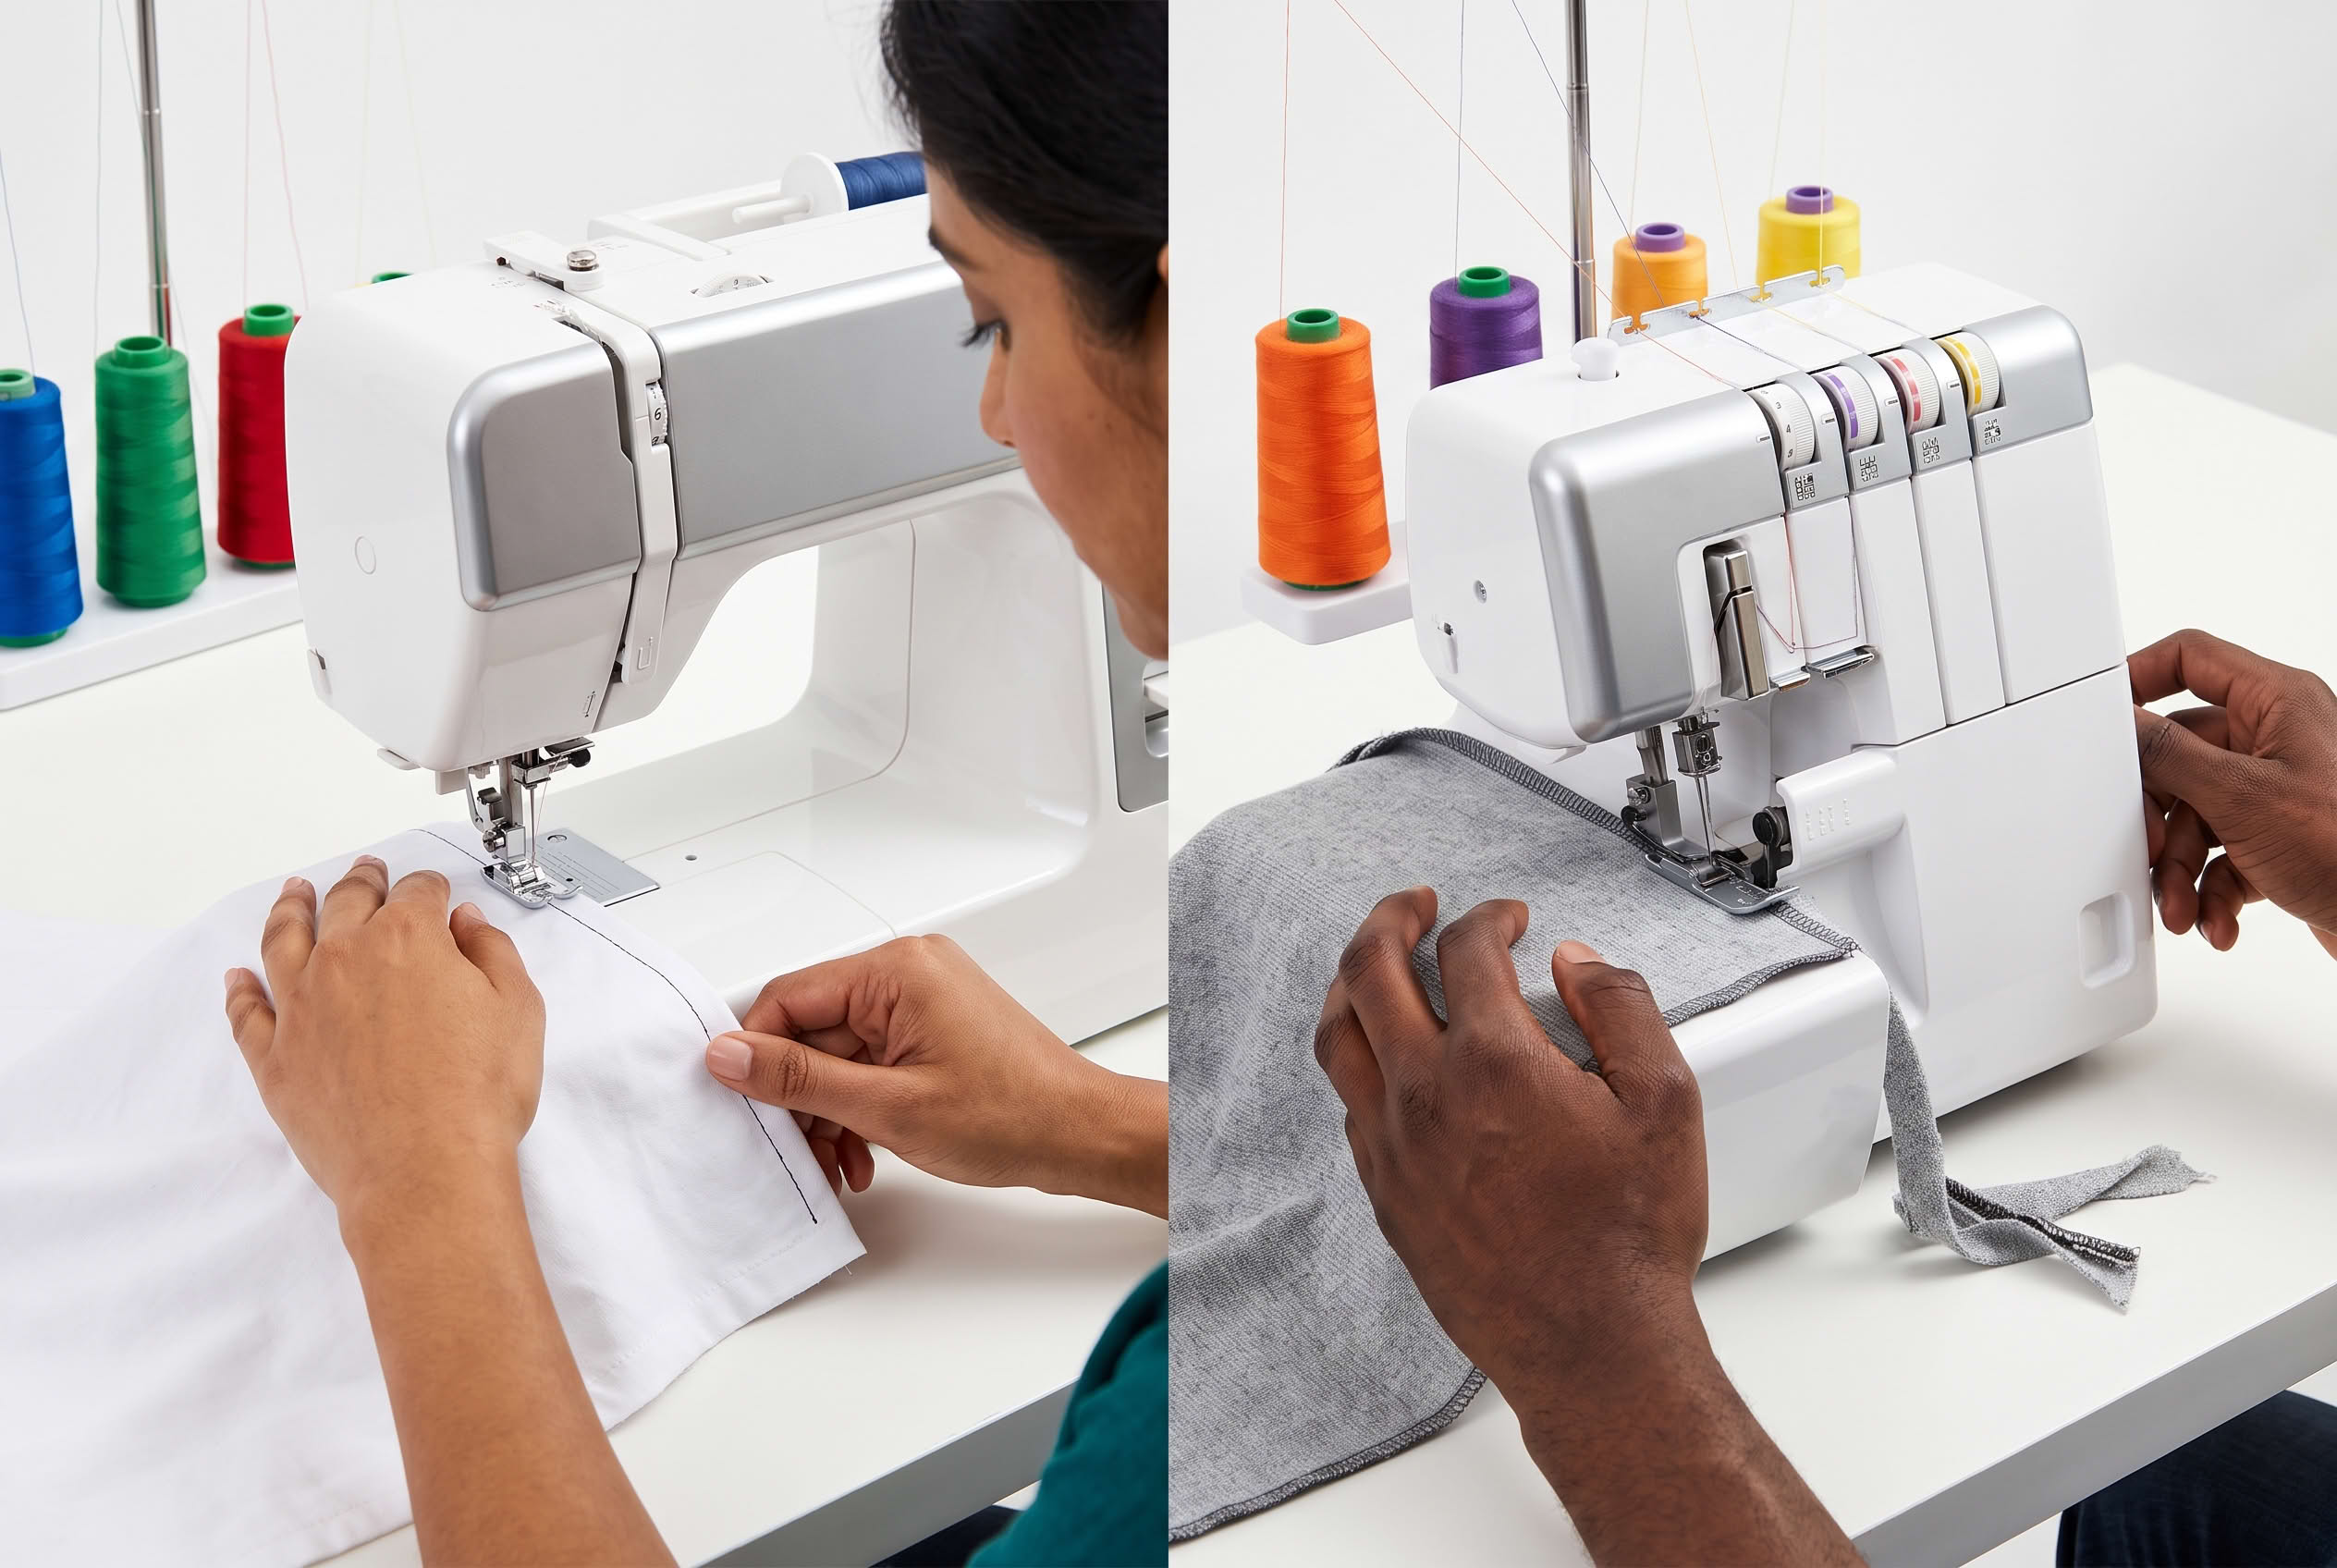
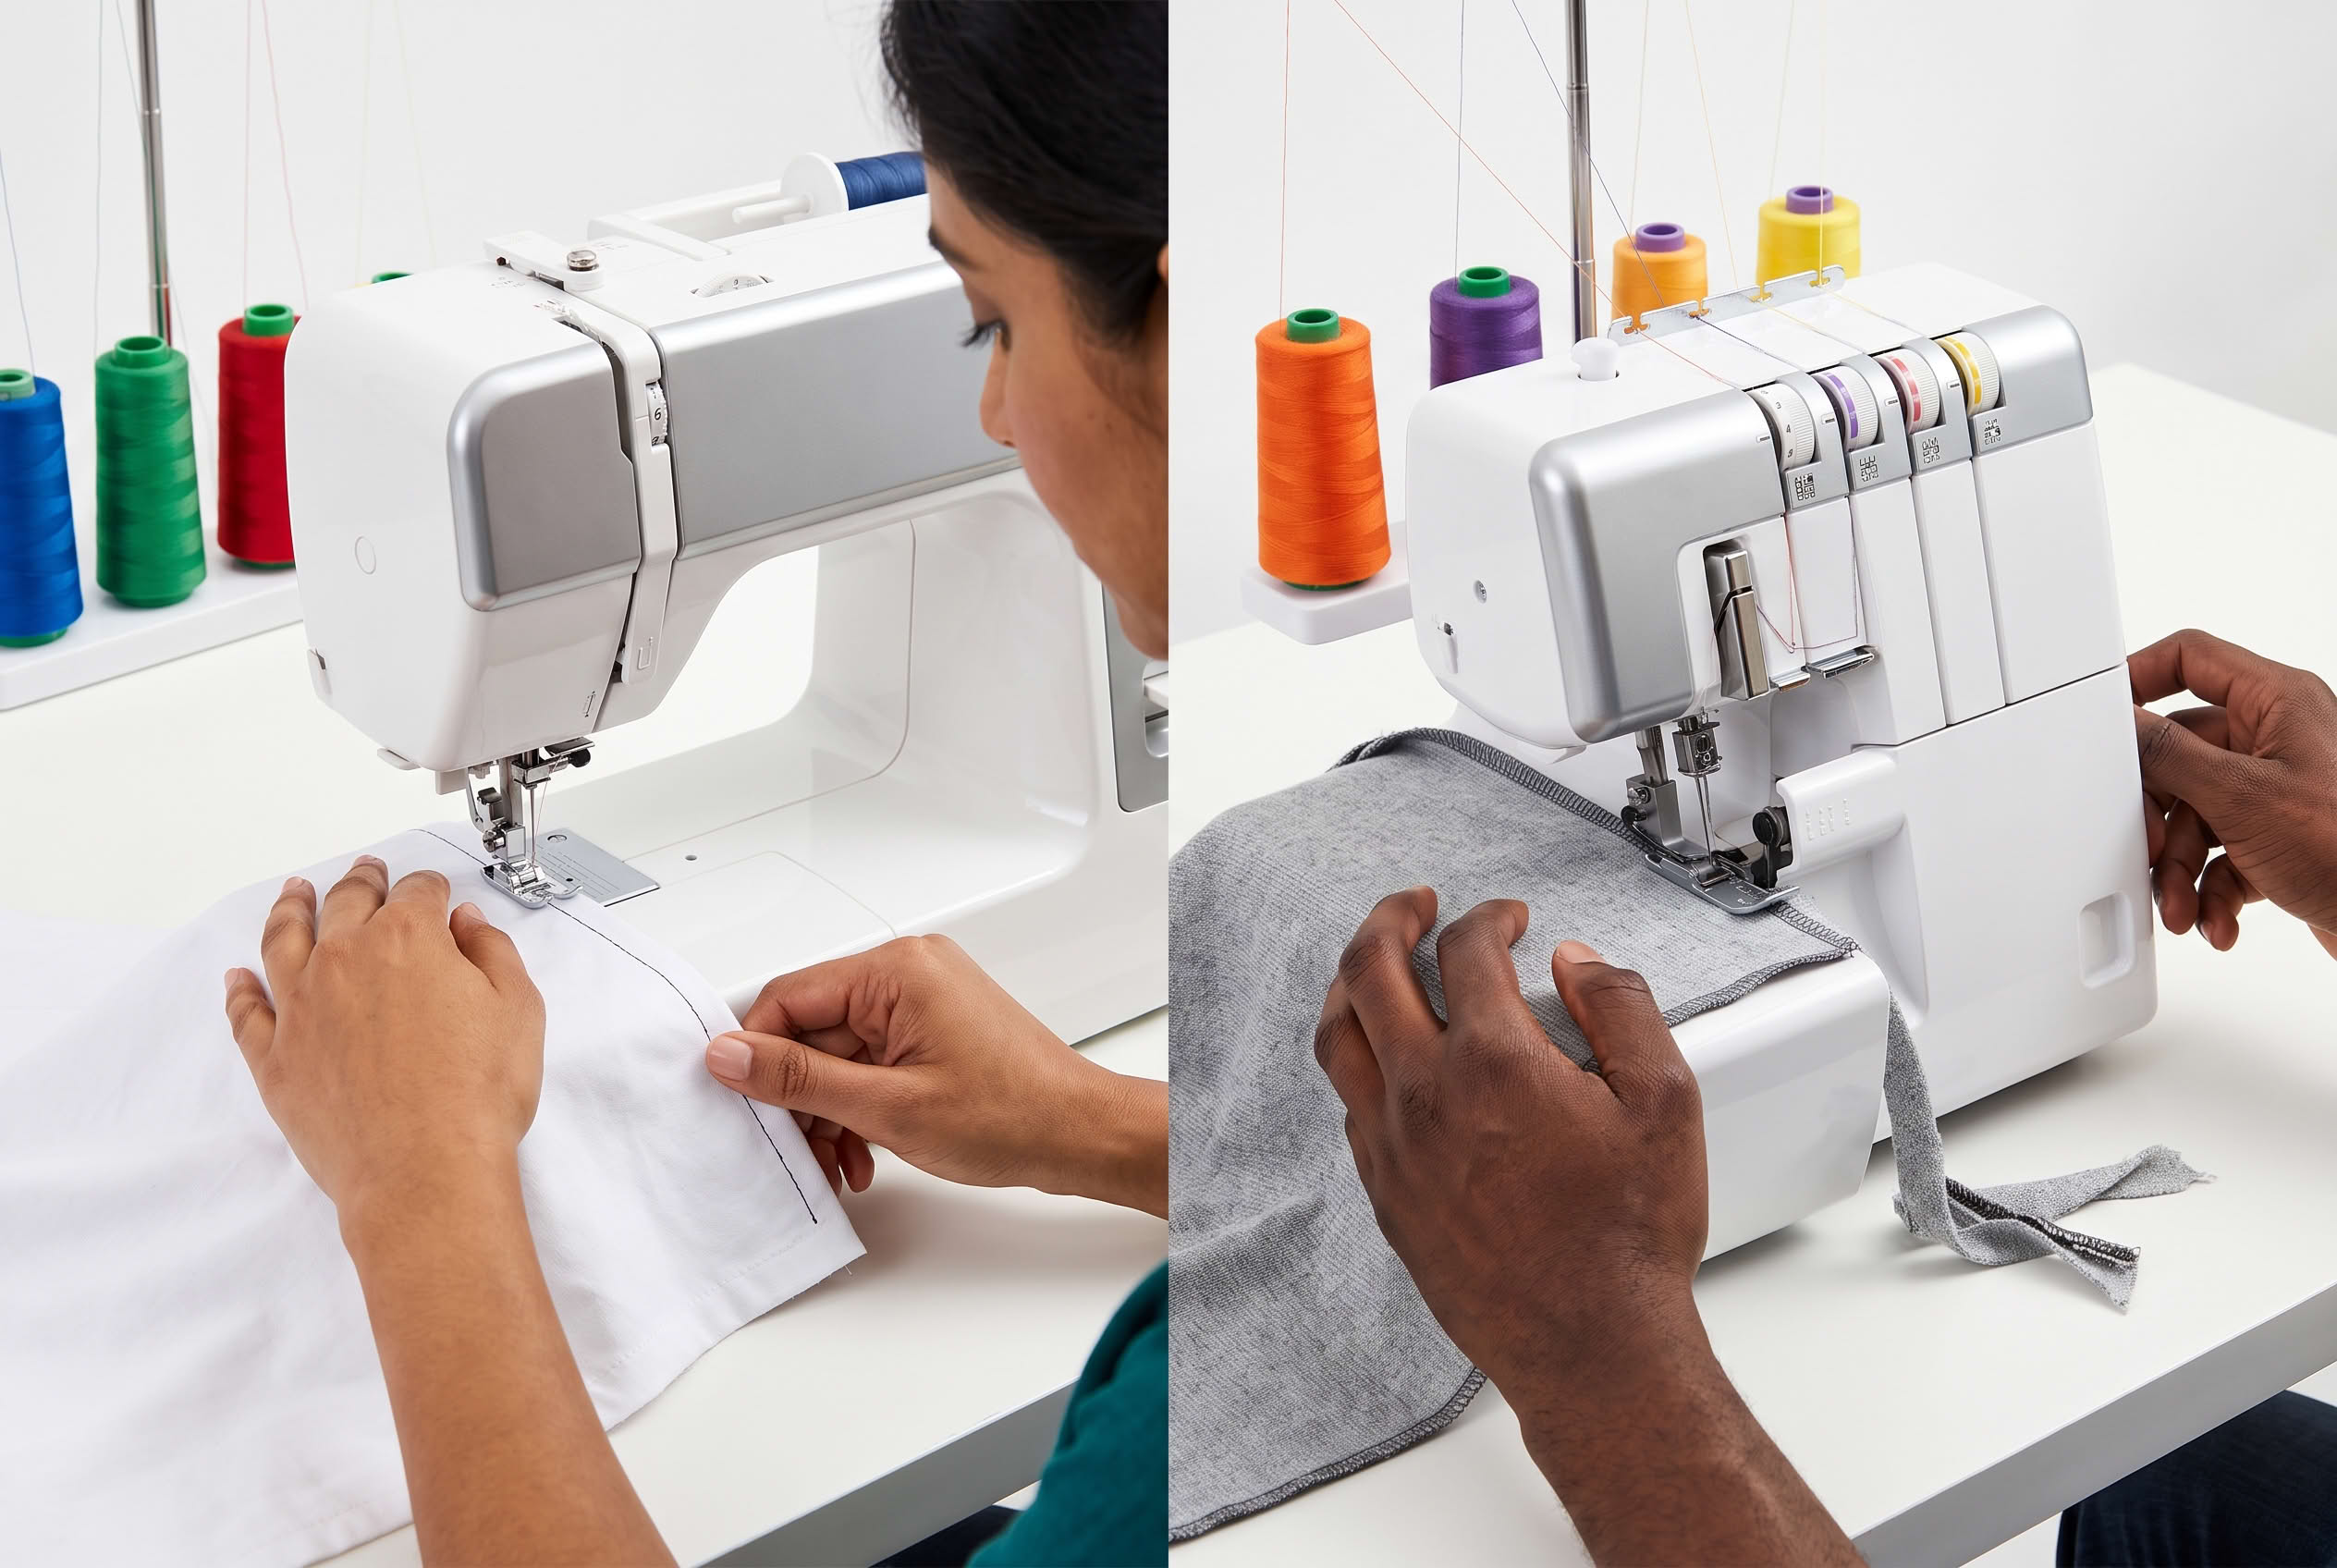
Sergers and sewing machines are fundamentally different tools designed for different tasks. A sewing machine uses 1-2 threads and creates stitches that go through the fabric layers, while a serger uses 3-5 threads with loopers that wrap around the fabric edge. Think of it this way: sewing machines are for construction and detail work, sergers are for finishing and speed.
Construction differences:
| Feature | Sewing Machine | Serger |
|---|---|---|
| Thread cones | 1-2 | 3-5 |
| Stitch formation | Needle and bobbin | Needles and loopers |
| Fabric trimming | No | Yes (built-in blade) |
| Seam width | Variable | Fixed (adjustable between models) |
| Speed | Moderate | Very fast |
| Stitch stretch | Limited | Excellent |
When each machine shines:
Choose your sewing machine for:
- Installing zippers, buttons, and closures
- Topstitching visible seams
- Quilting and patchwork
- Sewing precise corners and curves
- Working with a single thread color
- Any project requiring backstitching
Choose your serger for:
- Finishing raw edges on woven fabrics
- Sewing stretchy knit seams
- Creating lettuce-edge hems on knits
- Speed-finishing multiple garment seams
- Professional-looking interior seams
- Preventing fabric fraying on loosely woven materials
The stitch structure also differs significantly. Sewing machine stitches lock together above and below the fabric, which is why they hold firmly but don’t stretch much. Serger stitches use loopers that create chains of thread around the edge, allowing the seam to stretch with the fabric without breaking.
Do I Need Both a Serger and a Sewing Machine?
Yes, most sewists who invest in a serger keep their regular sewing machine and use both tools for different steps in the same project. A serger cannot replace a sewing machine for construction tasks like installing zippers, creating buttonholes, or topstitching, and a sewing machine can’t replicate the speed and professional finish of a serger for seam finishing.
Typical workflow using both machines:
- Cut pattern pieces and mark notches
- Sew construction seams on the sewing machine (side seams, shoulder seams, etc.)
- Finish seam allowances on the serger to prevent fraying
- Return to sewing machine for topstitching, hems, and closures
- Use serger for final edge finishing if needed
Budget considerations:
If you can only afford one machine right now, start with a quality sewing machine. It’s the more versatile tool that can handle complete projects from start to finish. You can finish seams with these sewing-machine alternatives:
- Zigzag stitch along raw edges
- Pinking shears to cut edges
- Bias tape to encase raw edges
- French seams for enclosed edges
- Hong Kong seam finish with bias strips
Once you’re sewing regularly (at least 2-3 projects per month) and find yourself frustrated by the time spent finishing seams, that’s when a serger becomes worth the investment. Many sewists report that adding a serger cuts their garment-making time by 30-40% because seam finishing happens so much faster.

METAL FRAME: The Brother 1034D is a durable serger made with a high-quality metal frame and interior components. Underlooper Threader-Yes

27 Unique Built-in Stitches: The Brother XM2701 sewing machine includes 27 built-in stitches including decorative, blind hem, zigzag, and stretch stitches and an auto-size buttonhole
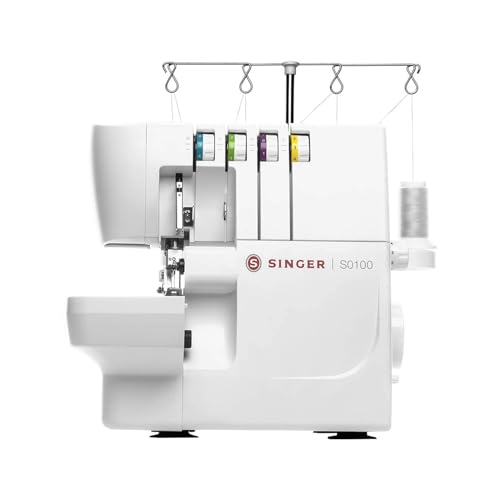
✅2, 3, OR 4-THREAD STITCH OPTIONS: Create professional-quality seams, hems, and decorative edges with a variety of thread combinations. Whether you’re sewing delicate napkin hems, stretchy knits, or adding flair to fleece, this serger provides the versatility needed for all kinds of projects.
Best Sergers for Beginners Under $300
Entry-level sergers in the $200-300 range offer reliable performance for beginners without overwhelming features. The Brother 1034D (around $250) and Juki MO654DE (around $280) consistently rank as top choices because they’re easy to thread, have clear tension dials, and include color-coded threading guides.
Top beginner-friendly models in 2026:
Brother 1034D ($230-260)
- 3 or 4 thread capability
- Differential feed for knits
- Easy-to-follow threading diagram on machine
- Included accessories: foot pedal, needles, tweezers, screwdriver
- Best for: Complete beginners who want straightforward operation
Juki MO654DE ($270-300)
- 2, 3, or 4 thread options
- Slightly faster stitching speed than Brother
- Color-coded threading system
- Lay-in tension system (easier than dial tension)
- Best for: Beginners who plan to sew frequently and want room to grow
Singer 14CG754 ($200-230)
- Budget-friendly entry point
- 2, 3, or 4 thread capability
- Free arm for cuffs and sleeves
- Slightly louder than Brother or Juki
- Best for: Tight budgets or occasional use
What to look for in a beginner serger:
- Threading guides printed on the machine (not just in the manual)
- Color-coded thread paths that match the thread cone holders
- Differential feed for working with knits and preventing puckering
- At least 3-4 thread capability (2-thread is too limiting for most projects)
- Included accessories like extra needles, tweezers, and a seam ripper
- Free arm for finishing cuffs and sleeve hems
Avoid sergers without differential feed or those that require tools to adjust tension. Also skip 5-thread models as a beginner, the extra complexity isn’t worth it until you’re comfortable with basic serging.

2/3/4-Thread Flexibility: Our serger sewing machine features easy switching between 2/3/4 threads with adjustable stitch length. Whether it's simple repairs or detailed edge finishing, it handles both with ease to meet a wide range of sewing needs

2-3-4 THREAD STITCH CAPABILITY FOR VERSATILE SEWING: The SINGER S14-78 offers 2, 3, and 4 thread stitch capability, providing a wide range of options for creating professional seams, seam finishes, decorative edges, rolled hems, and more. Whether you're sewing garments or home décor, this serger gives you the versatility to tackle any project with precision and durability

Metal frame: The ST4031HD is a strong, reliable serger built to tackle heavy duty projects with its sturdy metal frame
Can You Use a Serger as Your Only Machine?
No, a serger cannot function as your only sewing machine because it can’t perform essential construction tasks like installing zippers, creating buttonholes, sewing straight topstitching, or pivoting around corners. Sergers are designed specifically for edge finishing and seaming, not for the detailed construction work that regular sewing machines handle.
What you can’t do on a serger:
- Install zippers (sergers can’t backstitch or create precise straight lines)
- Make buttonholes (requires specific buttonhole foot and stitch)
- Sew on buttons (no button-sewing stitch)
- Create decorative topstitching (serger stitches are always on the edge)
- Quilt or piece patchwork (can’t pivot or create precise intersections)
- Hem with invisible stitches (serger hems are always visible)
- Sew precise corners (the blade cuts continuously)
What you can do on a serger alone:
- Finish all raw edges on a garment
- Create basic seams on knit garments (though you’ll need to hand-sew closures)
- Make simple infinity scarves or knit accessories
- Hem knit items with a rolled hem or lettuce edge
- Create ruffles with differential feed
Some sewists who exclusively make simple knit garments (basic t-shirts, leggings, infinity scarves) do work primarily on a serger and hand-sew any closures or details. But this is a very specific niche. For 95% of sewing projects, you need both machines or at minimum a regular sewing machine with alternative seam-finishing methods.
What Projects Actually Require a Serger?
No projects absolutely require a serger, but certain types of sewing become significantly easier and more professional-looking with one. Knit garments (t-shirts, leggings, activewear, swimwear) benefit most because serger seams stretch with the fabric and won’t pop when worn, while woven fabric projects can be finished adequately with sewing machine alternatives.
Projects where a serger makes the biggest difference:
Knit garments (high impact):
- T-shirts and tank tops
- Leggings and yoga pants
- Knit dresses and skirts
- Activewear and athletic wear
- Swimwear and rash guards
- Baby clothes (soft, stretchy seams)
Woven garments (moderate impact):
- Unlined jackets and coats (exposed seam allowances)
- Casual dresses and skirts
- Loose-weave fabrics that fray easily (linen, rayon)
- Sheer fabrics where seam bulk matters
Projects where a serger adds minimal value:
- Quilts (seam allowances are usually pressed open)
- Home decor items (seams often hidden or enclosed)
- Bags and accessories (seams typically enclosed or lined)
- Formal wear with lined construction (seam allowances hidden)
- Denim projects (flat-felled seams are traditional)
The key question: does your project involve stretchy fabric or exposed seam allowances? If yes to either, a serger helps significantly. If the project uses stable woven fabric with hidden or enclosed seams, you won’t miss having a serger.
Many sewists report that once they buy a serger, they use it on nearly every project simply because it’s faster and creates cleaner results. Even on projects that don’t require it, the time savings for seam finishing makes it worthwhile.
How Hard Is It to Thread a Serger for the First Time?
Threading a serger takes 15-30 minutes the first time because you’re following a specific path for 3-4 separate threads through tension discs, guides, and loopers in the correct order. After 3-4 practice sessions, most beginners can thread their serger in under 5 minutes, and the process becomes routine muscle memory.
Why serger threading feels intimidating:
- Multiple thread paths that must be followed in the correct sequence (usually right needle, left needle, upper looper, lower looper)
- Loopers are located under the needle plate and harder to see than a regular bobbin
- Tension discs that each thread must sit between properly
- One mistake in the threading path causes the whole stitch to fail
What makes it easier:
Modern beginner sergers include color-coded threading systems where each thread path is marked with a different color (red, yellow, green, blue) that matches the thread cone holders. You simply follow the red path for the red cone, yellow path for the yellow cone, and so on.
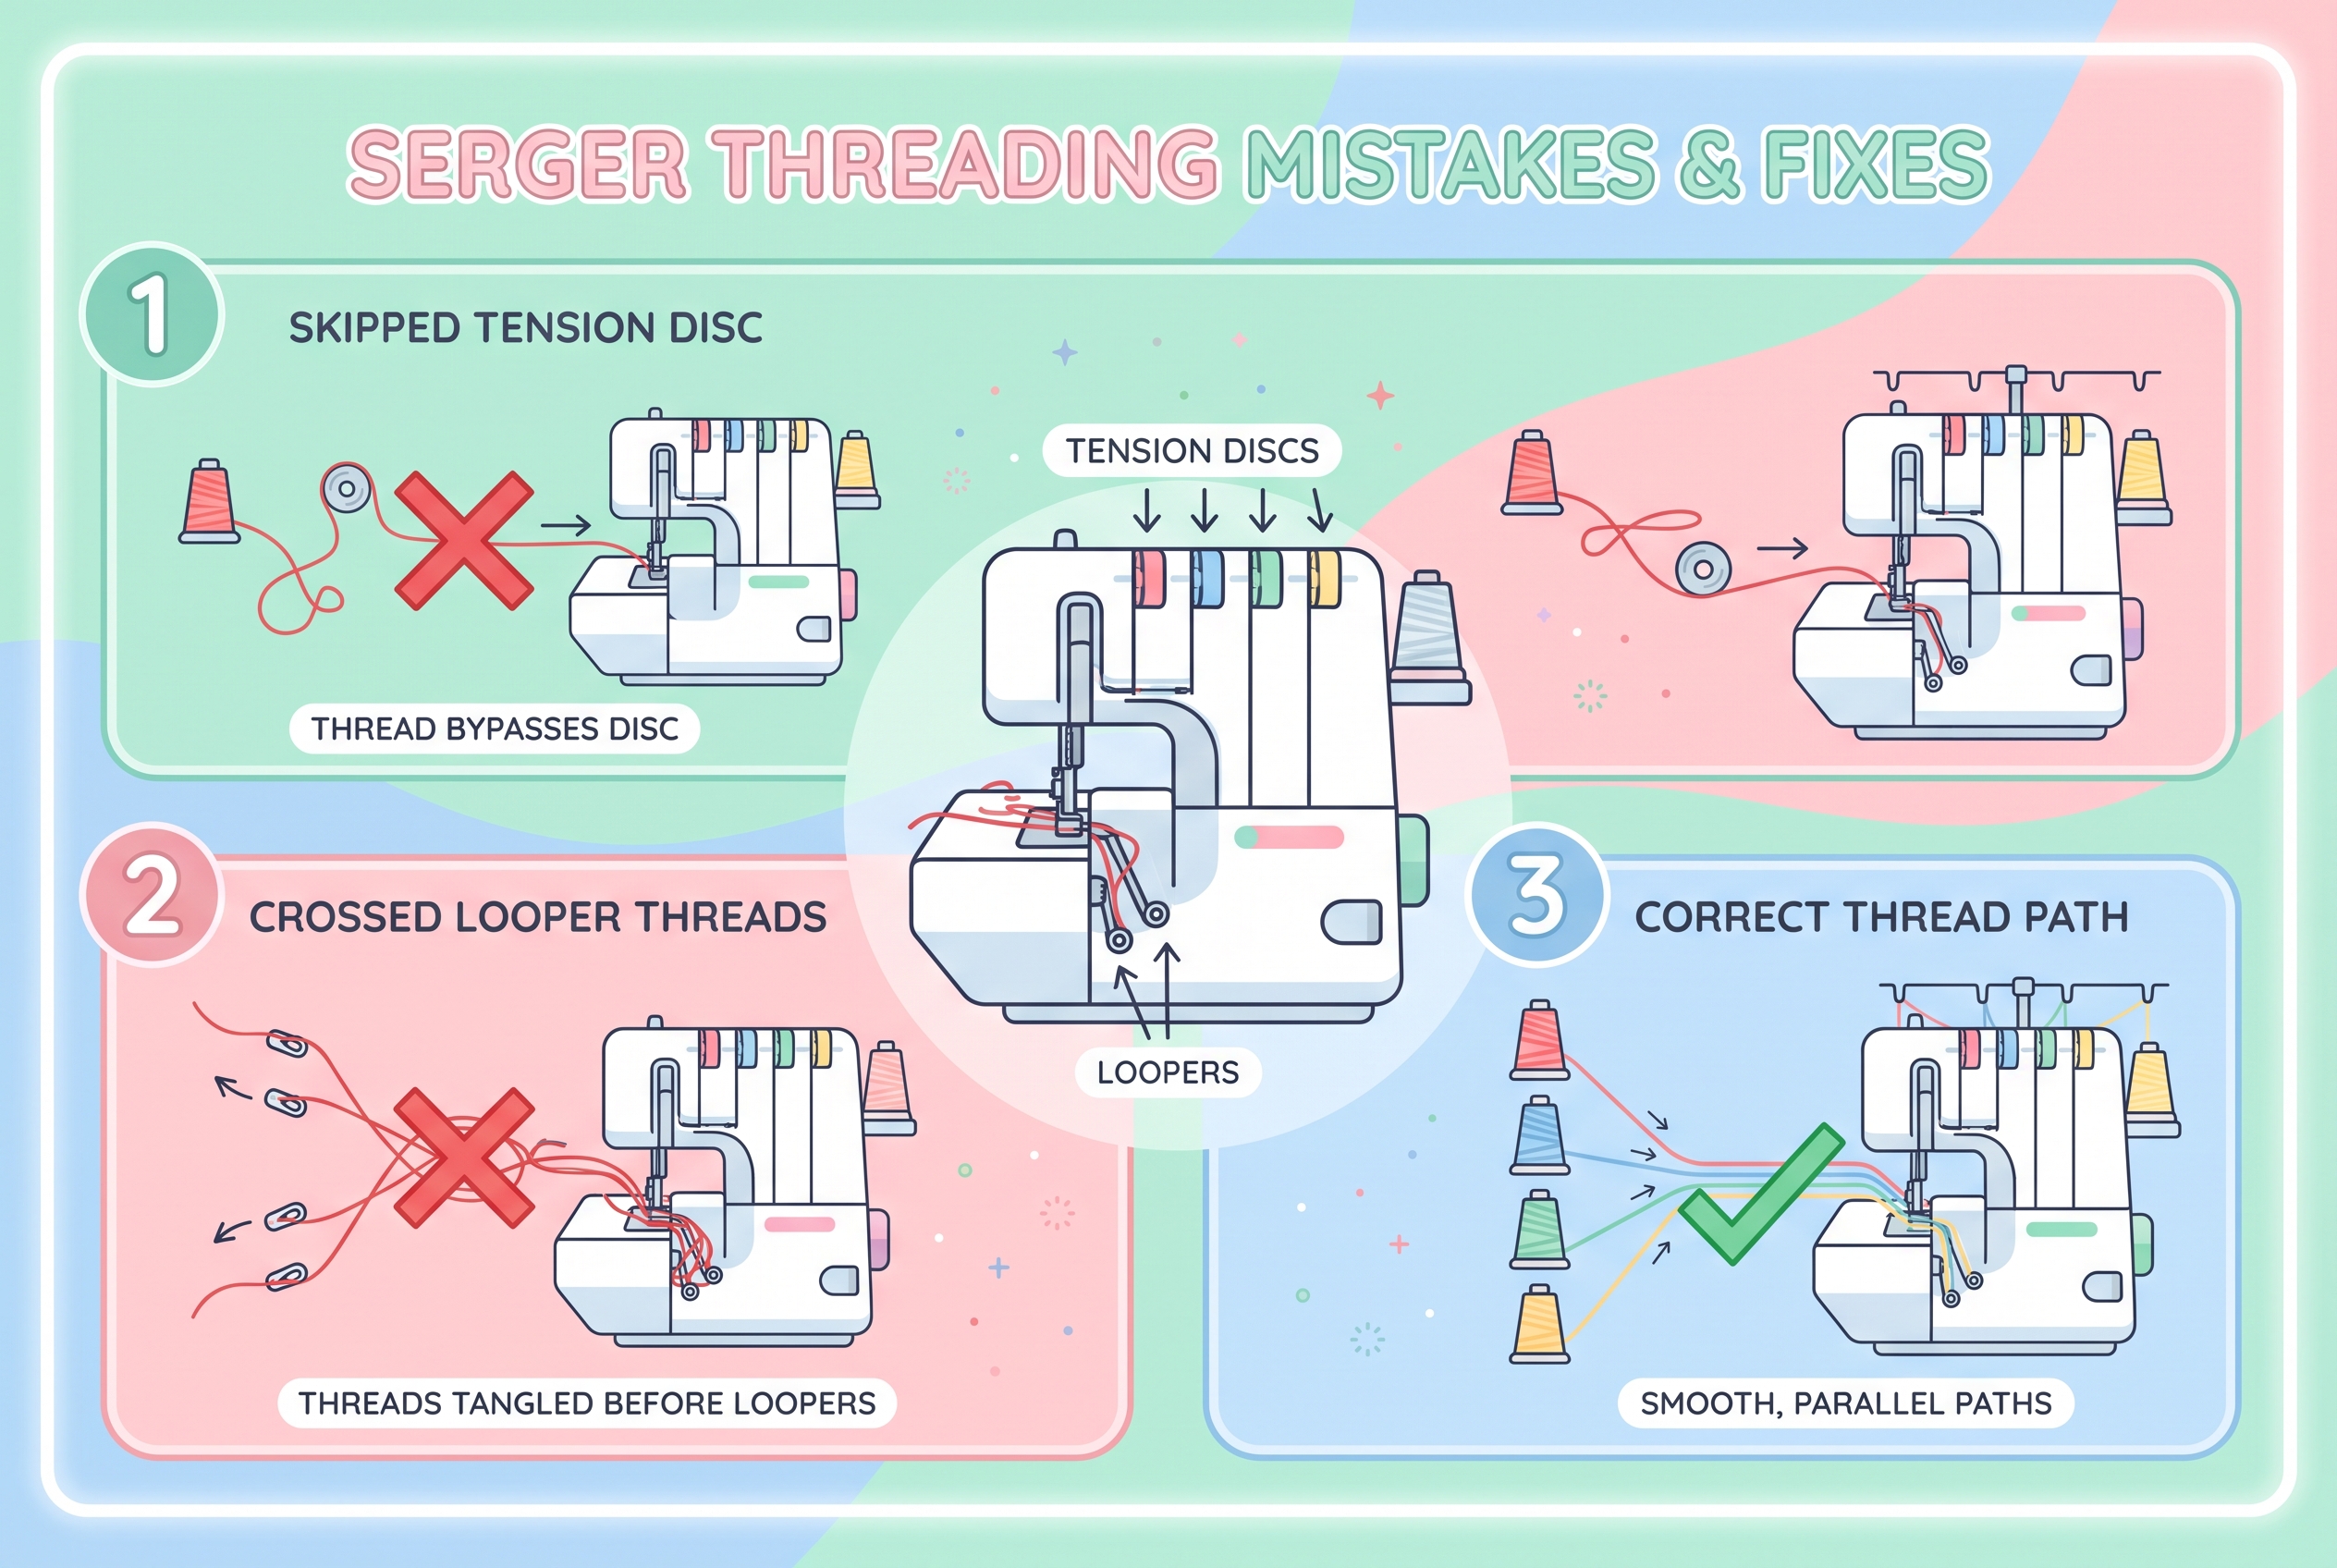
Step-by-step first-time threading tips:
- Use different colored threads for your first practice (makes it easy to see which thread is which)
- Follow the threading diagram printed on the machine, not just the manual
- Thread in the correct order (usually right to left: right needle → left needle → upper looper → lower looper)
- Use tweezers to guide thread through the loopers (included with most sergers)
- Raise the presser foot before threading (releases tension discs)
- Test on scrap fabric before starting your project
Common threading mistakes beginners make:
- Threading with the presser foot down (tension discs won’t open)
- Skipping a thread guide in the path
- Not seating thread fully between tension discs
- Threading in the wrong order
- Using old or cheap thread that breaks easily
The good news: once threads are in place, you can often sew for hours without rethreading. Many sewists leave their serger threaded with neutral colors (white, gray, black, navy) and only rethread when they need different colors for a visible seam.
Serger vs Overlock Stitch on a Regular Machine
An overlock stitch on a regular sewing machine is a zigzag-style stitch that mimics the appearance of a serger stitch but doesn’t trim the fabric edge or use multiple threads wrapped around the edge. It’s an adequate substitute for finishing seams on woven fabrics but can’t replicate the stretch and professional finish of a true serger stitch on knits.
Key differences:
Regular machine overlock stitch:
- Uses 1-2 threads (top and bobbin)
- Doesn’t trim fabric (you cut the seam allowance separately)
- Less stretch than true serger stitch
- Slower (must sew, then trim, then press)
- Works fine for woven fabrics that don’t need stretch
- Can look bulky on lightweight fabrics
True serger stitch:
- Uses 3-5 threads (needles and loopers)
- Trims fabric edge as it stitches
- Excellent stretch for knits
- Much faster (one pass does everything)
- Professional appearance on all fabric weights
- Less bulk because threads wrap around edge
When the overlock stitch on a regular machine is enough:
- Finishing seams on stable woven fabrics (cotton, linen, canvas)
- Projects where seam allowances will be hidden
- Occasional sewing where speed isn’t critical
- Budget constraints prevent buying a serger
- Learning basic garment construction before investing in more equipment
When you really need a true serger:
- Sewing knit fabrics regularly (the stretch difference is significant)
- Making activewear or swimwear (seams must stretch without breaking)
- Creating professional garments for sale
- Sewing multiple garments per month (time savings add up)
- Working with fabrics that fray aggressively
Many sewists use the overlock stitch on their regular machine for years before buying a serger. It’s a perfectly acceptable approach, especially if you’re primarily sewing woven fabrics. The jump to a serger becomes worthwhile when you start working with knits or find yourself frustrated by the time spent on seam finishing.
Is a Serger Worth It If I Only Sew Occasionally?
A serger is probably not worth the investment if you sew fewer than 2-3 projects per month or primarily work with woven fabrics on simple projects. The cost ($200-500 for a decent beginner model) and learning curve make more sense for regular sewists who will use it frequently enough to justify the expense and counter space.
Calculate your serger ROI:
Consider these factors to decide if a serger makes sense for your situation:
Buy a serger if:
- You sew at least 2-3 garments per month
- You’re working with knit fabrics regularly
- Seam finishing takes up 30%+ of your project time
- You’re frustrated with the quality of your seam finishes
- You have space for a second machine
- You’re making garments to sell or gift regularly
Wait on a serger if:
- You sew fewer than 6 projects per year
- You primarily make quilts, bags, or home decor
- You’re still learning basic sewing skills
- Your budget is tight (invest in better fabric or notions instead)
- You don’t have space for another machine
- You’re happy with your current seam finishing methods
Alternative calculation:
If you spend 30 minutes per garment finishing seams by hand or with a sewing machine, and you make 3 garments per month, that’s 90 minutes monthly or 18 hours per year. A serger would cut that to about 6 hours per year, saving you 12 hours. If your time is worth $20/hour, that’s $240 in value annually, which pays for an entry-level serger in one year.
Occasional sewist alternatives:
Instead of buying a serger right away, try these approaches:
- Take a serger class at a local sewing shop to test before buying
- Rent serger time at a maker space or sewing studio
- Borrow a friend’s serger for a project to see if you like it
- Master alternative finishing methods (French seams, bias binding, Hong Kong finish)
- Save up gradually while improving your regular sewing skills
Many experienced sewists say they wish they’d bought a serger sooner, but that’s usually after they’d already developed solid sewing skills and were working on multiple projects monthly. If you’re still learning or sewing infrequently, focus on mastering your regular machine first.
Common Mistakes Beginners Make with Sergers
The most common beginner serger mistakes are using incorrect tension settings for the fabric type, threading in the wrong order or skipping thread guides, and forgetting to test on scrap fabric before starting the actual project. These errors result in loose or puckered seams, thread jams, or uneven stitches that require ripping out and restarting.
Top 10 beginner serger mistakes:
1. Wrong tension settings
- Problem: Loops showing on fabric surface or seam puckering
- Fix: Start with manufacturer’s recommended settings for your fabric weight, then adjust one dial at a time
- Test on a folded scrap of your actual project fabric
2. Using cheap or old thread
- Problem: Constant thread breaks and jams
- Fix: Use quality serger thread (Maxi-Lock, Gutermann, or Coats & Clark) and replace thread older than 2-3 years
- Cheap thread has inconsistent thickness that causes tension problems
3. Threading with presser foot down
- Problem: Thread doesn’t seat properly in tension discs
- Fix: Always raise the presser foot before threading
- This releases the tension discs so thread can slip between them
4. Not testing on scraps first
- Problem: Ruined project fabric with wrong settings
- Fix: Always test on a folded scrap of the same fabric before serging your project
- Keep the test scrap to reference if you need to adjust mid-project
5. Serging too close to pins
- Problem: Broken needles or damaged blade
- Fix: Remove pins before they reach the blade, or place pins perpendicular to the edge at least 1 inch from the edge
- Serger blades are expensive to replace ($15-30)
6. Ignoring the differential feed
- Problem: Stretched or puckered seams on knits
- Fix: Adjust differential feed to 1.5-2.0 for knits (prevents stretching) or 0.7-0.8 for wovens that pucker
- This is the serger’s superpower, use it
7. Pulling fabric through the machine
- Problem: Uneven stitches or broken needles
- Fix: Let the feed dogs move the fabric; just guide it gently
- Pulling creates uneven tension and can damage the machine
8. Not cleaning out lint regularly
- Problem: Thread jams and skipped stitches
- Fix: Open the looper area and brush out lint after every 4-5 hours of sewing
- Sergers create more lint than regular machines because of the blade
9. Using the wrong needle type or size
- Problem: Skipped stitches or fabric damage
- Fix: Use serger needles (or universal needles) in the correct size for your fabric
- Change needles every 8-10 hours of sewing or when you hear a popping sound
10. Forgetting to disengage the blade for certain techniques
- Problem: Cutting fabric when you don’t want to
- Fix: Learn how to disengage the blade for rolled hems or decorative edges where you don’t want trimming
- Check your manual for the specific method on your model
Troubleshooting mindset:
When something goes wrong, check in this order:
- Is the machine threaded correctly? (Rethread completely)
- Are tension settings appropriate for the fabric?
- Is the needle bent, dull, or wrong size?
- Is there lint buildup in the looper area?
- Is the thread quality good and not too old?
Most serger problems come down to threading or tension. When in doubt, rethread the entire machine following the color-coded paths carefully.
Can You Sew Knit Fabric Without a Serger?
Yes, you can sew knit fabrics successfully on a regular sewing machine using a stretch needle, a zigzag or stretch stitch, and techniques like using a walking foot or adjusting presser foot pressure. The seams won’t have the same professional finish or stretch capacity as serged seams, but they’ll hold together and function well for most casual knit projects.
How to sew knits on a regular machine:
Essential supplies:
- Stretch or ballpoint needles (size 75/11 or 90/14 depending on fabric weight)
- Polyester thread (has more give than cotton)
- Walking foot (optional but helps feed knit fabric evenly)
Stitch options:
- Narrow zigzag stitch (width 1.5-2.0, length 2.5) – most versatile
- Stretch stitch (looks like a lightning bolt) – strongest but hardest to remove if you make a mistake
- Overlock stitch (if your machine has one) – mimics serger appearance
Technique tips:
- Don’t stretch fabric as you sew (let the feed dogs do the work)
- Use a scrap of fabric under the starting point to prevent fabric from being pulled into the needle plate
- Reduce presser foot pressure if your machine allows (prevents stretching)
- Use a longer stitch length than you would for wovens (2.5-3.0)
Seam finishing options without a serger:
- Zigzag the raw edges after sewing the seam with a straight or zigzag stitch
- Use a mock flat-lock seam (zigzag with seam allowances pressed open)
- Twin needle hem for professional-looking hems on knit hems
- Leave edges raw on knits that don’t curl (some ponte and double knits)
When regular machine knit sewing works fine:
- Casual t-shirts and tops for personal use
- Simple knit skirts and dresses
- Baby clothes (seams don’t need to withstand heavy stress)
- Knit accessories like headbands or infinity scarves
- Learning knit sewing before investing in a serger
When you really need a serger for knits:
- Activewear and athletic wear (seams must stretch significantly)
- Swimwear (seams will be under stress when wet)
- Leggings and fitted garments (seams need maximum stretch)
- Professional garments for sale (customers expect serged seams)
- High-volume knit sewing (serger is much faster)
Many sewists successfully make knit garments on regular machines for years. The key is using the right needle, stitch, and technique. The jump to a serger for knits is about speed and professional appearance more than basic functionality.
Who Should Buy a Serger vs Who Should Wait?
Buy a serger if you’re sewing at least 2-3 garments monthly, working regularly with knit fabrics, have mastered basic sewing machine skills, and find seam finishing tedious or time-consuming. Wait if you’re still learning fundamental sewing techniques, sew infrequently, work primarily with quilting or home decor projects, or don’t have space and budget for a second machine.
Buy a serger now if you:
✅ Make garments regularly (at least 2-3 per month)
✅ Work with knit fabrics frequently
✅ Sew for others (gifts, sales, or commissions)
✅ Feel confident with your regular sewing machine
✅ Have dedicated sewing space for multiple machines
✅ Budget allows $200-500 without financial stress
✅ Spend significant time on seam finishing
✅ Want to improve the quality of your garment interiors
Wait on a serger if you:
⏸️ Started sewing within the last 6 months
⏸️ Sew fewer than 6 projects per year
⏸️ Primarily quilt or make home decor items
⏸️ Still learning basic techniques (straight seams, zippers, buttonholes)
⏸️ Have limited space or budget
⏸️ Are happy with your current seam finishing methods
⏸️ Rarely work with knit fabrics
⏸️ Feel overwhelmed by your current machine
The skill progression most sewists follow:
- Months 1-6: Master straight sewing, basic seams, and simple projects on a regular machine
- Months 6-12: Learn garment construction, zippers, buttonholes, and various seam finishes
- Year 2: Attempt first knit projects and more complex garments; start feeling limited by seam finishing time
- Year 2-3: Invest in a serger once the need is clear and skills are solid
Middle-ground options:
If you’re on the fence, try these before buying:
- Take a serger class at a local fabric shop (usually $30-50 and includes machine use)
- Rent time at a maker space with sergers
- Buy used from a sewist upgrading (check Facebook Marketplace or Craigslist for $100-150 deals)
- Ask for it as a gift for a birthday or holiday if family asks what you want
The worst time to buy a serger is when you’re still struggling with basic sewing machine skills. The serger will sit unused while you build foundational skills, and you might get discouraged by the threading complexity. The best time is when you’re actively frustrated by seam finishing and can clearly articulate why you need one.
Why Does My Serger Keep Jamming?
Serger jams usually happen because of lint buildup in the looper area, incorrect threading (especially if thread isn’t seated properly in tension discs), using low-quality or old thread that breaks easily, or a bent needle. Regular cleaning after every 4-5 hours of use and careful threading prevent most jams.
Most common jam causes and fixes:
Lint buildup (most common)
- Cause: The blade creates fabric dust that accumulates around loopers
- Fix: Open the looper cover and brush out lint with the included brush after every few hours of sewing
- Prevention: Clean more frequently when sewing fleece, flannel, or other lint-heavy fabrics
Incorrect threading
- Cause: Thread not seated between tension discs or skipped a guide in the path
- Fix: Completely rethread the machine with presser foot raised, following color-coded paths
- Check: Gently tug each thread, it should have slight resistance if properly threaded
Poor quality thread
- Cause: Cheap thread has inconsistent thickness and weak spots that break
- Fix: Replace with quality serger thread (Maxi-Lock, Gutermann, Coats & Clark)
- Note: Thread older than 2-3 years becomes brittle and breaks easily
Bent or dull needle
- Cause: Hitting a pin or sewing through thick layers
- Fix: Replace needles (they’re cheap,$5-8 for a pack)
- Prevention: Change needles every 8-10 hours of sewing or when you hear popping sounds
Wrong needle type or size
- Cause: Using regular sewing machine needles instead of serger needles, or wrong size for fabric
- Fix: Use serger needles (or universal needles) in correct size: 75/11 for lightweight, 90/14 for medium, 100/16 for heavy
- Check your manual for specific needle recommendations
Tension too tight
- Cause: Tension dials set too high for the thread or fabric
- Fix: Loosen all tensions to 3-4 (middle setting) and test, then adjust one dial at a time
- Remember: Looser is often better for preventing jams
Troubleshooting steps when your serger jams:
- Turn off the machine and raise the presser foot
- Carefully cut threads above the jam (don’t pull)
- Remove the needle plate if possible and clear any tangled thread
- Clean out all lint from the looper area
- Check for bent needles and replace if needed
- Rethread completely with presser foot raised
- Test on scrap fabric before returning to your project
Prevention routine:
- Brush out lint after every 4-5 hours of sewing
- Use quality thread and replace old spools
- Change needles regularly (every 8-10 hours)
- Keep tension settings documented for different fabrics
- Don’t sew over pins
- Let the machine feed fabric (don’t pull)
If jams continue after trying all these fixes, your serger may need professional servicing. Timing issues or looper alignment problems require a technician.
Cheapest Way to Get Professional-Looking Seams Without a Serger
The most cost-effective methods for professional seam finishes without a serger are French seams (which enclose raw edges inside the seam), Hong Kong seam finish (binding edges with bias strips), or using a zigzag stitch along raw edges combined with pinking shears. These techniques cost nothing beyond basic supplies you likely already own.
Budget-friendly seam finishing techniques:
French seams (best for lightweight wovens)
- Cost: $0 (uses no extra materials)
- Method: Sew seam wrong sides together at ⅜”, trim to ⅛”, press, fold right sides together, sew at ¼”
- Result: Raw edges completely enclosed inside the seam
- Best for: Sheer fabrics, lightweight cotton, garment linings
- Limitation: Only works on straight seams, adds bulk
Zigzag + pinking shears (fastest method)
- Cost: $8-15 for pinking shears (one-time purchase)
- Method: Sew seam normally, then zigzag along each raw edge, trim with pinking shears
- Result: Clean edge that won’t fray
- Best for: Medium-weight wovens, casual garments
- Limitation: Not as durable as other methods
Hong Kong seam finish (most professional-looking)
- Cost: $3-5 per garment for bias tape or bias-cut fabric strips
- Method: Encase each raw edge in bias tape or bias-cut strips, stitching close to the edge
- Result: Looks like high-end ready-to-wear
- Best for: Unlined jackets, coats, special occasion garments
- Limitation: Time-consuming (15-20 minutes per garment)
Bias tape binding (easiest for beginners)
- Cost: $2-4 per package of bias tape
- Method: Encase raw edges in purchased bias tape, stitching through all layers
- Result: Clean, colorful edge finish
- Best for: Casual garments, children’s clothes, visible seam allowances
- Limitation: Adds bulk, visible on the outside
Mock flat-fell seam (great for activewear)
- Cost: $0 (uses no extra materials)
- Method: Sew seam, press both allowances to one side, topstitch through all layers
- Result: Strong, flat seam that looks professional
- Best for: Jeans, activewear, bags, sturdy garments
- Limitation: Visible topstitching (which can be a design feature)
Overlock stitch on regular machine (if available)
- Cost: $0 (built into many modern machines)
- Method: Use your machine’s overlock or overcast stitch along raw edges
- Result: Mimics serger appearance
- Best for: All fabric types, quick finishing
- Limitation: Not as stretchy as true serger stitch
Cost comparison:
| Method | Initial Cost | Time per Garment | Durability | Professional Look |
|---|---|---|---|---|
| French seam | $0 | 20 min | Excellent | High |
| Zigzag + pinking | $15 (shears) | 10 min | Good | Medium |
| Hong Kong finish | $3-5 | 20 min | Excellent | Very high |
| Bias tape | $2-4 | 15 min | Good | Medium |
| Mock flat-fell | $0 | 15 min | Excellent | High |
| Machine overlock | $0 | 8 min | Good | Medium |
| Serger | $200-300 | 5 min | Excellent | Very high |
When budget alternatives are enough:
- Making garments for yourself or family (not for sale)
- Sewing infrequently (fewer than 6 garments per year)
- Working with stable woven fabrics that don’t fray aggressively
- Creating lined garments where seam allowances are hidden
- Learning garment construction before investing in equipment
When to save up for a serger:
- Making garments regularly (2+ per month)
- Working with knit fabrics frequently
- Creating garments for sale (customers expect serged seams)
- Time is limited (serger saves 10-15 minutes per garment)
- Sewing with fabrics that fray easily (linen, rayon, loose weaves)
Many experienced sewists used these budget methods for years before buying a serger. They’re perfectly legitimate techniques, not just “beginner” methods. High-end designers still use French seams and Hong Kong finishes in couture garments because they’re beautiful and durable.
Frequently Asked Questions
How much does a good beginner serger cost?
A quality beginner serger costs $200-300, with popular models like the Brother 1034D around $250 and the Juki MO654DE around $280. These machines include essential features like differential feed, color-coded threading, and 3-4 thread capability without overwhelming complexity.
Can I use regular sewing thread in a serger?
You can use regular sewing thread in a serger, but serger-specific thread (on larger cones) is more economical and flows better through the machine. Serger thread is typically finer and creates less bulk in seams, and the larger cones mean less frequent thread changes during projects.
How often should I clean my serger?
Clean your serger after every 4-5 hours of sewing by brushing lint from the looper area and around the blade. Sergers create more lint than regular machines because the blade cuts fabric, so more frequent cleaning prevents jams and maintains stitch quality.
What’s the difference between a 3-thread and 4-thread serger?
A 3-thread serger uses two needles and one looper (or one needle and two loopers) for lighter seams and rolled hems, while a 4-thread serger adds an extra needle thread for stronger, more durable seams. Most beginners should choose a machine that can do both 3-thread and 4-thread configurations.
Can you sew a straight seam on a serger?
Sergers cannot sew straight seams in the traditional sense because they’re designed to stitch along fabric edges while trimming. The blade and stitch formation require working on an edge, so you can’t sew a straight line through the middle of fabric like you can on a regular sewing machine.
Do I need special needles for a serger?
Most sergers use standard universal sewing machine needles, though some brands recommend serger-specific needles. Check your manual for the correct needle system (usually 130/705H), and use the appropriate size for your fabric: 75/11 for lightweight, 90/14 for medium weight, 100/16 for heavy fabrics.
How long does it take to learn to use a serger?
Most beginners feel comfortable with basic serger operation after 3-5 practice sessions (about 6-10 hours total). Threading becomes routine within 2-3 weeks of regular use, and tension adjustments for different fabrics typically take 1-2 months to master through trial and error.
Can you use a serger on woven fabric?
Yes, sergers work excellently on woven fabrics for finishing seam allowances and preventing fraying. While sergers are essential for knits, they’re also valuable for wovens that fray easily (linen, rayon, loose weaves) or any project where you want professional-looking interior seams.
What is differential feed on a serger?
Differential feed is a feature where the front and rear feed dogs move at different speeds to prevent fabric stretching or puckering. Set it above 1.0 (typically 1.5-2.0) for knits to prevent stretching, or below 1.0 (0.7-0.8) for wovens that tend to pucker.
How do you fix loose serger stitches?
Loose serger stitches usually indicate tension that’s too low on one or more threads. Tighten the tension dial for the loose thread by small increments (half a number at a time), testing on scrap fabric between adjustments. Also verify the thread is properly seated in all tension discs.
Can you backstitch on a serger?
Sergers cannot backstitch because they create a chain stitch that requires continuous forward motion. To secure seam ends, sew off the fabric edge leaving a thread chain, then use a needle to weave the chain back into the seam or tie it off and trim close to the fabric.
What’s the best serger thread brand?
Popular quality serger thread brands include Maxi-Lock (affordable and widely available), Gutermann (premium quality), Coats & Clark (good mid-range option), and Madeira (professional grade). Avoid dollar-store thread, which has inconsistent thickness and breaks frequently, causing jams and tension problems.
Conclusion
A serger is a specialized machine that trims, stitches, and finishes fabric edges simultaneously, creating professional seams that regular sewing machines can’t replicate. While beginners don’t absolutely need one to start sewing, a serger becomes increasingly valuable once you’re working with knit fabrics regularly, making multiple garments per month, or frustrated by the time spent on seam finishing.
The decision to buy a serger comes down to your sewing frequency, project types, and skill level. If you’re sewing 2-3 garments monthly, working with knits, and comfortable with your regular machine, an entry-level serger in the $200-300 range (like the Brother 1034D or Juki MO654DE) will save time and improve your results. If you’re still learning basic skills or sew infrequently, focus on mastering alternative seam finishing techniques first.
Your next steps:
- Assess your current sewing practice: Count how many projects you complete monthly and what percentage involve knit fabrics or exposed seam allowances
- Try alternative methods first: Master French seams, Hong Kong finishes, or your machine’s overlock stitch to see if they meet your needs
- Take a serger class: Most fabric shops offer 2-3 hour classes where you can test a serger before buying
- Set a timeline: If you decide you need one, save up for 2-3 months to buy a quality beginner model rather than a cheap machine that will frustrate you
- Plan your space: Measure your sewing area to ensure you have room for both machines
Remember that even professional sewists use both machines, a serger doesn’t replace your sewing machine, it complements it. The combination of both tools gives you the flexibility to handle any project with professional results.