


Quick Answer
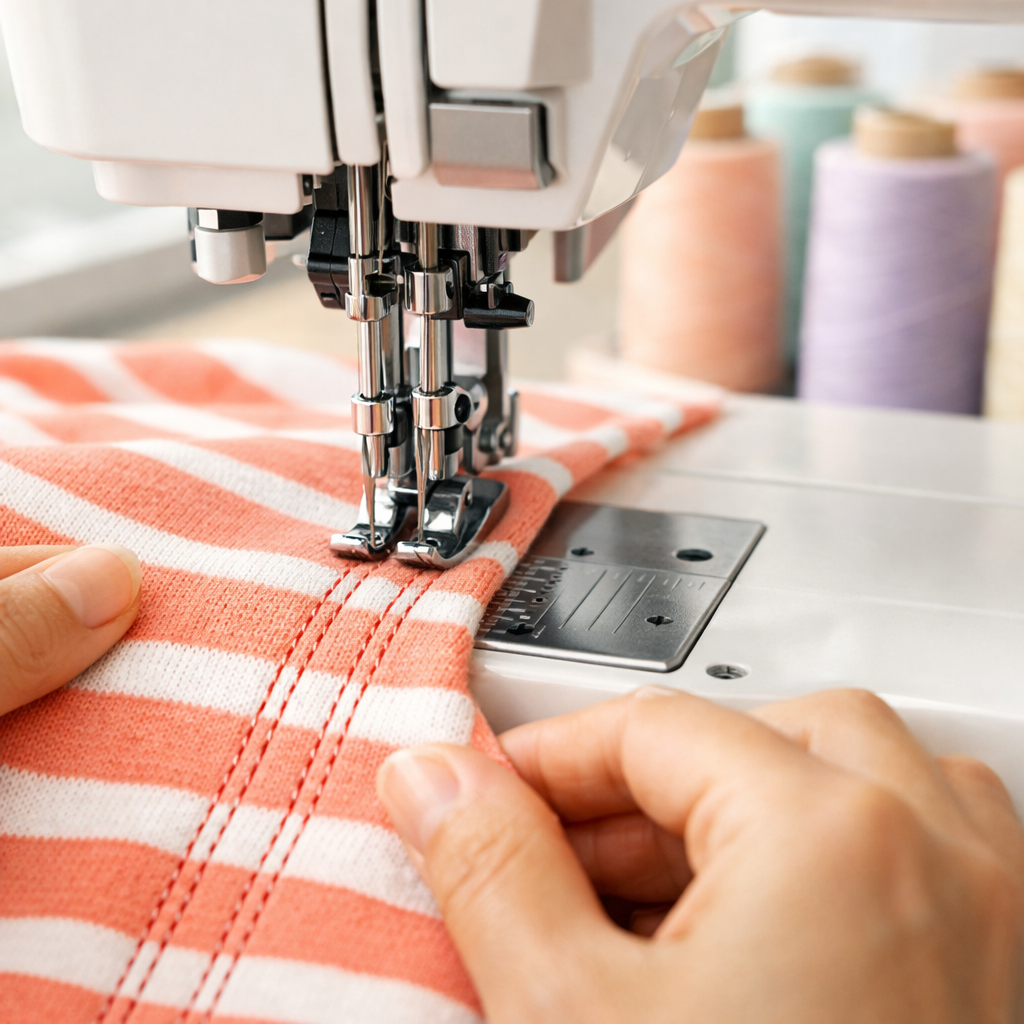
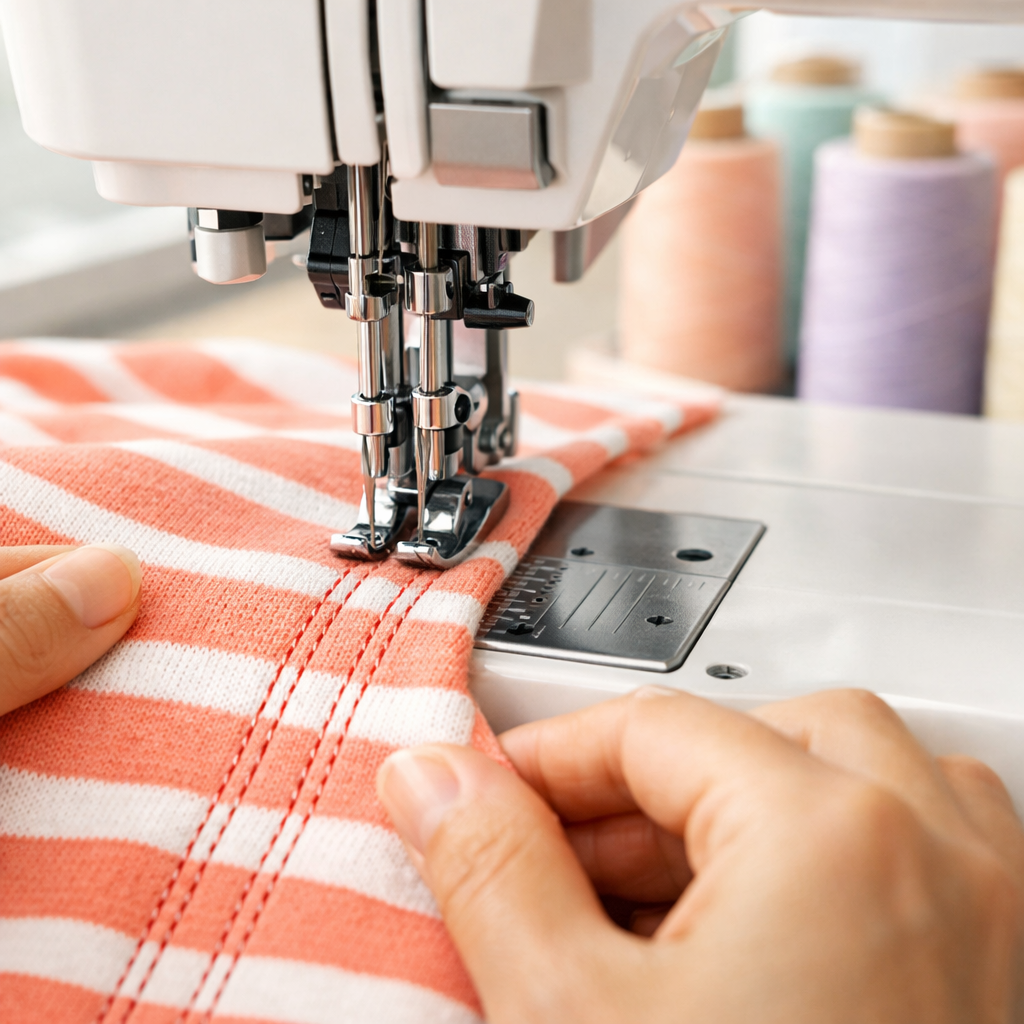
A coverstitch machine creates professional double-needle hems and decorative topstitching on knit fabrics, producing the same finish you see on store-bought t-shirts and activewear. It uses two or three needles on top and a looper underneath to form parallel rows of stitching on the right side with a chain stitch on the wrong side. Unlike sergers that cut and finish raw edges, coverstitches are specifically designed for hemming and topstitching stretchy fabrics without breaking the thread when the garment is worn or washed.
Key Takeaways
- Coverstitch machines specialize in professional hems on knit fabrics with the signature double or triple needle finish found on commercial garments
- They complement but don’t replace sergers, sergers finish raw edges while coverstitches create hems and topstitching
- Perfect for t-shirts, activewear, and loungewear where stretch and durability matter most
- Entry-level machines start around $300-400 while professional models can exceed $1,500
- Regular sewing machines cannot replicate true coverstitch, twin needles create a similar look but lack the stretchy chain stitch backing
- Best fabrics include jersey, interlock, and rib knits, wovens don’t benefit from coverstitch’s stretch properties
- Common issues like skipped stitches usually stem from incorrect threading, dull needles, or improper tension settings
- Worth the investment if you sew knits regularly, occasional knit sewers can manage with twin needles on a regular machine
What Is a Coverstitch Machine Used For?
A coverstitch machine is used primarily for creating professional-quality hems on knit fabrics and adding decorative topstitching that stretches with the garment. The machine produces the distinctive parallel rows of stitching you see on the bottom of t-shirt sleeves, necklines, and hems, that signature look that screams “professionally made.”
The coverstitch serves three main purposes in garment construction:
Hemming knit garments, The most common use is finishing the raw edges of t-shirts, sweatshirts, leggings, and underwear. The stitch stretches with the fabric, preventing thread breakage when you pull a shirt over your head or when fabric naturally expands during wear.
Decorative topstitching, Many sewers use coverstitches to add visual interest to garments. You can create pin-tucks, attach elastic for waistbands, or add contrasting thread colors for design details. Athletic wear often features bold coverstitch lines as both functional seams and style elements.
Attaching bindings and bands, Neckbands, cuffs, and waistbands can be attached with a coverstitch in one pass, creating a clean finish on both sides of the fabric. This technique is faster and more professional-looking than traditional methods.
The key advantage over other stitching methods is the combination of stretch and security. The looper thread on the underside creates a flexible chain that moves with knit fabrics, while the straight stitches on top provide a clean, polished appearance. When done correctly, coverstitch hems won’t pop or pucker, even after dozens of wash cycles.
Coverstitch vs Serger: What’s the Difference?
A serger (overlock machine) cuts fabric edges and encases them with thread to prevent fraying, while a coverstitch machine hems and topstitches without cutting. These are fundamentally different tools that serve distinct purposes in garment construction, though some combination machines can do both functions.
Here’s how they differ in practice:
Function and purpose:
- Sergers trim excess fabric while simultaneously wrapping the raw edge in thread, creating a clean finish that prevents unraveling. They’re essential for seaming knit garments and finishing woven fabric edges.
- Coverstitch machines work on finished or folded edges, creating hems and decorative stitching. They don’t cut fabric and aren’t designed for seam construction.
Stitch formation:
- Sergers use 3-5 threads and create stitches that wrap around the fabric edge, visible on both sides as an overlock stitch.
- Coverstitch machines use 2-4 threads to create parallel straight stitches on top and a looper chain underneath, never wrapping around an edge.
Typical applications:
- Sergers handle side seams, shoulder seams, attaching sleeves, and finishing any raw edge that might fray.
- Coverstitch machines finish hems on t-shirts, attach ribbing, create decorative details, and topstitch over seams.
Needle configuration:
- Sergers typically have 1-2 needles positioned to the left of the cutting blade.
- Coverstitch machines have 2-3 needles spaced evenly across the needle plate with no cutting mechanism.
Many sewers eventually own both machines because they complement each other perfectly in a knit-sewing workflow: serge the seams, then coverstitch the hems. Some manufacturers offer combination serger/coverstitch machines that can switch between functions, though these require rethreading and adjustment between modes.

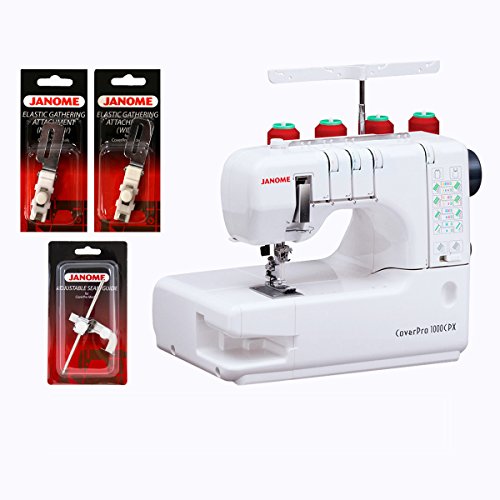
CoverPro 1000CPX innovative design is based on the marriage of an industrial-style cover edging machine and a handy home machine

LK-205 2or3 needle 5 lines CoverStitch Machine Sewing purpose flat stretch curling hem pull tube / bead width adjustable
Do I Need a Coverstitch Machine If I Have a Serger?
You don’t strictly need a coverstitch machine if you have a serger, but you’ll struggle to achieve professional-looking hems on knit garments without one. Sergers can create a rolled hem or flatlock stitch that works for some applications, but neither produces the classic double-needle hem finish that most sewers want on t-shirts and activewear.
When a serger alone is sufficient:
- You primarily sew woven fabrics that don’t require stretchy hems
- You’re comfortable with rolled hems or blind hems on knits
- You sew knits occasionally and don’t mind the less polished look of alternative hemming methods
- Budget constraints make a second machine impractical
When you should add a coverstitch machine:
- You regularly sew t-shirts, leggings, or activewear and want store-quality results
- You sell handmade garments and need professional finishing to compete with ready-to-wear
- You’ve tried twin-needle hemming on your regular machine and find it frustrating or inconsistent
- You want to add decorative topstitching details to your projects
The combination machine option: Some brands offer serger/coverstitch combo machines that convert between functions. These can be economical if you’re short on space or budget, but they have trade-offs. You’ll need to rethread the entire machine when switching modes (which can take 10-15 minutes), and some sewers find the conversion process tedious enough that they avoid using one function or the other.
The practical reality: Most sewers who work with knits regularly end up wanting both machines. The workflow becomes: serge seams, coverstitch hems. Trying to do everything with just a serger means compromising on hem quality, while trying to do everything with just a coverstitch means you’re missing the efficiency of serged seams.
If you’re just starting with knit sewing, begin with a serger and use your regular sewing machine with a twin needle for hems. Once you’re sewing knits weekly and feeling limited by your hemming options, that’s when a coverstitch machine becomes worth the investment.
What Can You Make With a Coverstitch Machine?

With a coverstitch machine, you can make any knit garment that requires professional hems and topstitching, including t-shirts, hoodies, leggings, underwear, activewear, and children’s clothing. The machine excels at creating the polished finish that makes handmade garments look store-bought.
Everyday clothing projects:
- T-shirts and tank tops, Hem sleeves, necklines, and bottom edges with the classic double-needle finish
- Sweatshirts and hoodies, Attach ribbed cuffs and waistbands, hem body and sleeves
- Leggings and yoga pants, Create stretchy, durable hems that won’t pop during wear
- Underwear and loungewear, Finish leg openings and waistbands with soft, flexible hems
- Children’s clothing, Hem play clothes that need to withstand constant washing and rough play
Athletic and activewear:
- Sports bras and workout tops, Add decorative topstitching and functional seams
- Running shorts and athletic leggings, Create professional-grade hems and attach elastic waistbands
- Swimwear cover-ups, Hem lightweight knits with stitching that moves with the fabric
Decorative and advanced techniques:
- Pin-tucks and decorative rows, Create texture and visual interest on plain knit fabrics
- Lettuce-edge hems, Stretch fabric while sewing to create a ruffled, wavy edge (popular on women’s tops)
- Attaching lace or trim, Secure decorative elements with parallel rows of topstitching
- Flatlock-style seams, Use the coverstitch as a decorative exposed seam on activewear
- Waistband casing, Create channels for elastic insertion with perfectly spaced parallel stitching
Home décor applications:
- Knit blankets and throws, Finish edges with a professional touch
- Pillow covers from t-shirt knit, Hem openings cleanly
- Stretchy slipcovers, Topstitch seams for durability
The coverstitch machine shines brightest on projects where the hem is highly visible and needs to stretch. A t-shirt hem gets pulled, stretched, and washed repeatedly, that’s where coverstitch proves its worth. For projects where the hem is hidden or doesn’t need stretch (like a lined jacket), you won’t see much benefit over other hemming methods.
How Much Does a Coverstitch Machine Cost?
Coverstitch machines range from approximately $300 for basic home models to over $2,000 for industrial-grade machines, with most home sewers finding good options in the $400-800 range. The price reflects features like number of needles, ease of threading, stitch width options, and build quality.
Entry-level machines ($300-500):
- Typically offer 2-needle coverstitch capability
- Basic tension adjustment
- Manual threading (no guides or color-coding)
- Suitable for occasional use and beginners learning the technique
- Examples: Some budget-friendly brands in this range require patience during setup
Mid-range machines ($500-900):
- Usually include 2-needle and 3-needle options
- Color-coded threading paths
- Better tension systems with easier adjustment
- More durable construction for regular use
- Built-in stitch width adjustment
- This is the sweet spot for serious home sewers who work with knits regularly
High-end home machines ($900-1,500):
- Multiple stitch width options
- Superior thread tension consistency
- Easier threading systems (some semi-automatic)
- Quieter operation
- Better customer support and warranty coverage
- Designed for daily use and small business applications
Industrial machines ($1,500-2,500+):
- Built for 8+ hours of daily operation
- Extremely fast stitching speed
- Highly specialized (may only do one stitch width)
- Require more space and sometimes special tables
- Overkill for most home sewers unless running a production business
Additional costs to consider:
- Needles: $5-15 per pack, need replacement every 8-10 hours of sewing
- Thread: Coverstitch machines use 3-4 cones simultaneously, budget $20-40 for a starter thread set
- Accessories: Binder attachments ($50-150), specialty feet ($15-40 each)
- Maintenance: Annual servicing runs $75-150 if you don’t do it yourself
Combination serger/coverstitch machines typically cost $600-1,200 and can be economical if you need both functions but have limited space. However, the conversion process between modes can be time-consuming, and some sewers find they avoid using one function because switching is tedious.
For most home sewers who make t-shirts and casual knit garments regularly, a machine in the $500-700 range offers the best balance of features, reliability, and value. Spending less often means frustration with threading and tension issues, while spending more delivers diminishing returns unless you’re sewing professionally.

METAL FRAME: The Brother 1034D is a durable serger made with a high-quality metal frame and interior components. Underlooper Threader-Yes

Bonus Includes: - Two packs of Schmetz ELx705 needles - Adjustable Seam Guide - Needle Threader

27 Unique Built-in Stitches: The Brother XM2701 sewing machine includes 27 built-in stitches including decorative, blind hem, zigzag, and stretch stitches and an auto-size buttonhole
Can a Regular Sewing Machine Do Coverstitch?
A regular sewing machine cannot create a true coverstitch, but it can approximate the look using a twin needle (also called a double needle), which creates two parallel rows of straight stitching on top and a zigzag stitch underneath. This twin-needle technique works for light-duty hemming but lacks the stretch, durability, and professional finish of a genuine coverstitch.
How twin-needle hemming differs from coverstitch:
Stitch structure:
- Twin needle: Creates straight stitches on top with a zigzag connecting them underneath
- True coverstitch: Creates straight stitches on top with a stretchy chain-stitch looper underneath
Stretch and recovery:
- Twin needle: Limited stretch; the zigzag can break if fabric is pulled too hard
- True coverstitch: Excellent stretch that recovers without breaking, ideal for garments that get pulled on and off
Appearance:
- Twin needle: Looks similar from the right side but the underside shows a zigzag pattern
- True coverstitch: Professional chain-stitch pattern on the underside, identical to ready-to-wear garments
Durability:
- Twin needle: Adequate for low-stress areas but may pop at necklines or waistbands
- True coverstitch: Extremely durable, withstands repeated stretching and washing
When twin-needle hemming is sufficient:
- You sew knits occasionally (a few times per year)
- Projects are for personal use where perfection isn’t critical
- You’re hemming areas that don’t experience much stress (like the bottom of a loose-fitting tunic)
- Budget doesn’t allow for a dedicated coverstitch machine
When you need a real coverstitch machine:
- You’re hemming necklines, sleeve cuffs, or other high-stress areas
- You want hems that look and perform like store-bought garments
- You sew activewear or children’s clothing that needs maximum durability
- You’re selling handmade items and need professional finishing
Tips for better twin-needle results on a regular machine:
- Use a stretch needle or ballpoint needle to prevent skipped stitches
- Reduce presser foot pressure to avoid stretching fabric as it feeds
- Use woolly nylon thread in the bobbin for more stretch
- Sew slowly and don’t pull or push the fabric
- Test on scraps first, tension adjustment is critical
Many sewers start with twin-needle hemming and upgrade to a coverstitch machine once they’re sewing knits regularly and feeling frustrated by the limitations. It’s a reasonable progression that lets you learn whether you enjoy knit sewing before investing in specialized equipment.
What’s the Best Coverstitch Machine for Beginners?
The best coverstitch machine for beginners balances ease of threading, clear instructions, reliable stitch formation, and a price point under $600. Machines with color-coded threading paths, adjustable stitch width, and good customer support help new users overcome the learning curve without excessive frustration.
Key features beginners should prioritize:
Easy threading system: Look for color-coded thread paths printed directly on the machine body. Threading a coverstitch machine involves 3-4 separate thread paths that must be followed precisely, and clear visual guides make this much less intimidating. Some machines include threading diagrams in the manual but not on the machine itself, avoid these if possible.
Adjustable stitch width: Machines that let you switch between narrow (2-needle) and wide (3-needle) coverstitches offer more versatility. You’ll want narrow stitching for sleeve hems and wider stitching for bottom hems, so having both options on one machine prevents the need to buy multiple machines later.
Accessible tension adjustment: Tension dials should be clearly labeled and easy to reach. Beginners will need to adjust tension frequently while learning, so avoid machines where tension adjustments require tools or are hidden under covers.
Clear manual and video support: Check whether the manufacturer provides video tutorials online. Written manuals are helpful, but watching someone thread the machine and troubleshoot common issues is invaluable for visual learners. Brands with active user communities and YouTube presence make learning much easier.
Reasonable price for learning: Spending $300-600 on a first coverstitch machine makes sense. You’ll learn what features matter to you without over-investing before you know your preferences. You can always upgrade later if you outgrow the machine’s capabilities.
Features to skip as a beginner:
- Industrial-speed machines (too fast for learning control)
- Machines with only one stitch width (limits what you can make)
- Models with proprietary thread requirements (increases ongoing costs)
- Combination serger/coverstitch machines (the conversion process adds complexity)
Common beginner mistakes to avoid:
- Buying based solely on price without checking threading ease
- Skipping the practice phase, thread and rethread several times before sewing on a real project
- Using cheap thread that breaks or shreds (invest in quality thread from the start)
- Not testing on fabric scraps before hemming a finished garment
Most beginners find success with mid-range machines from established brands that specialize in home sewing equipment. Read recent reviews from actual users, not just promotional materials, and look for comments about customer service quality, you’ll likely need support during your first few months of use.
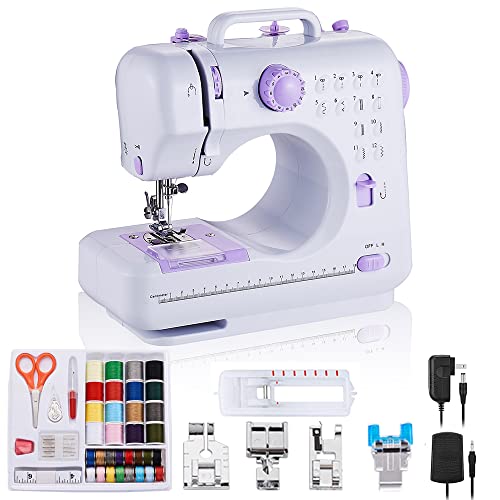
[Size and weight of sewing machine] Net weight of sewing machine: 2.4KG, size: 12.2*5.9*11.8 inches, suitable for household use, such as remodeling clothing, hand-made, sewing home decoration and other sewing needs.


【Ready to Start】 This sewing machine comes pre-threaded and is checked before packing to confirm normal stitching function. The small fabric piece inside is used only for factory stitch testing and does not mean the machine has been used.
Is a Coverstitch Machine Worth It for Home Sewing?
A coverstitch machine is worth the investment for home sewers who make knit garments at least monthly and want professional-quality hems, but it’s not essential for sewers who work primarily with woven fabrics or only occasionally sew knits. The value depends on how much you prioritize the polished, store-bought look versus the cost and learning curve.
Calculate your personal value equation:
You’ll get good value if:
- You sew t-shirts, leggings, or activewear regularly (at least 2-3 projects per month)
- You’ve tried twin-needle hemming and find it frustrating or inadequate
- You sell handmade garments and need professional finishing to justify your prices
- You have children and sew their play clothes frequently (kids’ clothes take a beating)
- You find satisfaction in mastering new techniques and equipment
- You have space for another machine and budget for the $400-800 investment
You probably won’t get good value if:
- You sew knits only occasionally (a few times per year)
- You’re satisfied with the results from twin-needle hemming on your regular machine
- You primarily sew woven fabrics like quilting cotton, linen, or denim
- You’re on a tight budget and the cost would strain your finances
- You have limited sewing space and storage
- You prefer simple, minimal equipment setups
The time investment factor: Learning to thread and use a coverstitch machine takes time. Expect to spend 2-3 hours practicing threading, tension adjustment, and stitch formation before you’re comfortable. Then plan for 15-20 minutes of setup time for each sewing session until you’ve built muscle memory. If you sew infrequently, you’ll essentially relearn the machine each time, which can be frustrating.
The quality-of-life improvement: Sewers who invest in a coverstitch machine often report that it transforms their knit sewing experience. Hems that previously took 30 minutes of fiddling with a twin needle now take 5 minutes and look better. The confidence that comes from knowing your hems won’t pop or pucker makes the entire sewing process more enjoyable.
Alternative approaches to consider:
- Start with twin-needle hemming and upgrade only if you feel limited
- Use a walking foot and stretch stitch on your regular machine for more durable hems
- Send garments to a local alterations shop for professional hemming (typically $8-15 per garment)
- Join a sewing studio or makerspace that has a coverstitch machine available for member use
The resale value consideration: Coverstitch machines hold their value reasonably well in the used market. If you buy a quality machine and later decide it’s not for you, you can typically recoup 50-70% of your purchase price by selling it locally or online. This makes the risk of trying one lower than you might think.
For most home sewers who’ve moved beyond beginner stage and regularly work with knits, a coverstitch machine becomes one of those tools they wonder how they lived without. But for casual sewers or those focused on other fabric types, the investment doesn’t make practical sense.
How to Fix Skipped Stitches on a Coverstitch Machine
Skipped stitches on a coverstitch machine usually result from incorrect threading, a dull or wrong-type needle, or improper tension settings. Start by rethreading the entire machine with the presser foot up, replace the needles, and adjust the looper tension slightly tighter.
Step-by-step troubleshooting process:
1. Rethread completely (solves 60% of skipped stitch issues):
- Turn off the machine and raise the presser foot
- Remove all thread from every thread path
- Check that you’re using the correct thread weight (typically 40-50 weight for coverstitch)
- Thread each path slowly, following the color-coded guides exactly
- Make sure thread is seated properly in all tension discs
- Thread needles from front to back (or as specified in your manual)
- Pull thread tails at least 6 inches behind the presser foot before starting
2. Replace needles (solves 25% of remaining issues):
- Use fresh needles, dull needles are a primary cause of skipped stitches
- Verify you’re using the correct needle type (usually stretch or ballpoint for knits)
- Check that needles are inserted fully and facing the correct direction
- Replace needles every 8-10 hours of sewing time, or immediately if you hit a pin
- Use the same brand and size needles in all positions (mixing can cause problems)
3. Adjust looper tension:
- If the looper thread isn’t catching the needle threads, increase looper tension by 1-2 numbers
- Test on scrap fabric after each adjustment
- The looper thread should form a smooth chain on the underside without loops or gaps
4. Check fabric handling:
- Don’t pull or push fabric through the machine, let the feed dogs do the work
- Reduce presser foot pressure for lightweight knits
- Use a stabilizer (like tissue paper or water-soluble stabilizer) under very stretchy fabrics
- Make sure fabric isn’t bunching or stretching as it feeds
5. Verify machine settings:
- Confirm stitch length is appropriate (usually 3-4mm for most applications)
- Check that differential feed is set correctly (usually 1.0 for normal fabrics, higher for preventing stretch)
- Ensure you’re sewing at a moderate, consistent speed, going too fast can cause skipping
Less common causes to check if basics don’t solve it:
- Lint buildup around the looper area (clean thoroughly with a brush)
- Bent needle plate or damaged looper (requires professional service)
- Thread quality issues (cheap thread can be inconsistent in diameter)
- Incorrect needle size for fabric weight (use 80/12 for medium knits, 90/14 for heavy)
Fabric-specific considerations:
- Very thin knits (like jersey) may need tissue paper underneath to prevent skipping
- Thick fabrics (like sweatshirt fleece) may require larger needles and adjusted presser foot pressure
- Slippery fabrics (like athletic knits) benefit from a walking foot if your machine accepts one
If you’ve worked through all these steps and still experience skipped stitches, the machine may need professional servicing. Timing issues (where the looper and needles aren’t synchronized correctly) require a technician to adjust and aren’t something home sewers should attempt to fix themselves.
Coverstitch Machine vs Twin Needle: Which Should You Choose?
Choose a coverstitch machine if you sew knit garments regularly and want professional, durable hems; choose twin-needle hemming on your regular sewing machine if you sew knits occasionally and can accept a less polished finish. The decision comes down to frequency of use, quality expectations, and budget.
Direct comparison:
| Factor | Coverstitch Machine | Twin Needle on Regular Machine |
|---|---|---|
| Initial cost | $300-800 | $5-10 (just the needle) |
| Stitch durability | Excellent, withstands repeated stretching | Moderate, can break under stress |
| Appearance | Professional, identical to ready-to-wear | Similar from top, zigzag underneath |
| Stretch | Excellent recovery, moves with fabric | Limited stretch, less recovery |
| Learning curve | Steep, threading and tension take practice | Moderate, tension can be tricky |
| Setup time | 10-15 minutes per session initially | 2-3 minutes |
| Best for | Regular knit sewers, professional results | Occasional knit projects, personal use |
| Versatility | Only does coverstitch and chain stitch | Machine does all regular stitches too |
Choose a coverstitch machine when:
- You sew at least 2-3 knit projects per month
- You’re hemming high-stress areas (necklines, cuffs, waistbands)
- You sell handmade garments and need competitive finishing
- You’ve outgrown twin-needle results and feel frustrated by limitations
- You have space and budget for dedicated equipment
- You enjoy mastering specialized techniques
Choose twin-needle hemming when:
- You sew knits a few times per year or less
- Projects are for personal use where perfection isn’t critical
- You’re hemming low-stress areas (bottom of loose tunics, decorative details)
- Budget is tight and you can’t justify $400+ for a single-purpose machine
- You have limited space for equipment
- You want to test whether you enjoy knit sewing before investing in specialized tools
The hybrid approach many sewers use: Start with twin-needle hemming while you’re learning to sew knits. Once you’re confident you enjoy working with knit fabrics and you’re making projects regularly, upgrade to a coverstitch machine. This progression lets you develop skills without over-investing before you know your preferences.
Quality expectations matter: If you’re comparing your handmade garments to fast-fashion quality, twin needles might be sufficient, many mass-produced items use chain stitching that’s not much better than a good twin-needle hem. But if you’re comparing to premium ready-to-wear or athletic brands, you’ll need a true coverstitch to match that quality level.
The coverstitch machine is a specialized tool that excels at one thing. If that one thing is something you do frequently and care about doing well, it’s absolutely worth the investment. If it’s something you do occasionally and don’t mind compromising on, stick with the twin needle you already have.
What Fabrics Work Best With Coverstitch?
Knit fabrics work best with coverstitch machines, particularly medium-weight jerseys, interlock knits, rib knits, and athletic/performance fabrics that contain spandex or elastane. The coverstitch’s stretchy chain-stitch backing is specifically designed to move with knit fabrics without breaking or puckering.
Ideal fabric types:
Jersey knits (single and double):
- Cotton jersey (t-shirt fabric), the most common coverstitch application
- Bamboo jersey, slightly slippery but works well with proper tension
- Modal jersey, soft and drapey, great for coverstitch hems
- These fabrics have moderate stretch and recover well, making them forgiving for beginners
Interlock knits:
- Heavier and more stable than jersey
- Excellent for coverstitch because they don’t curl at edges
- Common in children’s clothing and loungewear
- Produce very clean, professional-looking hems
Rib knits:
- Used for cuffs, waistbands, and neckbands
- High stretch in one direction
- Coverstitch attaches ribbing beautifully while maintaining stretch
- Requires slightly higher tension settings than jersey
Athletic and performance fabrics:
- Moisture-wicking polyester blends
- Spandex/lycra blends for activewear
- Compression fabrics for leggings
- These fabrics demand the stretch that only coverstitch provides
- May require ballpoint or stretch needles
French terry and sweatshirt fleece:
- Thicker knits that benefit from coverstitch durability
- May require larger needles (90/14) and adjusted presser foot pressure
- Creates professional hems on hoodies and sweatshirts
Fabrics that work but require adjustments:
Very lightweight knits:
- Tissue-weight jersey or rayon knits
- May need stabilizer underneath to prevent skipped stitches
- Reduce presser foot pressure
- Use finer needles (70/10 or 75/11)
Heavy sweater knits:
- Can be coverstitched but may be too bulky for some machines
- Test first, some machines struggle with very thick layers
- May need to reduce stitch width
Fabrics to avoid:
Woven fabrics:
- Cotton, linen, denim, and other non-stretch wovens don’t benefit from coverstitch
- The stretchy chain stitch on the back serves no purpose on non-stretch fabric
- Use a regular sewing machine with a straight stitch or blind hem instead
- Exception: Some sewers use coverstitch decoratively on wovens, but it’s not the intended use
Very slippery fabrics:
- Silk jersey or rayon challis can be challenging
- Fabric may shift during sewing, causing uneven stitching
- If you must coverstitch these, use lots of pins and go slowly
Extremely stretchy fabrics:
- Swimwear fabrics with 100%+ stretch
- May overstretch during sewing, causing wavy hems
- Require careful handling and possibly a walking foot
Fabric preparation tips:
- Pre-wash all knits before coverstitching, shrinkage after hemming will cause puckering
- Let fabric relax after cutting, knits can stretch when cut and need time to return to their natural state
- Don’t stretch while sewing, let the machine feed the fabric naturally
- Test on scraps first, every fabric behaves slightly differently, so dial in your settings before hemming the actual garment
The coverstitch machine was engineered specifically for knit fabrics, and that’s where it performs best. If you’re working primarily with woven fabrics, you won’t get much value from a coverstitch machine. But if your sewing room is full of jersey, interlock, and athletic knits, the coverstitch will quickly become your favorite tool.
Can You Hem Jeans With a Coverstitch Machine?
You should not hem jeans with a coverstitch machine because denim is a woven fabric that doesn’t stretch, making the coverstitch’s stretchy chain-stitch backing unnecessary and potentially problematic. Regular jeans are best hemmed with a straight stitch on a standard sewing machine or a blind hem stitch for an invisible finish.
Why coverstitch doesn’t work for regular jeans:
Fabric type mismatch: Denim is a tightly woven cotton fabric with little to no stretch. The coverstitch’s primary advantage, its ability to stretch with knit fabrics, provides no benefit on denim. The chain stitch on the underside can actually create bulk and may catch on things because it sits raised above the fabric surface.
Appearance issues: Traditional jeans feature a single row of topstitching or a blind hem, not the double or triple parallel rows that coverstitch creates. Using a coverstitch on regular jeans would look unusual and not match the original hem style.
Bulk problems: Denim is thick, and jeans hems often involve 4-6 layers of fabric when folded. Adding the bulky chain stitch underneath can make the hem too thick to press flat or too stiff to drape naturally.
The one exception, stretch denim:
Jeggings and stretch jeans: If you’re hemming jeggings, stretch jeans, or denim leggings that contain spandex or elastane (usually 2-5% stretch), a coverstitch can work well. These hybrid fabrics behave more like heavy knits than traditional denim, and they benefit from the coverstitch’s stretch properties.
When to use coverstitch on stretch denim:
- The fabric has visible stretch when you pull it
- The garment is meant to be form-fitting (like jeggings)
- You want the hem to stretch when you pull the pants on
- The style is casual/athletic rather than traditional jeans
Better hemming methods for regular jeans:
Original hem method:
- Cut jeans to desired length plus seam allowance
- Fold up the original hem and stitch through all layers
- Preserves the factory hem appearance
- Best for maintaining the authentic jeans look
Straight stitch with topstitching:
- Use a denim needle (100/16) and heavy-duty thread
- Fold hem to desired length
- Topstitch with one or two parallel rows
- Matches traditional jeans construction
Blind hem:
- Creates an invisible hem from the outside
- Best for dress jeans or when you want a clean look
- Requires a blind hem foot on your regular machine
Chain stitch (not coverstitch):
- Some vintage jeans feature a single chain stitch hem
- Requires a chain stitch machine (different from coverstitch)
- Creates the “roping” effect seen on raw denim
If you’re specifically trying to replicate the double-needle topstitching seen on some jeans, use a twin needle on your regular sewing machine rather than a coverstitch machine. The twin needle will create the parallel rows on top with a zigzag underneath, which works fine on non-stretch denim and creates less bulk than a coverstitch.
Do Professional Sewers Use Coverstitch Machines?
Professional sewers who specialize in knit garments, activewear, and children’s clothing use coverstitch machines extensively because they’re essential for producing commercial-quality hems efficiently. However, professionals who focus on woven garments, tailoring, or couture sewing rarely use coverstitches since those applications don’t require stretchy hems.
Industries and professionals who rely on coverstitch machines:
Activewear and athletic apparel makers:
- Coverstitch is the industry standard for hemming workout clothes, sports bras, and leggings
- The stretch and durability are non-negotiable for garments that experience high stress
- Professional shops often use industrial coverstitch machines that run much faster than home models
Children’s clothing manufacturers:
- Kids’ clothes need durable hems that survive constant washing and rough play
- Coverstitch provides the stretch needed for pulling clothes over children’s heads
- Small-batch children’s clothing brands almost always use coverstitch for finishing
T-shirt and casual knit apparel businesses:
- Any business producing t-shirts, hoodies, or casual knit wear uses coverstitch
- It’s the expected finish, customers recognize and expect the double-needle hem
- Trying to compete without a coverstitch machine puts you at a quality disadvantage
Lingerie and underwear makers:
- Coverstitch creates soft, stretchy hems on intimate apparel
- The flat chain stitch is comfortable against skin
- Essential for elastic attachment and finishing leg openings
Professionals who typically don’t use coverstitch:
Tailors and alterations specialists:
- Focus on woven fabrics (suits, dress pants, formal wear)
- Use blind hems, hand stitching, and traditional machine hems
- May have a coverstitch for the occasional knit garment but it’s not their primary tool
Bridal and formal wear designers:
- Work primarily with wovens, lace, and non-stretch fabrics
- Finishing techniques emphasize invisible or decorative hand stitching
- Coverstitch doesn’t fit the aesthetic or functional needs
Quilters and home décor sewers:
- Work almost exclusively with cotton wovens
- Don’t need stretch in their seams or hems
- Coverstitch offers no advantage for their applications
The professional workflow difference:
Professional sewers who use coverstitch machines typically own industrial models that cost $1,500-3,000 and are designed for 8+ hours of daily use. These machines are:
- Much faster than home models (up to 1,500 stitches per minute vs. 1,000 for home machines)
- More durable with metal construction throughout
- Often specialized for one specific stitch width
- Require more space and sometimes special tables or stands
Many professionals also use combination machines that can switch between serging and coverstitching, though in high-volume settings, having dedicated machines for each function is more efficient.
The skill level factor:
Professional sewers master coverstitch technique to the point where setup and tension adjustment become second nature. What takes a home sewer 15 minutes to set up takes a professional 2-3 minutes. This efficiency makes the coverstitch practical for even small production runs.
If you’re considering turning your sewing hobby into a business and plan to make knit garments, investing in a quality coverstitch machine is one of the clearest markers of professional-level work. Customers can immediately spot the difference between a twin-needle hem and a true coverstitch, and that difference affects perceived value and pricing power.
Common Mistakes When Using a Coverstitch Machine
The most common mistakes when using a coverstitch machine include threading errors (especially missing a thread guide), using incorrect tension settings, sewing with dull needles, and pulling or pushing fabric through the machine instead of letting the feed dogs control the speed. These mistakes cause skipped stitches, puckered hems, and thread breakage.
Threading mistakes (the #1 problem):
Missing a thread guide:
- Coverstitch machines have 3-4 separate thread paths with multiple guides each
- Missing even one guide causes tension problems and skipped stitches
- Always thread with the presser foot UP so tension discs are open
- Follow the color-coded path exactly, checking each guide twice
Threading in the wrong order:
- Some machines require threading in a specific sequence (usually right to left)
- Threading out of order can cause threads to tangle or break
- Check your manual for the correct threading sequence
Not seating thread in tension discs:
- Thread must sit fully inside tension discs to work properly
- After threading, tug gently on each thread to ensure it’s caught
- If thread pulls freely, it’s not properly seated
Tension mistakes:
Using the same tension for all fabrics:
- Different fabric weights require different tension settings
- Lightweight knits need less tension; heavy knits need more
- Always test on scraps and adjust before sewing your project
Adjusting only needle tension:
- The looper tension is equally important and often needs adjustment
- If stitches look loose on the underside, increase looper tension
- If fabric puckers, try decreasing looper tension first
Over-tightening tension:
- Beginners often crank tension too high, causing thread breaks
- Start with medium tension (usually around 4-5) and adjust from there
- Make small adjustments (1 number at a time) and test between changes
Needle mistakes:
Using dull needles:
- Dull needles are the second-most common cause of skipped stitches
- Replace needles every 8-10 hours of sewing or after hitting a pin
- Keep a needle log if you sew frequently
Wrong needle type for fabric:
- Use ballpoint or stretch needles for knits, not universal needles
- Match needle size to fabric weight (80/12 for medium, 90/14 for heavy)
- Using the wrong needle type causes skipped stitches and fabric damage
Mixing needle brands or sizes:
- Use identical needles in all positions
- Mixing can cause uneven stitching because needles may sit at slightly different heights
Fabric handling mistakes:
Pulling or pushing fabric:
- Let the feed dogs move the fabric at their own pace
- Pulling causes stretched, wavy hems
- Pushing causes puckered, compressed hems
Not stabilizing stretchy fabrics:
- Very stretchy or lightweight knits may need stabilizer underneath
- Use tissue paper, water-soluble stabilizer, or tear-away stabilizer
- Remove stabilizer after sewing
Sewing over pins:
- Hitting a pin can bend or break needles, causing immediate skipped stitches
- Remove pins before they reach the needle or pin perpendicular and remove as you sew
Maintenance mistakes:
Not cleaning regularly:
- Lint builds up quickly around the looper area
- Clean with a brush after every 2-3 hours of sewing
- Built-up lint causes skipped stitches and thread breaks
Using cheap thread:
- Low-quality thread shreds, breaks, and creates lint
- Invest in good polyester or cotton-wrapped polyester thread
- The money saved on cheap thread is lost in frustration and wasted time
Not oiling (if required):
- Some machines need regular oiling; others are self-lubricating
- Check your manual and follow the maintenance schedule
- Over-oiling is as bad as under-oiling
Setup mistakes:
Skipping the test swatch:
- Always test on fabric scraps before hemming your actual garment
- Testing reveals tension issues, stitch length problems, and other adjustments needed
- A ruined test swatch is much better than a ruined garment
Not adjusting differential feed:
- Differential feed controls how fabric is fed through the machine
- Setting too high causes gathered/puckered fabric
- Setting too low causes stretched, wavy hems
- Start at 1.0 (neutral) and adjust based on results
Using the wrong stitch width:
- Narrow hems (like sleeves) need 2-needle setting
- Wide hems (like shirt bottoms) look better with 3-needle setting
- Using the wrong width looks unbalanced
Most of these mistakes are easy to fix once you know what to look for. Keep a troubleshooting checklist near your machine and work through it systematically when problems arise. With practice, you’ll develop intuition for what’s wrong based on how the stitches look, and adjustments will become quick and automatic.
FAQ
How long does it take to learn to use a coverstitch machine? Most sewers can create basic hems within 2-3 hours of practice, but mastering threading, tension adjustment, and troubleshooting typically takes 10-15 hours of hands-on sewing time spread over several weeks. The threading process becomes faster with repetition, and tension adjustment becomes more intuitive as you learn how different fabrics behave.
Can you use regular thread on a coverstitch machine? Yes, you can use regular polyester or cotton-wrapped polyester thread (40-50 weight) on a coverstitch machine. Avoid using serger thread (which is often lighter weight) or heavy topstitching thread unless your manual specifically recommends it. Quality thread matters more than brand, cheap thread causes breaks and lint buildup.
Do I need special needles for a coverstitch machine? You need ballpoint or stretch needles designed for knit fabrics, typically in size 80/12 for medium-weight knits or 90/14 for heavier fabrics. Universal needles can cause skipped stitches on knits. Use the same brand and size needle in all positions, and replace them every 8-10 hours of sewing.
Can you sew backwards on a coverstitch machine? No, coverstitch machines only sew forward. The looper mechanism is designed for forward motion only. To secure stitches at the beginning and end, either overlap stitching by about an inch or pull thread tails to the wrong side and tie them off manually.
Why does my coverstitch hem look wavy? Wavy hems usually result from stretching the fabric as it feeds through the machine or from differential feed set too low. Let the feed dogs move the fabric without pulling or pushing, and try increasing the differential feed setting slightly. Also check that you’re not using too much presser foot pressure on lightweight fabrics.
How much thread does a coverstitch machine use? A coverstitch machine uses 3-4 thread cones simultaneously and consumes thread faster than a regular sewing machine. A typical t-shirt hem uses approximately 15-20 yards of thread per needle plus looper thread. Buying thread on large cones (1,000+ yards) is more economical than small spools.
Can you use a coverstitch machine for decorative stitching? Yes, coverstitch machines create beautiful decorative effects including pin-tucks, parallel topstitching rows, and lettuce-edge hems (by stretching fabric while sewing). You can also use contrasting thread colors to make the stitching a design feature. The parallel rows create visual interest on plain knit fabrics.
What’s the difference between a coverstitch and a chain stitch? A coverstitch uses 2-3 needles to create parallel straight stitches on top with a looper chain underneath, while a chain stitch uses one needle and creates a single line of stitching on top with a chain underneath. Most coverstitch machines can also do chain stitch by using only the center needle.
How do you remove coverstitch stitching? Pull the looper thread on the underside of the fabric, the entire seam will unravel quickly because it’s a chain stitch. This is much faster than picking out individual stitches. Be careful when removing coverstitch from delicate fabrics, as the needle holes may be visible after removal.
Can you coverstitch knit ribbing? Yes, coverstitch is ideal for attaching knit ribbing to necklines, cuffs, and waistbands. The stretch in the coverstitch accommodates the high stretch in ribbing. You may need to adjust tension slightly higher for ribbing than for regular jersey, and use a walking foot if your machine accepts one for better control.
Do you need a serger if you have a coverstitch machine? Yes, a coverstitch machine doesn’t replace a serger because they serve different functions. Sergers construct seams and finish raw edges, while coverstitch machines create hems and topstitching. Most knit-sewing workflows use both: serge the seams, then coverstitch the hems.
Why does my coverstitch skip stitches on the first few inches? Skipped stitches at the beginning often occur because thread tails aren’t long enough or aren’t held behind the presser foot. Pull thread tails at least 6 inches behind the foot before starting, and hold them gently for the first few stitches. Starting on a scrap of fabric and then moving to your project also helps.
Conclusion
A coverstitch machine creates the professional double-needle hems and stretchy topstitching that transform homemade knit garments into pieces that rival store-bought quality. While not essential for every sewer, it becomes invaluable for anyone who regularly works with t-shirts, activewear, leggings, or children’s clothing.
The investment makes sense when you’re sewing knits at least monthly and you’ve outgrown the limitations of twin-needle hemming on a regular machine. Expect to spend $400-800 for a quality home model that will serve you well for years, and budget time for the learning curve, threading and tension adjustment take practice, but become second nature with repetition.
Your next steps:
If you’re considering a coverstitch machine, start by honestly assessing how often you sew knits and whether the professional finish matters for your projects. Try twin-needle hemming first if you haven’t already, it’s a low-cost way to test whether you enjoy working with knit hems enough to justify specialized equipment.
When you’re ready to buy, prioritize ease of threading (look for color-coded guides), adjustable stitch width, and good customer support over the absolute lowest price. Read recent user reviews and watch video tutorials to see how the machine performs in real-world use.
Before your first project, invest 2-3 hours in practice time. Thread and rethread the machine several times until it becomes comfortable, then sew on fabric scraps to dial in tension settings. This practice prevents the frustration of ruining a finished garment while you’re still learning.
The coverstitch machine is a specialized tool that does one thing exceptionally well. If that one thing aligns with your sewing goals, it will quickly become one of your most-used and most-loved pieces of equipment. Your knit garments will look more polished, your hems will be more durable, and you’ll gain the confidence that comes from mastering a professional finishing technique.


