


Quick Answer
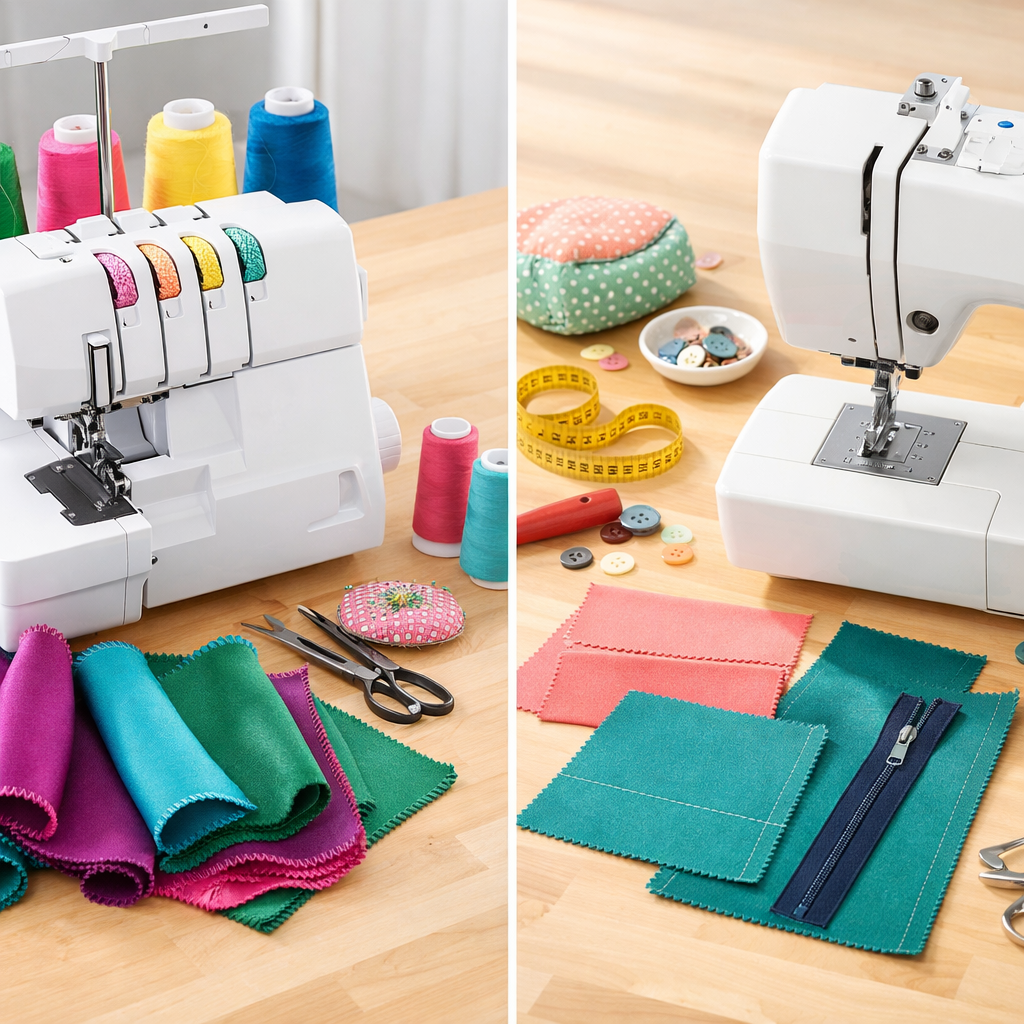
A serger (also called an overlock machine) trims fabric edges while simultaneously sewing and finishing seams with multiple threads, making it ideal for knits and professional-looking garment construction. A regular sewing machine creates a wide variety of stitches including straight stitch, zigzag, buttonholes, and decorative patterns, making it essential for construction details, topstitching, and general sewing tasks. Most sewists who make clothing regularly find they need both machines because each excels at different tasks that the other cannot replicate well.
Key Takeaways
- Sergers specialize in seam finishing by trimming, sewing, and overcasting fabric edges in one pass with 3-5 threads, creating stretchy, professional seams perfect for knits
- Sewing machines handle construction tasks like installing zippers, creating buttonholes, topstitching, hemming, and sewing precise straight lines that sergers cannot do
- A serger cannot fully replace a sewing machine because it lacks the ability to start and stop mid-fabric, create buttonholes, or sew decorative stitches
- Beginners should start with a sewing machine first to learn fundamental sewing skills before investing in a serger (typically $200-$800 for quality models)
- Professional garment makers use both machines in their workflow, using the sewing machine for construction and the serger for seam finishing and knit fabrics
- Sergers work faster on seams but require more complex threading (4 threads through multiple loopers) and more frequent adjustments than sewing machines
- You can sew knits without a serger using a sewing machine’s stretch or zigzag stitch, though the finish won’t be as professional or durable
- Cost comparison: quality sewing machines range from $150-$500 for beginners, while sergers start around $200 and go up to $1,500+ for advanced models
What Is a Serger and How Is It Different from a Regular Sewing Machine?
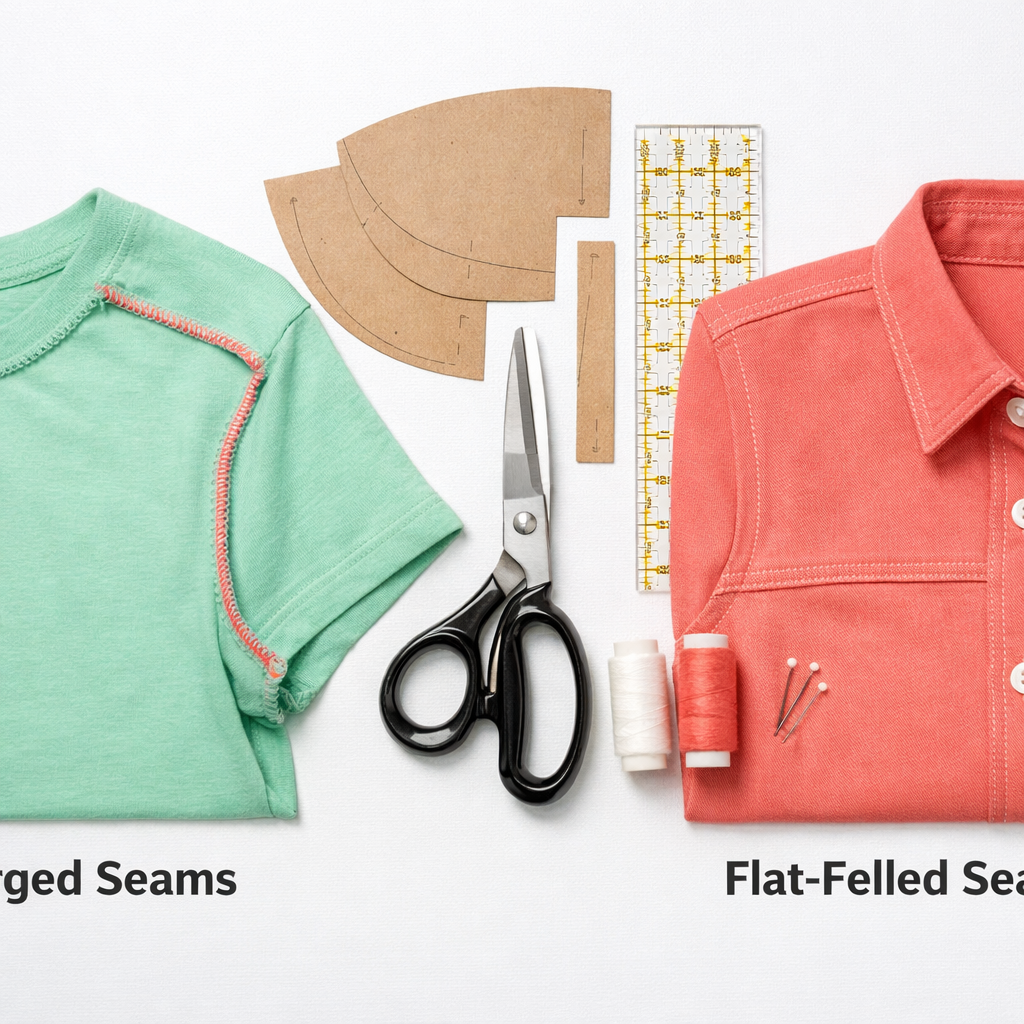
A serger is a specialized sewing machine that uses 3-5 threads and two needles to create an overlock stitch that simultaneously sews a seam, trims the excess fabric, and encases the raw edge in thread. Unlike a regular sewing machine that uses a top thread and bobbin to create stitches, a serger uses loopers (instead of a bobbin) that interlock threads around the fabric edge, creating a stretchy, professional finish commonly seen on the inside seams of store-bought clothing.
Key differences between sergers and sewing machines:
- Stitch formation: Sergers use loopers and create chain stitches; sewing machines use bobbins and create lock stitches
- Fabric trimming: Sergers have a built-in blade that cuts fabric as you sew; sewing machines do not trim
- Thread count: Sergers use 3-5 thread spools simultaneously; most sewing machines use 1-2 threads
- Seam stretch: Serger stitches stretch with fabric (perfect for knits); standard sewing machine straight stitches do not stretch
- Speed: Sergers sew significantly faster, often 1,500 stitches per minute vs. 800-1,000 for sewing machines
- Stitch width: Serger stitches are typically 3-7mm wide; sewing machine stitches range from 0-9mm depending on the model
The serger excels at one specific job, finishing edges and creating stretchy seams, while a sewing machine is a versatile tool that can handle dozens of different sewing tasks. Think of a serger as a specialist and a sewing machine as a generalist.

METAL FRAME: The Brother 1034D is a durable serger made with a high-quality metal frame and interior components. Underlooper Threader-Yes

2-3-4 THREAD STITCH CAPABILITY FOR VERSATILE SEWING: The SINGER S14-78 offers 2, 3, and 4 thread stitch capability, providing a wide range of options for creating professional seams, seam finishes, decorative edges, rolled hems, and more. Whether you're sewing garments or home décor, this serger gives you the versatility to tackle any project with precision and durability

2/3/4-Thread Flexibility: Our serger sewing machine features easy switching between 2/3/4 threads with adjustable stitch length. Whether it's simple repairs or detailed edge finishing, it handles both with ease to meet a wide range of sewing needs
What Can a Sewing Machine Do That a Serger Cannot?
A sewing machine can start and stop stitching anywhere on fabric, create buttonholes, install zippers, sew decorative stitches, and perform precise topstitching, none of which a serger can do. Because a serger’s blade trims fabric and its stitches hang off the edge, it cannot sew in the middle of fabric or create the controlled, precise stitches needed for construction details like attaching pockets, sewing darts, or creating hems with topstitching.
Essential tasks only a sewing machine can perform:
- Buttonholes and button attachment: Sergers cannot create the precise, reinforced stitches needed for functional buttonholes
- Zipper installation: Requires a zipper foot and precise straight stitching close to zipper teeth
- Topstitching: Decorative or functional stitching visible on the outside of garments (jeans, collars, pockets)
- Darts and pleats: Require starting and stopping mid-fabric with precise tapering
- Appliqué and decorative stitching: Satin stitch, blanket stitch, and hundreds of decorative patterns
- Quilting: Piecing blocks, free-motion quilting, and binding attachment
- Hemming with blind stitch: Creates nearly invisible hems on dress pants and skirts
- Basting and gathering: Long, loose stitches for temporary holds or creating ruffles
- Mending and alterations: Patching holes, repairing seams, shortening garments
A serger’s blade and edge-dependent stitching make it fundamentally unsuited for any task that requires sewing away from a fabric edge. This is why even sewists who own sergers still use their sewing machines for the majority of garment construction steps.

Magnetic Seam Guide for Sewing Machine: Seam guide with a strong built-in magnetic backing, securely adheres to any metal sewing machine bed. No slipping or shifting—just steady guidance for consistent stitching every time

Universal Use for All Home Sewing Machines: Engineered with a flat shank side for perfect positioning in the needle holder and for smooth, reliable performance, SCHMETZ Topstitch Needles are compatible with all home sewing machine brands, including Brother, Janome, Singer, Baby Lock, and more

IMPORTANT FIT NOTE: Please confirm your machine table has two mounting holes and enough installation space near the needle plate before purchase.
What Is a Serger Best Used For?
A serger is best used for finishing seam allowances on woven fabrics, sewing stretchy knit fabrics, creating rolled hems on lightweight fabrics, and achieving professional-looking garment interiors. The machine’s ability to trim, sew, and overcast in one pass makes it invaluable for anyone sewing clothing regularly, especially activewear, t-shirts, or any project using knit fabrics that need to stretch.
Top applications where sergers excel:
- Knit fabric construction: T-shirts, leggings, sweaters, and activewear benefit from the serger’s stretchy seams that move with the fabric
- Seam finishing on wovens: Prevents fraying on cotton, linen, and other woven fabrics better than a zigzag stitch
- Rolled hems: Creates delicate, narrow hems on scarves, napkins, and lightweight garments in seconds
- Flatlock seams: Decorative, flat seams often seen on athletic wear and loungewear
- Fast garment production: Professional sewists and small business owners use sergers to speed up production time
- Swimwear and lingerie: The stretchy, secure seams work perfectly for garments that need to stretch significantly
- Baby and children’s clothing: Soft, stretchy seams are more comfortable and durable through repeated washing
The serger shines when you’re working with fabric edges and need speed, stretch, or a professional finish. For home sewists making casual clothing, a serger can cut finishing time in half compared to using a sewing machine’s zigzag stitch for seam finishing.

Comprehensive Elastic Sewing Thread Set: Includes 22 elastic thread for sewing machine, each 20 meters long with a 0.6mm diameter. Perfect for a wide range of sewing projects that require stretch and flexibility.

Orders are despatched from our UK warehouse next working day.

Can a Serger Replace a Sewing Machine Completely?
No, a serger cannot replace a sewing machine completely because it lacks the versatility needed for most sewing projects. While a serger excels at seam finishing and knit construction, it cannot perform essential tasks like installing zippers, creating buttonholes, sewing on buttons, topstitching, or any stitching that doesn’t occur at a fabric edge. Even when making a simple t-shirt, you’ll likely need a sewing machine for hemming the sleeves and neckline before using the serger for the seams.
Why you cannot rely on a serger alone:
- No mid-fabric stitching: The blade and edge-dependent design prevent sewing anywhere except fabric edges
- Limited stitch types: Sergers create variations of overlock stitches only, not the 20-200+ stitches available on sewing machines
- No reverse function: Sergers create chain stitches that unravel if not secured, and they cannot backstitch like sewing machines
- Difficult thread changes: Switching thread colors takes 15-30 minutes on a serger vs. 2 minutes on a sewing machine
- Cannot handle thick layers: Sergers struggle with heavy fabrics like denim or multiple layers that sewing machines handle easily
- No precision work: Tasks requiring exact stitch placement (attaching labels, sewing curves with precision) need a sewing machine
Common mistake: New sewists sometimes buy a serger first because they want to make t-shirts, only to discover they still need a sewing machine for neckbands, hems, and any garment details. The serger is a powerful supplement to a sewing machine, not a replacement.
Do I Need Both a Serger and a Sewing Machine for Sewing Clothes?
You need a sewing machine for all types of garment sewing, but you only need a serger if you regularly sew knit fabrics or want professional-looking seam finishes on garments you plan to sell or wear frequently. Beginners can successfully make clothing with just a sewing machine using zigzag stitches for seam finishing and stretch stitches for knits, though the results won’t look as polished as serged seams.
Choose both machines if you:
- Sew knit garments (t-shirts, leggings, sweaters) more than once a month
- Want garment interiors that look store-bought and professional
- Plan to sell handmade clothing or take commissions
- Sew activewear, swimwear, or lingerie that requires stretchy seams
- Have the budget ($350-$1,000 total for both machines) and space for two machines
- Enjoy sewing enough that faster seam finishing justifies the investment
Stick with just a sewing machine if you:
- Primarily sew woven fabrics (quilting cotton, linen, denim)
- Make home décor items (curtains, pillows, bags) more than clothing
- Sew only occasionally (less than once a month)
- Have limited budget or workspace
- Are still learning basic sewing skills and techniques
- Don’t mind the extra time required for zigzag seam finishing
Most professional seamstresses and serious home sewists eventually acquire both machines because the workflow efficiency and quality improvement justify the investment. However, thousands of skilled sewists create beautiful garments with only a sewing machine by mastering alternative finishing techniques.
Can a Regular Sewing Machine Do Serger Stitches?
A regular sewing machine cannot replicate a true serger stitch, but it can create an overlock stitch or use a zigzag stitch that serves a similar purpose of finishing seam edges and providing some stretch. Modern sewing machines often include an “overlock stitch” or “stretch overlock stitch” that mimics the appearance of a serged edge, though it uses only one or two threads instead of the serger’s 3-5 threads and does not trim the fabric edge automatically.
Sewing machine alternatives to serger stitches:
- Overlock stitch: A combination of straight and zigzag stitches that looks similar to a 3-thread overlock (available on most modern machines)
- Zigzag stitch: The most basic edge-finishing option that prevents fraying but doesn’t look as professional
- Stretch stitch: A narrow zigzag or lightning-bolt pattern that allows seams to stretch with knit fabrics
- Mock flatlock: Some machines offer a stitch that approximates the appearance of a flatlock seam
- Three-step zigzag: A wider, more durable zigzag that better secures fabric edges
Key limitations of sewing machine “serger” stitches:
- You must manually trim seam allowances before or after stitching (sergers trim automatically)
- The stitches use less thread, making them less durable and less stretchy than true serged seams
- Stitching takes longer because you’re working with one needle instead of two
- The finished appearance is noticeably different from professional serged seams
- Thread tension is harder to balance for a clean finish
For casual garments you’re making for yourself, a sewing machine’s overlock or zigzag stitch works perfectly fine. For garments you plan to sell, wear frequently, or wash repeatedly, a true serger provides superior durability and appearance.
Serger vs Overlock Stitch on Sewing Machine: Which Is Better?
A true serger is better than a sewing machine’s overlock stitch for durability, stretch, speed, and professional appearance because it uses more threads, trims the fabric edge simultaneously, and creates a more secure stitch structure. However, a sewing machine’s overlock stitch is better for sewists who only occasionally need edge finishing, have limited budget or space, or primarily work with woven fabrics that don’t require maximum stretch.
Comparison of serger vs. sewing machine overlock:
| Feature | Serger | Sewing Machine Overlock |
|---|---|---|
| Thread count | 3-5 threads | 1-2 threads |
| Fabric trimming | Automatic blade | Manual (trim separately) |
| Stitch durability | Excellent, very secure | Good, adequate for most uses |
| Stretch capacity | Maximum stretch | Moderate stretch |
| Speed | Very fast (1,500 stitches/min) | Moderate (800-1,000 stitches/min) |
| Professional appearance | Store-bought quality | Homemade but neat |
| Setup time | 15-30 min thread changes | 2-5 min thread changes |
| Cost | $200-$800 | $0 (included feature) |
Choose a serger over sewing machine overlock when:
- You sew knit garments weekly or more frequently
- Seam durability matters (children’s clothing, activewear)
- You’re selling garments and need professional interiors
- Speed matters because you’re producing multiple garments
Choose sewing machine overlock when:
- You sew garments only occasionally
- Budget or space constraints prevent buying a serger
- You primarily work with woven fabrics that don’t need maximum stretch
- You’re still learning and want to master one machine first
The quality difference is noticeable but not dramatic for casual home sewing. Many successful home sewists use only their sewing machine’s overlock stitch for years before deciding whether a serger is worth the investment.
Can You Sew Knit Fabric Without a Serger?
Yes, you can successfully sew knit fabric without a serger by using your sewing machine’s stretch stitch, narrow zigzag, or twin needle, though the seams won’t be as stretchy or professional-looking as serged seams. The key is using a ballpoint or stretch needle, selecting a stitch that allows the seam to stretch with the fabric, and avoiding pulling or stretching the fabric as you sew.
Best techniques for sewing knits on a regular sewing machine:
- Stretch stitch or lightning bolt stitch: Built into most modern machines, this stitch stretches with the fabric and prevents popping seams
- Narrow zigzag (width 1.5-2.5, length 2.5): Creates a seam with enough give for most knit fabrics
- Twin needle for hems: Creates a professional-looking double topstitch on the right side with a zigzag on the wrong side that stretches
- Walking foot: Helps feed stretchy fabric evenly and prevents wavy seams
- Stabilizing seams: Use clear elastic or stay tape on shoulder seams to prevent stretching out
Tips for success with knits on a sewing machine:
- Always use a ballpoint or stretch needle (size 75/11 or 90/14 depending on fabric weight)
- Reduce presser foot pressure if your machine allows it
- Use polyester thread, which has more give than cotton thread
- Don’t pull or stretch the fabric as you sew; let the feed dogs do the work
- Test your stitch on fabric scraps and stretch the seam to ensure it doesn’t pop
- Finish seam allowances with a zigzag stitch to prevent fraying and add durability
Common mistake: Using a straight stitch on knits, which creates a rigid seam that pops when the fabric stretches. Always use a stitch with some give, even if you don’t have a serger.
Thousands of sewists make beautiful t-shirts, leggings, and knit dresses using only a sewing machine. The seams will be slightly less stretchy and the interior won’t look quite as professional, but the garments will be perfectly wearable and durable.
How Much Does a Good Serger Cost Compared to a Sewing Machine?
A good beginner serger costs $200-$400, while a quality beginner sewing machine costs $150-$300, making the initial investment similar, though mid-range sergers ($400-$800) typically cost more than comparable sewing machines ($300-$500). The total cost of ownership for a serger is also higher because it uses 3-5 thread spools simultaneously (vs. 1-2 for sewing machines) and requires more frequent blade replacements and maintenance.
Price ranges for sergers in 2026:
- Budget sergers ($150-$250): Basic 3/4-thread models from brands like Singer or Brother, suitable for occasional use
- Mid-range sergers ($250-$500): Reliable 3/4-thread models with differential feed, good for regular home sewing
- Advanced home sergers ($500-$1,000): 2/3/4/5-thread capability, easier threading, better stitch quality
- Professional sergers ($1,000-$2,500+): Industrial-quality machines for daily use and small businesses
Price ranges for sewing machines in 2026:
- Budget machines ($100-$200): Basic mechanical machines with 10-20 stitches, good for learning
- Mid-range machines ($200-$500): Computerized or mechanical with 50-200 stitches, automatic buttonhole
- Advanced home machines ($500-$1,500): Extensive stitch libraries, embroidery capability, advanced features
- Professional machines ($1,500-$5,000+): Industrial-quality for daily use and business applications
Ongoing costs to consider:
- Thread consumption: Sergers use 3-5x more thread per project than sewing machines
- Blade replacement: Serger blades need replacement every 6-12 months with regular use ($10-$20)
- Maintenance: Sergers require more frequent professional servicing ($75-$150 annually)
- Learning curve: Many sewists take classes ($50-$150) to learn serger threading and tension adjustment
For most beginners, investing in a quality sewing machine first ($250-$400) makes more sense than buying both machines at once. Once you’ve mastered basic sewing and know you’ll use a serger regularly, adding a mid-range serger ($300-$500) to your workspace provides the best value.
Can You Hem Jeans with a Serger or Do You Need a Sewing Machine?
You need a sewing machine to hem jeans properly because hemming requires topstitching visible on the outside of the garment, which a serger cannot do. While you could technically use a serger to finish the raw edge of a jean hem before folding and stitching, the actual hem stitch that holds the fold in place and creates the characteristic double row of topstitching on jeans must be done with a sewing machine using a denim needle and heavy-duty thread.
Why sewing machines are essential for jean hems:
- Topstitching visibility: Jean hems feature visible decorative stitching on the outside that matches the original hem
- Stitch placement: Hemming requires stitching in the middle of fabric (away from edges), which sergers cannot do
- Thread matching: You need to match the gold or contrasting topstitching thread used on the original jeans
- Needle strength: Hemming jeans requires a denim needle (size 100/16 or 110/18) and a machine that can handle thick layers
- Precision: Maintaining an even hem distance requires the control and precision of a sewing machine
Proper jean hemming technique:
- Try on jeans and mark desired length with pins
- Cut excess fabric, leaving 1.5-2 inches for hem allowance
- Finish raw edge with zigzag or serger (optional but recommended)
- Fold hem to desired length and press firmly
- Topstitch using a denim needle, heavy-duty thread, and a straight stitch
- For authentic look, create two parallel rows of topstitching 1/4 inch apart
A serger can speed up the edge-finishing step, but the actual hemming work requires a sewing machine. This is a perfect example of why even sewists who own sergers still use their sewing machines regularly.
Is a Serger Worth It for Beginners or Should I Start with a Sewing Machine?
Beginners should start with a sewing machine first because it teaches fundamental sewing skills, handles a wider variety of projects, and is essential for learning pattern reading, seam construction, and garment assembly before adding the specialized skill of serger operation. A serger is worth adding to your toolkit once you’re sewing garments regularly (at least monthly), have mastered basic sewing machine skills, and understand whether you prefer sewing knits or wovens.
Why beginners should start with a sewing machine:
- Foundational skills: Learning tension, stitch selection, and basic techniques is easier on a sewing machine
- Project variety: You can make quilts, bags, home décor, and garments with one machine
- Lower frustration: Sewing machines are easier to thread and adjust than sergers
- Better learning resources: More classes, tutorials, and books focus on sewing machine basics
- Essential tool: You’ll need a sewing machine regardless, so start with the must-have tool
- Budget-friendly: Invest in one quality machine rather than two mediocre ones
Signs you’re ready to add a serger:
- You’ve completed at least 5-10 garment projects on your sewing machine
- You understand seam allowances, pattern markings, and basic construction
- You’re sewing knit garments or garments for sale regularly
- Seam finishing with a zigzag stitch feels tedious and time-consuming
- You have the budget ($200-$500) without sacrificing sewing machine quality
- You have workspace for a second machine (sergers need to stay set up)
Common beginner mistake: Buying a serger too early and feeling overwhelmed by the complex threading, tension adjustments, and limited applications. Many beginners abandon their sergers for months or years because they haven’t yet developed the sewing skills to use them effectively.
Start with a solid mid-range sewing machine ($250-$400), take a few classes or follow online tutorials, and make a variety of projects. After 6-12 months, you’ll have a much better sense of whether a serger fits your sewing style and project preferences.
What Are the Most Common Mistakes When Using a Serger vs Sewing Machine?
The most common serger mistakes include incorrect threading (especially the lower looper), cutting off too much fabric with the blade, and failing to secure chain tails properly, while common sewing machine mistakes include using the wrong needle type, skipping tension adjustments, and not backstitching to secure seams. Understanding these pitfalls helps sewists avoid frustration and achieve better results with both machines.
Common serger mistakes:
- Threading errors: Missing one thread path or threading in the wrong order causes skipped stitches or jammed machines
- Blade position: Forgetting to disengage the blade when you don’t want to trim (like when making a rolled hem)
- Tension imbalance: Not adjusting all thread tensions when changing fabric weight or thread type
- Cutting too much: The blade removes more fabric than expected, especially on curves
- Unsecured chain tails: Not securing the thread chain at the beginning and end causes seams to unravel
- Wrong differential feed: Not adjusting for knit vs. woven fabrics causes wavy or puckered seams
- Dull blades: Continuing to use a dull blade that pulls fabric instead of cutting cleanly
Common sewing machine mistakes:
- Wrong needle type: Using a universal needle on knits (needs ballpoint) or denim (needs denim needle)
- Skipping backstitching: Not securing seam starts and ends causes seams to come apart
- Ignoring tension: Not adjusting tension when changing thread or fabric type
- Wrong presser foot: Using the standard foot when a zipper foot, walking foot, or buttonhole foot is needed
- Not testing: Skipping test stitches on scrap fabric before sewing the actual project
- Pulling fabric: Pulling or pushing fabric instead of letting the feed dogs do the work
- Neglecting maintenance: Not cleaning lint, changing needles regularly, or oiling the machine
Pro tip: Keep a notebook with successful tension settings for different fabric types for both machines. This reference saves hours of frustration when you return to a similar project months later.
Do Professional Seamstresses Use Both Sergers and Sewing Machines?
Yes, professional seamstresses and garment manufacturers use both sergers and sewing machines in their standard workflow because each machine performs tasks the other cannot do efficiently. A typical professional garment construction process uses the sewing machine for construction steps (attaching collars, installing zippers, creating buttonholes, topstitching) and the serger for seam finishing and knit fabric assembly, with both machines running simultaneously in production environments.
Professional workflow for a typical shirt:
- Sewing machine: Cut fabric pieces, mark pattern notations
- Serger: Finish all raw edges that will be enclosed in seams
- Sewing machine: Sew darts, attach pockets, construct collar
- Sewing machine: Attach collar to neckline, set in sleeves
- Serger: Finish seam allowances on shoulder and side seams
- Sewing machine: Create buttonholes, sew on buttons
- Sewing machine: Hem sleeves and bottom edge with topstitching
Why professionals invest in both machines:
- Speed: Using the right machine for each task cuts production time by 30-50%
- Quality: Professional seam finishes and construction details justify higher prices
- Durability: Properly serged seams last longer through repeated wearing and washing
- Versatility: Ability to work with any fabric type (wovens, knits, stretch, non-stretch)
- Client expectations: Customers expect garment interiors to look store-bought
Professional setup considerations:
- Many professionals use industrial versions of both machines for durability and speed
- Sergers often run continuously for seam finishing while sewing machines handle detail work
- Thread color changes are minimized by batching similar projects together
- Regular maintenance schedules prevent downtime during production
For home sewists considering turning their hobby into a business, investing in both a quality sewing machine and serger is essential for producing professional-quality garments that can command appropriate prices.
Conclusion
Understanding the difference between a serger and a sewing machine, and what each does best, empowers you to make smart equipment decisions and improve your sewing results. A sewing machine is the essential foundation tool that handles construction, topstitching, buttonholes, and countless other tasks, while a serger is the specialized finishing tool that creates professional seam finishes and excels with knit fabrics.
For beginners, start with a quality sewing machine in the $250-$400 range and master fundamental skills before considering a serger. Once you’re sewing garments regularly and understand your project preferences, adding a mid-range serger ($300-$500) will dramatically improve your seam finishes and speed up your workflow, especially if you work with knits.
Your next steps:
- Assess your current projects: Track what you’re actually sewing over the next month to determine if a serger would get regular use
- Master your sewing machine: If you’re still learning, focus on perfecting tension, stitch selection, and basic techniques before adding complexity
- Try before you buy: Take a serger class at a local sewing shop or borrow a friend’s machine to test whether you enjoy using it
- Budget realistically: Factor in the cost of thread (sergers use 3-5x more), blades, and potential classes when planning your purchase
- Plan your workspace: Ensure you have room for both machines to stay set up, as frequent setup and takedown discourages use
Both machines have earned their place in sewing rooms worldwide because they complement each other perfectly. The sewing machine builds your projects, and the serger finishes them with professional polish. Understanding what each does, and what each cannot do, helps you choose the right tool for every task and create garments you’ll be proud to wear and share.


