


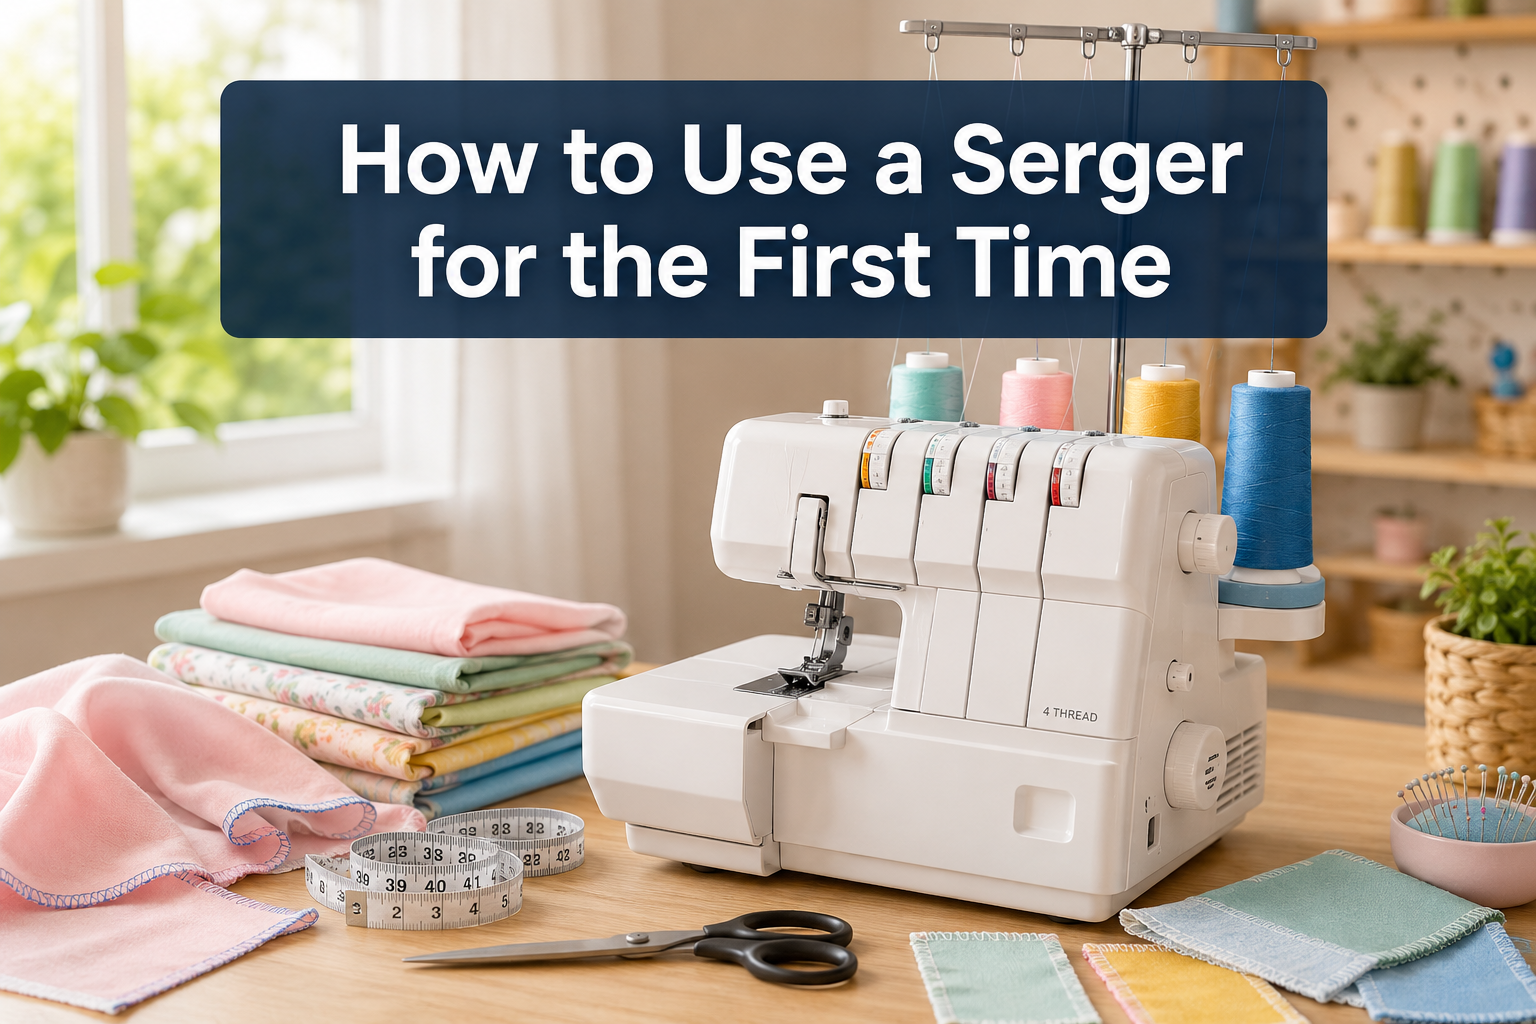
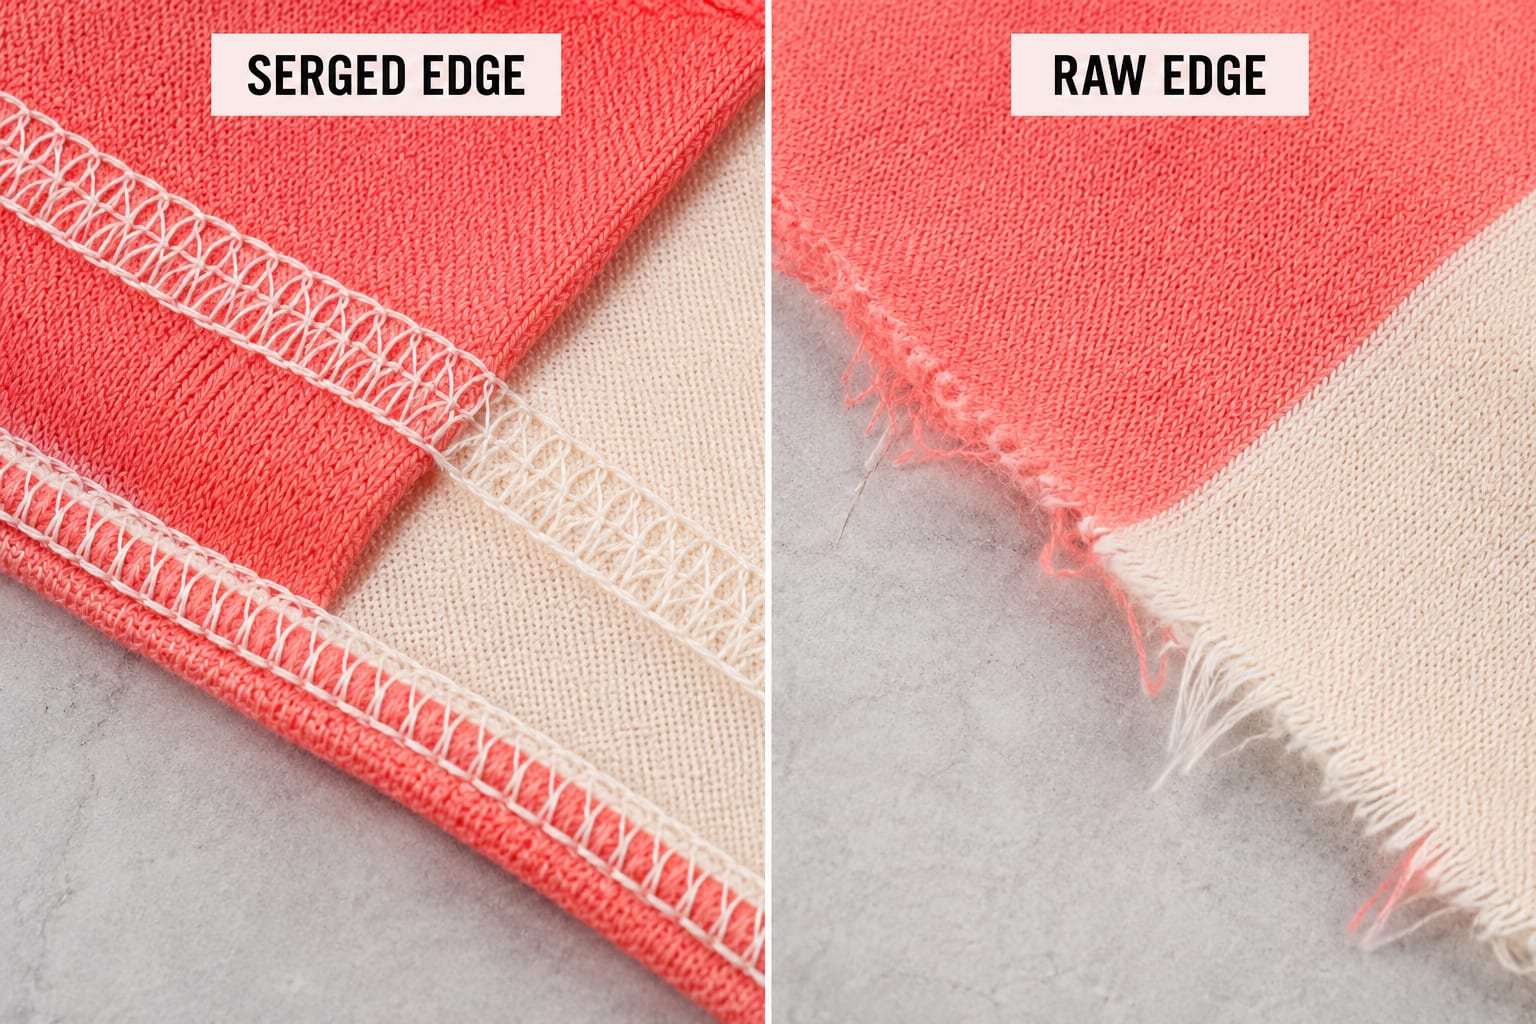
A serger (also called an overlock machine) trims fabric edges while simultaneously encasing them in thread, creating professional seam finishes in one pass. Learning how to use a serger for the first time involves threading four spools through a specific path, adjusting tension dials, and practicing on scrap fabric before tackling real projects. Most beginners master basic serging within 2-3 hours of hands-on practice.
Key Takeaways
- Sergers finish seams professionally by trimming and encasing raw edges in thread simultaneously, preventing fraying on knits and wovens
- Threading takes practice but follows a color-coded path from right to left (upper looper, lower looper, right needle, left needle)
- Tension settings vary by fabric but most machines ship with balanced factory settings suitable for medium-weight cotton and knits
- Budget-friendly options exist with quality 3/4-thread sergers available under $300 from brands like Brother and Singer
- Common mistakes include cutting off too much fabric, using regular sewing thread instead of serger thread, and skipping test samples
- Start with simple projects like cloth napkins, T-shirt hems, or pillowcase edges to build confidence before garment construction
- Sergers complement (not replace) regular sewing machines, each serving distinct purposes in a complete sewing toolkit
What Is a Serger and How Is It Different From a Regular Sewing Machine?
A serger is a specialized sewing machine that trims fabric edges with a built-in blade while simultaneously wrapping them in 2-5 threads to create a finished seam. Unlike a regular sewing machine that uses a top thread and bobbin to create lockstitches through fabric layers, a serger uses loopers (instead of bobbins) to interlock threads around the fabric edge.
The key differences include:
- Stitch formation: Regular machines create lockstitches through fabric; sergers create overlock stitches around edges
- Thread count: Sewing machines use 1-2 threads; sergers use 3-5 threads simultaneously
- Built-in blade: Sergers trim excess fabric as they sew, creating perfectly even seam allowances
- Speed: Sergers typically sew 1,300-1,700 stitches per minute compared to 800-1,000 on regular machines
- Seam stretch: Serged seams stretch with knit fabrics, making them ideal for activewear and T-shirts
Regular sewing machines excel at construction tasks like installing zippers, topstitching, and decorative work. Sergers specialize in edge finishing, seam construction for knits, and creating professional-looking hems. Most serious sewers eventually own both machines because they serve complementary purposes in garment construction.
Do I Need a Serger If I Already Have a Sewing Machine?
You don’t absolutely need a serger if you sew occasionally or work primarily with woven fabrics that don’t stretch. However, a serger becomes valuable if you sew knit fabrics regularly, want professional-looking seam finishes, or produce garments in any volume.
Choose a serger if you:
- Sew with knits, jersey, or stretch fabrics more than twice monthly
- Want to finish seams on unlined jackets, dresses, or pants professionally
- Sew activewear, swimwear, or lingerie that requires stretchy seams
- Produce items for sale and need consistent, durable edge finishing
- Feel frustrated with time-consuming seam finishing techniques
Skip the serger for now if you:
- Sew only quilts or home décor items with enclosed seams
- Work exclusively with non-fraying fabrics like fleece or felt
- Have limited space or budget for additional equipment
- Primarily alter ready-made garments rather than construct from scratch
Many sewers use their regular machine’s overlock stitch as a temporary solution, but it doesn’t trim fabric edges or create the same stretch and durability as a true serger. If you’re serious about sewing knit garments or finishing seams like ready-to-wear clothing, a serger pays for itself in time savings and professional results. For more on when to upgrade your equipment, see our guide on intermediate sewing machines.

Pack of 5 Schmetz Special Super Stretch Needles - Assorted Size.

Orders are despatched from our UK warehouse next working day.

Essential Colors: 12 colors serger thread set for clean edges, hemming, and overlock sewing, perfect for garments, crafts, and professional overlock machine projects
How to Thread a Serger for Beginners Step by Step
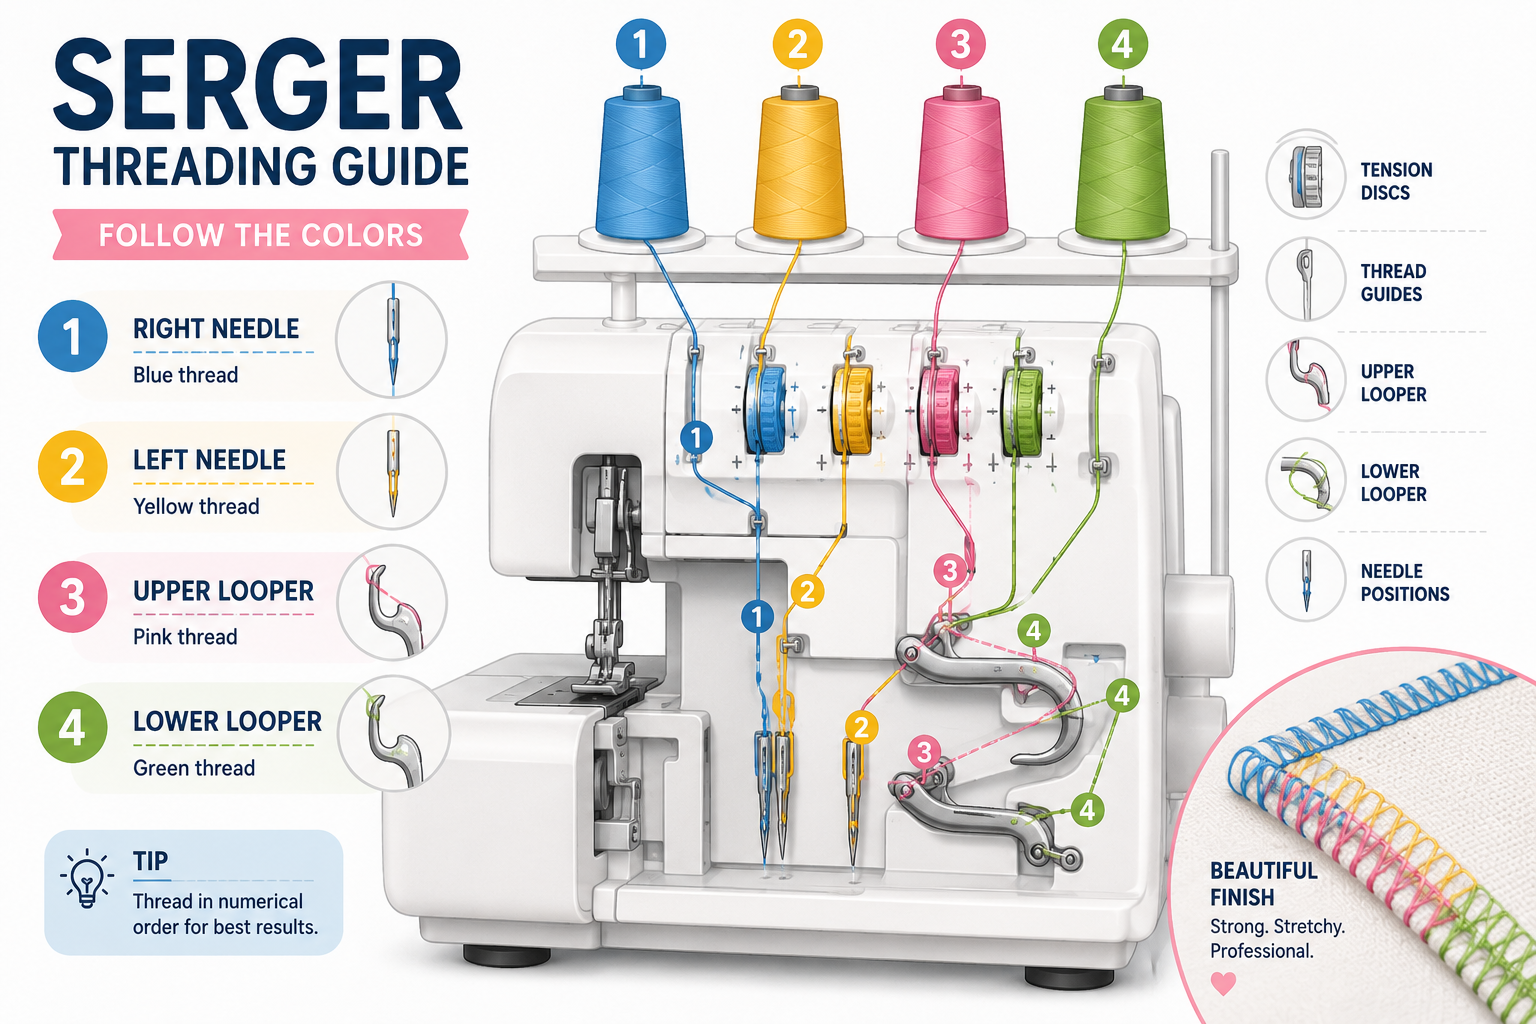
Threading a serger follows a specific right-to-left sequence, and most machines include color-coded guides or numbered paths printed directly on the machine body. The process takes 10-15 minutes the first time but reduces to 3-5 minutes with practice.
Step-by-step threading process:
- Raise the presser foot to release tension discs (critical step many beginners forget)
- Thread the upper looper first (usually green or right-most thread path):
- Follow the colored line from the thread cone through the tension dial
- Guide thread through the upper looper eye (located above the needle area)
- Thread the lower looper second (usually red or second from right):
- Route through its dedicated tension dial
- Thread through the lower looper eye (below the needle plate, often requires tweezers)
- Thread the right needle (usually yellow or second from left):
- Pass through the needle tension dial
- Thread the needle from front to back
- Thread the left needle last (usually blue or left-most, if using 4-thread mode):
- Follow its tension path
- Thread from front to back
Pro threading tips:
- Use the air threading technique: engage the handwheel while holding thread tails to pull threads through loopers
- Keep a threading hook or tweezers near your machine for the lower looper (the hardest to reach)
- Tie new thread to old thread when changing colors instead of rethreading the entire path
- Take a photo of correct threading with your phone for quick reference
If you’re comfortable threading a regular sewing machine, the serger process is similar but multiplied. The key difference is following the exact sequence and ensuring each thread passes through its designated tension disc. For comparison with standard machine threading, check out our guide on how to thread a sewing machine.

Threading a needle or looper cannot be made simpler.

【Resilient Storage Case】The sewing machine kit comes with a robust hard plastic case, allowing for easy organization and transportation. This ensures that your tools are securely stored and readily accessible whenever needed.

ADVANCED SERGER MACHINE: The Bernette B64 Airlock serger sewing machine combines advanced features like air threading, 1300 stitches per minute, and 16 built-in stitches with professional results. Ideal for quilting, embroidery, or basic sewing at home, it includes bobbins, a threader, spools, an extension table, an LED light, and a portable design. A reliable tool for beginners or pros, no battery or LCD display is required.
What Tension Settings Should I Use on My Serger?
Most sergers ship with balanced tension settings (usually marked “4” or at the midpoint on each dial) that work well for medium-weight cotton and cotton-knit fabrics. For your first projects, leave the factory settings unchanged and only adjust if you see visible problems in your test stitches.
Balanced tension looks like:
- Threads interlock at the fabric edge (not on top or underneath)
- Seam lies flat without puckering or waving
- All threads appear equally tight with no loose loops
- Fabric edge is fully encased in thread
Common tension problems and fixes:
| Problem | Cause | Solution |
|---|---|---|
| Loops on top edge | Upper looper too loose | Increase upper looper tension by 1-2 numbers |
| Loops on bottom edge | Lower looper too loose | Increase lower looper tension by 1-2 numbers |
| Fabric puckering | All tensions too tight | Decrease all tensions by 1 number |
| Seam pulls apart easily | All tensions too loose | Increase all tensions by 1 number |
| One thread breaks repeatedly | That thread too tight | Decrease that tension dial by 1-2 numbers |
Tension adjustments by fabric type:
- Lightweight fabrics (chiffon, silk): Decrease all tensions by 1-2 numbers to prevent puckering
- Heavy fabrics (denim, canvas): Increase all tensions by 1-2 numbers for secure seams
- Stretchy knits (jersey, spandex): Slightly decrease tensions to maintain stretch
- Slippery fabrics (satin, polyester): Increase differential feed rather than tension
Always make tension changes in small increments (one number at a time) and test on scrap fabric before sewing your project. Most beginners over-adjust tension when the real problem is incorrect threading or dull needles. If you’re struggling with tension issues on your regular machine too, our tension problems guide covers troubleshooting principles that apply to both machines.
Best Beginner Serger Under $300
Several quality sergers fall within the $300 budget range and offer the features beginners need without overwhelming complexity. The Brother 1034D consistently ranks as the top choice for first-time serger users, offering 3/4-thread capability, differential feed, and color-coded threading for around $250-280.
Top budget-friendly sergers for 2026:
Brother 1034D ($250-280)
- 3/4-thread capability with easy thread conversion
- Differential feed for knits and wovens
- Color-coded threading guides
- 1,300 stitches per minute
- Best for: All-around beginner use
Singer 14CG754 ($220-250)
- 2/3/4-thread versatility
- Built-in rolled hem capability
- Free arm for tubular sewing
- Slightly slower speed (1,100 SPM)
- Best for: Budget-conscious beginners
Juki MO654DE ($280-300)
- Industrial-quality construction
- Differential feed with wider range
- Quieter operation than competitors
- Slightly more complex threading
- Best for: Beginners planning high-volume sewing
Features to prioritize in your first serger:
- Differential feed (essential for preventing wavy seams on knits)
- Color-coded threading (reduces frustration during learning phase)
- 3/4-thread capability (provides versatility for different projects)
- Adjustable stitch length and width (allows customization for various fabrics)
- Free arm (helpful for hemming sleeves and pant legs)
Avoid ultra-budget sergers under $180, as they often lack differential feed and use lower-quality components that create tension problems and require frequent adjustments. The $250-300 range represents the sweet spot where you get reliable performance without paying for advanced features you won’t use as a beginner.
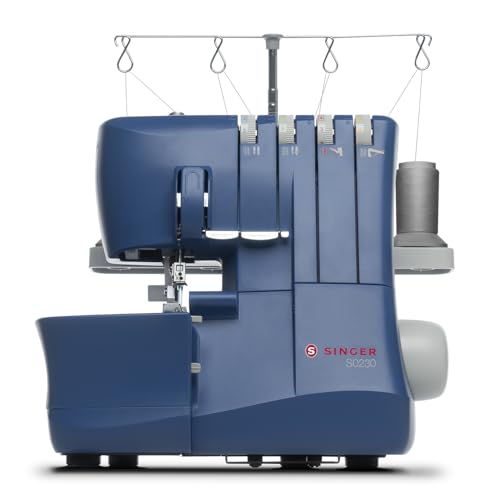
✅ 2/3/4 THREAD SERGING & COLOR-CODED THREADING: Use 2, 3, or 4 threads for a variety of stitch combinations including seams, rolled hems, and decorative edges. The color-coded threading system makes setup simple, quick, and beginner-friendly while ensuring accurate threading every time.


Made to Last: Made of aluminum alloy and engineering plastic, this product is not easy to rust or deform, ensuring your long-term use
Why Does My Serger Keep Jamming or Skipping Stitches?
Serger jamming and skipped stitches typically result from incorrect threading, dull or bent needles, or fabric feeding problems rather than machine defects. Unlike regular sewing machines, sergers are more sensitive to threading errors because they use multiple threads that must interlock precisely at the fabric edge.
Most common causes and solutions:
Threading errors (70% of jamming issues)
- One or more threads not properly seated in tension discs
- Thread caught on spool or tangled before entering machine
- Fix: Raise presser foot, remove all threads, and rethread completely in correct sequence
Needle problems (15% of issues)
- Dull needle after 8-10 hours of sewing
- Bent needle from hitting pins or blade
- Wrong needle type (use serger or stretch needles, not regular sharps)
- Fix: Replace needles every 3-4 projects or when you hear a popping sound
Blade issues (10% of issues)
- Dull blade fails to cut fabric cleanly, causing bunching
- Blade disengaged accidentally
- Fix: Replace blade every 40-60 hours of use or sharpen if your model allows
Fabric feeding problems (5% of issues)
- Differential feed set incorrectly for fabric type
- Presser foot pressure too light for heavy fabrics
- Sewing too slowly (sergers need consistent speed)
- Fix: Adjust differential feed to “N” (neutral) for testing, increase presser foot pressure
Troubleshooting checklist when jamming occurs:
- Turn off machine and remove fabric
- Clip all threads and remove any thread nests
- Clean lint from looper area and blade
- Rethread entire machine with presser foot raised
- Replace needles if you can’t remember when you last changed them
- Test on scrap fabric at medium-fast speed
Sergers require more frequent cleaning than regular sewing machines because they generate more lint from trimming fabric edges. Clean the looper area and blade after every 4-6 hours of sewing to prevent lint buildup that causes jamming. For more on preventing skipped stitches across different machine types, see our comprehensive troubleshooting guide.
Can You Use a Serger on All Types of Fabric?
Sergers work on most woven and knit fabrics but require adjustments for extreme fabric types (very lightweight, very heavy, or very stretchy). The machine excels on medium-weight cottons, knits, and blends but needs tension and differential feed modifications for specialty fabrics.
Fabric compatibility guide:
Excellent serger fabrics:
- Cotton knits (T-shirt jersey, interlock)
- Cotton wovens (quilting cotton, poplin)
- Polyester knits and blends
- Fleece and sweatshirt fabric
- Linen and linen blends
Requires adjustments:
- Lightweight fabrics (chiffon, georgette, silk): Decrease tensions, use differential feed at 0.7, use fine thread
- Heavy fabrics (denim, canvas, upholstery): Increase tensions, use longer stitch length, use heavy-duty thread
- Very stretchy fabrics (spandex, swimwear): Increase differential feed to 1.5-2.0, decrease tensions slightly
- Slippery fabrics (satin, taffeta): Use water-soluble stabilizer, increase presser foot pressure
Fabrics to avoid on sergers:
- Leather and vinyl: Blade creates permanent holes; use regular machine with leather needle
- Very thick layers: Sergers handle 2-3 layers maximum; use regular machine for thick seams
- Fabrics requiring precise seam allowances: Serger blade trims fabric, making exact seam widths difficult
The differential feed mechanism is your most important tool for fabric adaptation. Set it below 1.0 (0.7-0.9) for lightweight or slippery fabrics to prevent stretching, and above 1.0 (1.5-2.0) for knits to prevent wavy edges. Always test on scraps before serging your actual project, especially with expensive or unfamiliar fabrics.
For detailed guidance on working with specific challenging fabrics, see our article on seam durability across different materials.
What Is the Difference Between 3-Thread and 4-Thread Serger?
A 3-thread serger uses two loopers and one needle to create a narrower, more flexible seam, while a 4-thread serger adds a second needle to create a wider, more secure seam with a straight stitch component. Most modern sergers offer both configurations, allowing you to switch between them by removing one needle and adjusting the stitch finger.
3-thread serger characteristics:
- Uses upper looper, lower looper, and one needle
- Creates narrower seam (2-3mm wide)
- More stretch and flexibility in finished seam
- Ideal for rolled hems, decorative edges, and lightweight fabrics
- Uses less thread per inch
- Faster to thread and adjust
4-thread serger characteristics:
- Uses upper looper, lower looper, and two needles
- Creates wider seam (5-7mm wide) with straight stitch line
- More secure and durable for stress points
- Ideal for garment construction, activewear, and seams that will be stressed
- Provides seam allowance and edge finishing in one pass
- Slightly more complex to thread and balance
When to use each configuration:
| Project Type | Recommended Thread Count | Reason |
|---|---|---|
| T-shirt side seams | 4-thread | Durability and stretch |
| Rolled napkin hems | 3-thread | Delicate finish |
| Activewear seams | 4-thread | Strength for movement |
| Lightweight blouse edges | 3-thread | Less bulk |
| Children’s clothing | 4-thread | Extra durability |
| Decorative edges | 3-thread | Flexibility and appearance |
Some sewers use a 4-thread serger for construction seams and then switch to 3-thread for hemming the same garment. The conversion process takes 2-3 minutes once you’re comfortable with your machine. If you’re buying your first serger, prioritize 3/4-thread capability over 5-thread options, as you’ll use these two configurations for 95% of projects.
Common Mistakes Beginners Make When Using a Serger
New serger users often cut off too much seam allowance, forget to raise the presser foot before threading, and skip test samples before sewing actual projects. These mistakes are easily preventable once you understand how sergers differ from regular sewing machines.
Top beginner mistakes and how to avoid them:
Cutting off too much fabric
- Mistake: Serger blade trims away intended seam allowance
- Prevention: Mark your seamline with chalk or washable marker, align it with the blade, not the needle
- Recovery: Add seam allowance to pattern pieces before cutting (5/8″ instead of standard 1/2″)
Threading with presser foot down
- Mistake: Tension discs remain closed, preventing proper thread seating
- Prevention: Always raise presser foot before threading any thread path
- Result: Loose loops, jamming, and thread breakage if forgotten
Using regular sewing thread
- Mistake: Regular thread is too thick and creates bulky seams
- Prevention: Use serger thread (also called overlock thread) on cones or large spools
- Why it matters: Serger thread is finer and stronger, designed for multi-thread seams
Sewing too slowly
- Mistake: Inconsistent slow speed causes uneven stitches
- Prevention: Sergers perform best at medium-fast consistent speed
- Tip: Practice on scraps until you find a comfortable rhythm
Not testing on scraps first
- Mistake: Discovering tension or setting problems on actual project
- Prevention: Always sew 6-8 inches on fabric scraps before starting project
- Save time: Keep a test sample pinned to your machine for quick reference
Forgetting to disengage the blade
- Mistake: Trimming fabric when you only want to finish an existing seam
- Prevention: Learn your machine’s blade disengagement mechanism for finishing pre-sewn seams
- When to use: Finishing seams already sewn on regular machine
Pulling or pushing fabric
- Mistake: Fighting the feed dogs causes uneven seams and needle breaks
- Prevention: Guide fabric gently without pulling; let the machine feed at its own pace
- Exception: Slight tension on knits can prevent stretching, but never force
Most of these mistakes happen because beginners treat sergers like regular sewing machines. Remember that sergers are designed for speed and efficiency, they work best when you set them up correctly and then let them do their job without interference. For more on avoiding common sewing problems, see our guide on thread breaking fixes.
Do I Need Special Thread or Needles for a Serger?
Sergers require serger thread (also called overlock or cone thread), which is finer and wound on larger spools than regular sewing thread. You also need serger needles or stretch needles rather than universal sewing machine needles, though the needle type depends on your specific machine brand.
Serger thread specifications:
- Weight: Typically 40wt or 50wt (finer than regular thread)
- Format: Sold on cones (1,000-6,000 yards) or large spools
- Material: Polyester (most versatile), cotton (natural fibers), or woolly nylon (stretchy seams)
- Why it matters: Multiple threads create bulk; finer thread reduces seam thickness
- Cost: More economical per yard than regular thread due to cone size
Can you use regular thread in a serger?
Yes, but only for short-term testing or when you need exact color matching for visible seams. Regular thread creates bulkier seams and may cause tension problems because it’s thicker than serger thread. Never use regular thread in loopers for extended sewing.
Serger needle requirements:
- System: Check your manual (most use HAx1, 15×1, or ELx705 systems)
- Size: 80/12 or 90/14 for most fabrics (same as regular machines)
- Type: Universal for wovens, stretch/ballpoint for knits, microtex for lightweight fabrics
- Replacement schedule: Every 8-10 hours of sewing or every 3-4 projects
Thread and needle combinations by project:
| Project Type | Thread Type | Needle Type | Needle Size |
|---|---|---|---|
| Cotton T-shirts | Polyester serger thread | Stretch/ballpoint | 80/12 |
| Woven cotton garments | Polyester or cotton serger thread | Universal | 80/12 |
| Activewear/swimwear | Woolly nylon | Stretch | 75/11 |
| Lightweight silk | Fine polyester (50wt) | Microtex | 70/10 |
| Heavy denim | Polyester serger thread | Denim | 90/14 |
Buy serger thread in neutral colors (white, black, gray, navy) in bulk for economical everyday sewing. Save expensive color-matched thread for projects where the serged edge will be visible. Many sewers use decorative thread in the upper looper only and neutral thread in other positions to save money while achieving colorful effects.
For more on selecting the right needles for different fabrics, see our guide on sewing machine needles.
How to Fix Uneven Serger Stitches on Seams
Uneven serger stitches appear as irregular loops, varying stitch lengths, or one side tighter than the other, usually caused by unbalanced tension, inconsistent sewing speed, or threading errors. Fix the problem by systematically checking threading, testing tension adjustments, and ensuring consistent fabric feeding.
Diagnostic steps for uneven stitches:
Identify which thread is uneven
- Examine the seam to determine if loops appear on top, bottom, or one side
- Each visible problem corresponds to a specific thread path
Check threading first (solves 60% of problems)
- Raise presser foot and pull each thread gently to ensure it moves freely
- Rethread any path that feels stuck or doesn’t pull smoothly
- Verify each thread passes through its tension disc
Test tension adjustments (solves 30% of problems)
- Adjust only the thread that appears loose (showing loops)
- Increase tension by one number at a time
- Test on scrap fabric after each adjustment
Check mechanical issues (solves 10% of problems)
- Replace needles if stitches are inconsistent along the seam
- Clean lint from tension discs and looper area
- Verify presser foot pressure is appropriate for fabric weight
Specific stitch problems and solutions:
Loops on upper edge: Upper looper tension too loose, increase by 1-2 numbers
Loops on lower edge: Lower looper tension too loose, increase by 1-2 numbers
Stitches longer in some areas: Inconsistent sewing speed, practice maintaining steady pace
One side pulls tighter: Needle tension unbalanced, adjust the tighter needle tension down by 1 number
Wavy seam edge: Differential feed incorrect for fabric, adjust toward 1.5 for knits, 0.7 for wovens
Entire seam loose: All tensions too loose, increase all tensions by 1 number and test
Always make one adjustment at a time and test on scrap fabric before continuing your project. If you adjust multiple settings simultaneously, you won’t know which change solved the problem (or made it worse). Keep notes on successful tension settings for different fabric types to speed up future setup.
For related troubleshooting on your regular machine, see our comprehensive guide on sewing machine tension.
Is a Serger Worth It for Casual Sewing Projects?
A serger is worth the investment for casual sewers who work with knit fabrics regularly, sew more than 5-10 projects annually, or want professional-looking seam finishes without time-consuming hand techniques. However, it’s not essential for quilters, occasional menders, or sewers working exclusively with non-fraying fabrics.
Calculate your serger ROI:
Time savings: A serger finishes seams in one pass versus 2-3 passes on a regular machine (saves 30-40% of construction time)
Professional results: Serged seams look identical to ready-to-wear clothing and don’t unravel over time
Fabric versatility: Opens up knit sewing, which represents 60% of modern clothing patterns
Cost consideration: $250-300 initial investment, minimal ongoing costs (thread, needles, occasional blade replacement)
You’ll use a serger frequently if you:
- Sew clothing for yourself or family members
- Work with knit fabrics (T-shirts, leggings, dresses)
- Sell handmade items and need professional finishing
- Sew children’s clothing (requires durable, stretchy seams)
- Enjoy sewing enough to complete 10+ projects yearly
Skip the serger if you:
- Primarily quilt (seams are enclosed and pressed open)
- Sew only 1-2 projects per year
- Work exclusively with fleece, felt, or non-fraying fabrics
- Have limited workspace or storage
- Prefer hand-finishing techniques for the meditative process
Many casual sewers report that buying a serger increased their sewing frequency because projects finish faster and look more professional. The machine pays for itself in saved time after approximately 15-20 garment projects. If you’re unsure, try borrowing a friend’s serger or taking a class that provides machine access before committing to the purchase.
Serger vs Overlock Stitch on Regular Machine: Which Is Better?
A dedicated serger produces stronger, more professional seams than the overlock stitch on a regular sewing machine because it uses multiple threads, trims fabric edges, and creates true overlock construction. The overlock stitch on a regular machine is a useful substitute for occasional projects but lacks the durability, stretch, and finished appearance of serged seams.
Key differences:
| Feature | Dedicated Serger | Regular Machine Overlock Stitch |
|---|---|---|
| Thread count | 3-5 threads | 1-2 threads |
| Seam strength | Excellent, won’t unravel | Good, may unravel under stress |
| Stretch | Maintains fabric stretch | Limited stretch |
| Edge trimming | Built-in blade trims as you sew | Must trim separately |
| Speed | 1,300-1,700 SPM | 800-1,000 SPM |
| Seam appearance | Professional, identical to RTW | Functional but visibly different |
| Learning curve | Moderate (threading complexity) | Easy (familiar machine) |
When the regular machine overlock stitch works well:
- Finishing seam allowances on woven fabrics that won’t be stressed
- Occasional knit projects (1-2 per year)
- Preventing fraying on fabrics that will be lined or enclosed
- Projects where seam appearance doesn’t matter (inside of bags, home décor)
- Testing patterns before committing to serging
When you need a dedicated serger:
- Constructing knit garments (T-shirts, leggings, dresses)
- Sewing activewear or swimwear requiring stretch
- Producing items for sale requiring professional finish
- High-volume sewing where speed matters
- Creating rolled hems or decorative edges
The overlock stitch on your regular machine is an excellent starting point for exploring seam finishing techniques. Use it to determine if you enjoy working with knits and finishing seams before investing in a serger. However, once you try a dedicated serger, you’ll immediately notice the difference in speed, appearance, and seam quality.
For more on maximizing your regular machine’s capabilities, see our guide on sewing machine feet and specialty attachments.
What Projects Should I Start With on My First Serger?
Begin with simple projects that have straight seams and don’t require precise fit, such as cloth napkins, infinity scarves, or pillowcases. These projects let you practice threading, tension adjustment, and consistent sewing speed without the pressure of creating a wearable garment.
Best beginner serger projects (in order of difficulty):
Level 1: Practice and confidence building
Cloth napkins (1-2 hours)
- Simple squares with rolled hem edges
- Practice corner techniques and tension
- Immediate useful results
Infinity scarf (1 hour)
- One seam on knit fabric
- Practice stretchy seam construction
- Forgiving fit (no sizing required)
Pillowcase with serged seams (2 hours)
- Straight seams with corners
- Practice seam finishing on wovens
- Functional home décor item
Level 2: Simple wearables
Basic T-shirt (3-4 hours)
- Multiple seams with consistent technique
- Practice neckline and sleeve finishing
- First wearable garment
Knit skirt with elastic waist (2-3 hours)
- Circular sewing practice
- Elastic insertion technique
- Forgiving fit
Leggings (3-4 hours)
- Multiple seams requiring precision
- Practice with very stretchy fabric
- Functional activewear
Level 3: Intermediate projects
- Knit dress (5-6 hours)
- Combines multiple techniques
- Requires consistent tension throughout
- Complete garment construction
Skills to practice with each project:
- Napkins: Threading, tension balance, rolled hem, corners
- Scarf: Knit fabric handling, circular sewing, joining ends
- Pillowcase: Woven fabric finishing, straight seams, corners
- T-shirt: Garment construction sequence, sleeve insertion, neckline finishing
- Skirt: Elastic application, circular sewing, hem finishing
- Leggings: Stretchy fabric control, crotch seam reinforcement, consistent tension
- Dress: Complete garment assembly, multiple fabric types, professional finishing
Always cut and sew a test sample before starting each project, especially when working with new fabric types. Keep your early projects as reference samples for tension settings and technique reminders. Most beginners feel confident with basic serger operation after completing 3-4 practice projects over 2-3 weeks.
For more project ideas as you advance, explore our collection of sewing techniques and intermediate patterns.
Frequently Asked Questions
How long does it take to learn how to use a serger for the first time?
Most beginners master basic serger operation within 2-3 hours of hands-on practice, including threading, tension adjustment, and sewing straight seams. Achieving consistent professional results typically takes 3-4 practice projects over 2-3 weeks.
Can I use a serger without a regular sewing machine?
You can use a serger alone for simple knit garments and edge finishing, but you’ll need a regular sewing machine for zippers, buttonholes, topstitching, and any sewing that doesn’t involve edge finishing. Most sewers use both machines for complete garment construction.
Why is my serger so loud compared to my sewing machine?
Sergers run at higher speeds (1,300-1,700 stitches per minute) and use loopers instead of bobbins, creating more mechanical noise. This is normal operation. Regular cleaning and oiling reduce noise, but sergers are inherently louder than standard sewing machines.
How often should I clean my serger?
Clean the looper area, blade, and feed dogs after every 4-6 hours of sewing or whenever you notice lint buildup. Sergers generate more lint than regular machines because they trim fabric edges. Oil according to your manual’s recommendations (typically every 8-10 hours of use).
Can I serge over pins like I do on my regular machine?
Never serge over pins, the blade will hit them, causing damage to both the blade and pins, and potentially breaking needles. Remove all pins before fabric reaches the blade area, or pin within the seam allowance away from the cutting line.
What’s the difference between a serger and a coverstitch machine?
A serger finishes edges and creates seams by trimming and encasing fabric edges, while a coverstitch machine creates the double-needle topstitch seen on T-shirt hems without cutting fabric. Some machines combine both functions (serger/coverstitch combo machines).
Do I need to backstitch on a serger?
Sergers don’t backstitch. Instead, secure seam ends by sewing off the fabric edge, leaving a thread chain, then either tying off the chain or using a tapestry needle to weave it back into the seam. The multiple-thread construction prevents unraveling without backstitching.
Can I use my serger for quilting?
Sergers aren’t ideal for traditional quilting because they trim fabric edges and don’t create the pressed-open seams quilters prefer. However, you can use a serger for quilt binding, finishing raw edges on art quilts, or creating decorative edges on modern quilts.
Why does my serger blade get dull so quickly?
Serger blades dull faster when cutting synthetic fabrics, thick materials, or multiple layers. Expect to replace the blade every 40-60 hours of active sewing. Hitting pins or sewing over thick seam intersections also accelerates blade wear.
Can I adjust the width of my serger stitch?
Yes, most sergers allow stitch width adjustment by moving the stitch finger or adjusting the cutting width. Narrower stitches (2-3mm) work for rolled hems and lightweight fabrics, while wider stitches (5-7mm) suit garment construction and heavy fabrics.
Is it normal for my serger to use so much thread?
Yes, sergers use 3-5 times more thread than regular sewing machines because they use multiple threads simultaneously. This is why serger thread comes on large cones (1,000-6,000 yards) and costs less per yard than regular spools.
What should I do if I can’t thread my lower looper?
Use a threading hook, bent wire, or tweezers to guide thread through the lower looper eye. Some sewers use the “air threading” method: hold the thread tail near the looper eye while turning the handwheel to create suction that pulls the thread through. Practice makes this easier over time.
Conclusion
Learning how to use a serger for the first time opens up a new world of professional garment construction and efficient seam finishing. While the initial threading process may seem complex, most sewers master the basics within a few hours of practice and quickly appreciate the speed and quality that sergers bring to their sewing projects.
Your next steps:
- Choose your first serger based on budget and features (prioritize differential feed and 3/4-thread capability)
- Set up a dedicated space with good lighting and room for thread cones
- Practice threading 3-4 times before starting your first project
- Complete 2-3 simple projects (napkins, scarves, pillowcases) to build confidence
- Keep a project journal noting tension settings and techniques for different fabrics
- Join online communities for troubleshooting support and project inspiration
Remember that every serger user struggled with threading and tension at first. The machine becomes intuitive with practice, and the professional results make the learning curve worthwhile. Start with simple projects, test on scraps before sewing actual pieces, and don’t hesitate to rethread completely when problems arise.
Whether you’re finishing seams on woven garments or constructing stretchy activewear, your serger will become an indispensable tool in your sewing room. The investment in time and equipment pays dividends in faster project completion, professional-looking results, and expanded creative possibilities for your sewing journey.


