Quick Answer: Sewing a seam means stitching two pieces of fabric together along their edges, typically with a 5/8-inch seam allowance for most projects. Beginners can sew seams by hand or machine by aligning fabric edges right sides together, pinning in place, and stitching in a straight line while backstitching at both ends to secure the thread. With practice on scrap fabric and attention to tension settings, even complete beginners can master basic seams within a few hours.
Key Takeaways
- A seam joins two fabric pieces together, while a hem finishes a single fabric edge by folding it over
- Most beginner patterns use a 5/8-inch seam allowance, though some modern patterns use 1/2-inch
- You can sew seams by hand using a running stitch or backstitch, but a machine is faster and more durable
- Backstitching at the start and end of every seam prevents unraveling and strengthens the stitching
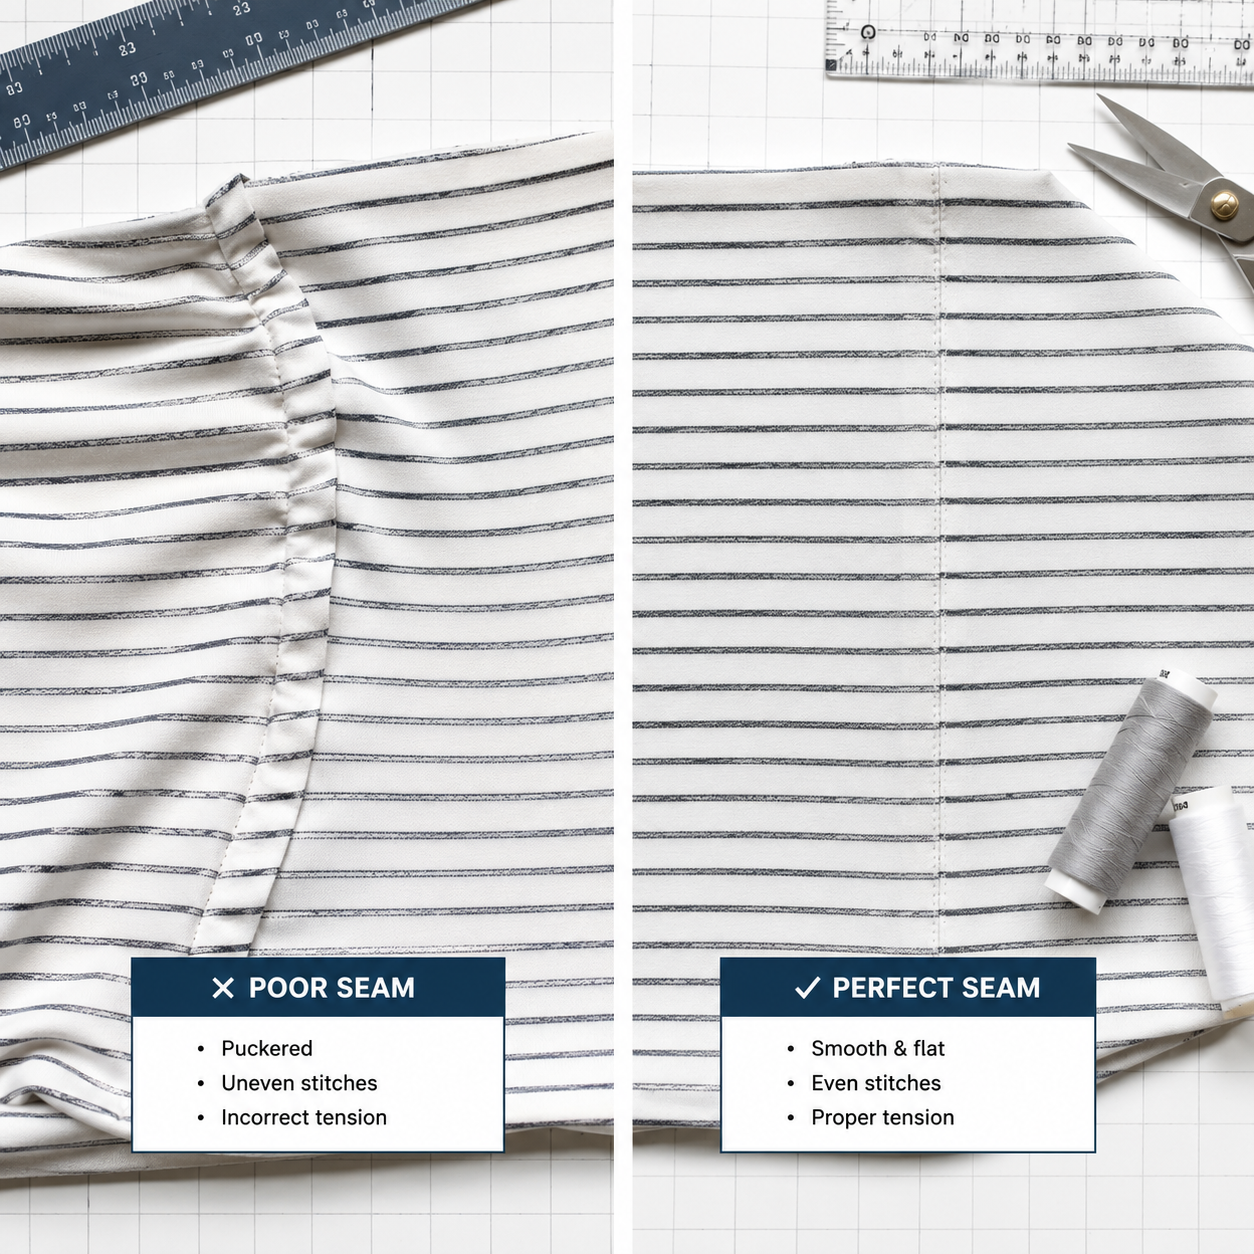
- Puckered seams usually result from thread tension that’s too tight or pulling fabric while sewing
- Practice on scrap fabric first to test tension, stitch length, and your ability to sew straight lines
- French seams encase raw edges for a clean finish, ideal for sheer fabrics and garments without linings
- Stretchy fabrics require a ballpoint needle, slight zigzag stitch, and gentle handling to prevent wavy seams
What Is a Seam in Sewing?
A seam is the line of stitching that joins two or more pieces of fabric together. The seam creates a permanent bond between fabric layers and forms the foundation of nearly every sewn item, from clothing to home décor projects.
When sewing a seam, fabric pieces are typically placed with their right sides (the pretty, printed, or outer sides) facing each other. The stitching line runs parallel to the fabric edge at a specific distance called the seam allowance. After stitching, the fabric opens up with the seam on the inside and the right sides facing outward.
Common seam types include:
- Plain seam, The most basic seam where two fabric edges are stitched together in a straight line
- French seam, A double-stitched seam that encases raw edges for a clean finish
- Flat-felled seam, A strong, visible seam often used on jeans and workwear
- Zigzag seam, Used for stretchy fabrics to allow the seam to stretch with the material
The seam allowance (the space between the stitching line and the raw fabric edge) provides room for the seam to hold securely without fraying or pulling apart during wear.
What’s the Difference Between a Seam and a Hem?
A seam joins two separate pieces of fabric together, while a hem finishes the edge of a single piece of fabric by folding it over and stitching it down. This distinction matters because the techniques, measurements, and purposes differ completely.
Seams appear wherever two fabric pieces meet: side seams on a shirt, inseams on pants, or shoulder seams on a dress. Hems appear at the bottom edges of garments, sleeve ends, or anywhere a single fabric edge needs a finished look to prevent fraying.
Key differences:
| Feature | Seam | Hem |
|---|---|---|
| Purpose | Joins two fabric pieces | Finishes one fabric edge |
| Fabric layers | Two or more separate pieces | Same piece folded over |
| Typical location | Sides, shoulders, inseams | Bottom edges, sleeve ends |
| Allowance | 5/8 inch or 1/2 inch standard | Varies, often 1-2 inches |
Choose seam techniques when constructing a project and hem techniques when finishing edges. A dress requires seams to connect the front and back panels, then hems to finish the bottom edge and sleeves.
What Seam Allowance Should Beginners Use?
Beginners should use a 5/8-inch seam allowance for most projects because this measurement is the standard in commercial patterns and provides enough fabric to create a secure, durable seam. Some modern indie patterns use 1/2-inch seam allowances, so always check your pattern instructions before cutting.
The seam allowance is the distance between your stitching line and the raw edge of the fabric. A consistent seam allowance ensures that garment pieces fit together correctly and that the finished item matches the intended size.
Why 5/8 inch became standard:
- Provides enough fabric to prevent fraying and seam failure
- Allows room for adjustments if you need to let out seams later
- Matches the markings on most sewing machine throat plates
- Compatible with the majority of vintage and commercial patterns
Most sewing machines have guidelines etched into the throat plate (the metal plate under the presser foot). The line marked 5/8 inch from the needle position helps you keep your fabric edge aligned as you sew.
Common seam allowances by project type:
- Garment sewing: 5/8 inch (standard) or 1/2 inch (modern patterns)
- Quilting: 1/4 inch (precise piecing for patchwork)
- Home décor: 1/2 inch to 5/8 inch depending on fabric weight
- Bag making: 1/2 inch to 3/8 inch for crisp corners
If your pattern doesn’t specify, use 5/8 inch as your default. Mark this measurement on your fabric with tailor’s chalk or use the machine guidelines to maintain consistency throughout your project.
How to Sew a Straight Seam by Hand
Sewing a straight seam by hand requires a threaded needle, two fabric pieces placed right sides together, and either a running stitch or backstitch along the seam line. Hand-sewn seams work well for small repairs, delicate fabrics, or projects where you don’t have access to a machine.
Step-by-step process:
- Thread your needle, Cut about 18-24 inches of thread, thread it through the needle eye, and tie a knot at the end
- Pin fabric pieces, Place fabric right sides together, align edges, and pin perpendicular to the seam line every 2-3 inches
- Start with a backstitch, Insert the needle from the back side, pull through, then go back about 1/8 inch and come up 1/8 inch ahead to secure the thread
- Sew the running stitch, Push the needle down through both fabric layers, then back up about 1/8 to 1/4 inch ahead; repeat along the seam line
- Keep stitches even, Maintain consistent stitch length (about 1/8 inch for strength, 1/4 inch for basting)
- End with backstitches, When you reach the end, sew backward over the last few stitches to lock the thread
- Tie off and trim, Make a small knot close to the fabric and trim excess thread
Running stitch vs. backstitch:
- Running stitch, Faster but less strong; needle goes in and out in a continuous line
- Backstitch, Stronger and more durable; each stitch overlaps the previous one, creating a solid line similar to machine stitching
For seams that will experience stress (like clothing seams), use backstitch. For temporary seams or gathering, running stitch works fine.
Common mistake: Pulling thread too tight creates puckering and makes the seam stiff. Keep tension firm but not tight, allowing the fabric to lie flat naturally.
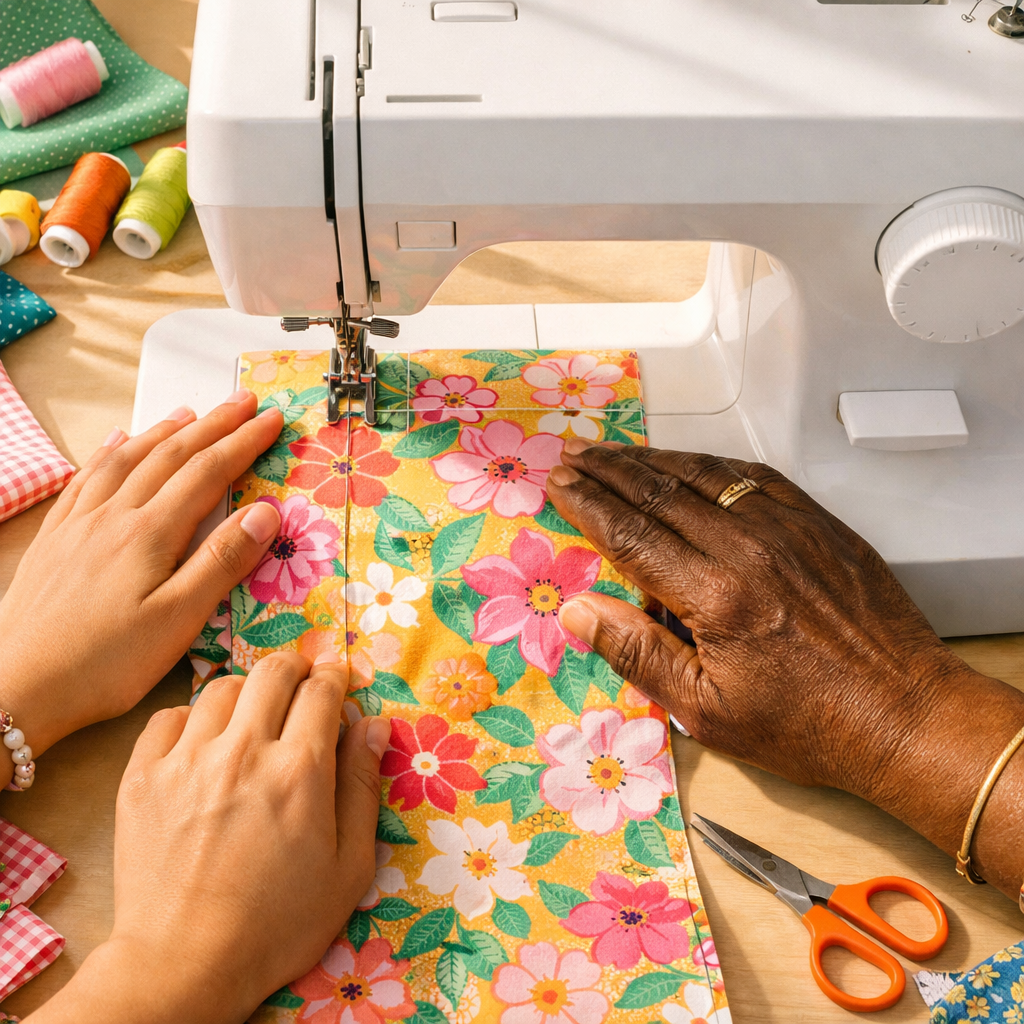
Do You Need a Sewing Machine to Sew Seams?
You don’t need a sewing machine to sew seams, but a machine makes the process significantly faster and creates more durable, even stitches for most projects. Hand sewing works perfectly for small repairs, delicate fabrics, or historical reproduction, but machine sewing is more practical for garments and larger items.
Hand sewing advantages:
- No equipment cost or electricity needed
- Portable and quiet
- Better control for delicate fabrics like silk or lace
- Ideal for small repairs and alterations
- Necessary for techniques like invisible hems or hand-picked zippers
Machine sewing advantages:
- 10-20 times faster than hand sewing
- Creates stronger, more consistent stitches
- Handles thick fabrics and multiple layers easily
- Offers specialized stitches (zigzag, stretch, decorative)
- Less hand fatigue on large projects
Choose hand sewing if you’re working on a small project (under 12 inches of seams), repairing a single seam, or learning basic stitching concepts. Choose machine sewing for garments, home décor projects, quilts, or anything with more than a few feet of seams.
Hybrid approach: Many sewers use machines for long seams and hand sewing for finishing details like hems, buttons, and closures. This combination offers speed where it matters and precision where it counts.

【Pre-Tested Before Shipping】 Each sewing machine is pre-threaded and checked before leaving the factory to confirm normal operation. A small piece of fabric may remain under the presser foot from this testing process and does not indicate prior use. If you need assistance with the machine, customer support is available to help.

27 Unique Built-in Stitches: The Brother XM2701 sewing machine includes 27 built-in stitches including decorative, blind hem, zigzag, and stretch stitches and an auto-size buttonhole

【14 Stitches for Beginner Sewing】 This sewing machine for beginners features 14 built-in stitch patterns for basic sewing, clothing repair, hemming, DIY crafts and fabric projects. A practical beginner sewing machine for learning simple sewing skills and handling everyday home sewing tasks.
Why Is My Seam Puckering?
Seam puckering happens when thread tension is too tight, you’re pulling the fabric while sewing, or the stitch length is too short for the fabric weight. The fabric gathers along the seam line instead of lying flat, creating an unprofessional, wavy appearance.
Main causes and fixes:
1. Thread tension too tight
- The upper thread pulls the fabric layers together too forcefully
- Test on scrap fabric and gradually loosen upper tension
- Most machines have a tension dial numbered 0-9; start at 4-5 and adjust
2. Pulling or pushing fabric
- Let the machine’s feed dogs move the fabric naturally
- Guide fabric gently without pulling it toward you or pushing it away
- Rest your hands lightly on the fabric to keep it aligned
3. Stitch length too short
- Short stitches (under 2.0mm) can cause puckering on lightweight fabrics
- Use 2.5-3.0mm stitch length for medium-weight cotton
- Increase to 3.5-4.0mm for heavier fabrics like denim
4. Wrong needle or thread
- Heavy thread on lightweight fabric creates puckering
- Use thread weight appropriate to fabric (50-weight all-purpose for most projects)
- Match needle size to fabric weight (size 80/12 for medium cotton, 70/10 for lightweight)
5. Fabric not properly supported
- Fabric hanging off the table edge creates drag
- Support fabric weight on both sides of the machine
- Use a chair or table extension for large projects
Quick test: Sew a 6-inch seam on scrap fabric identical to your project. If it puckers, adjust one variable at a time (tension first, then stitch length, then needle size) until the seam lies flat.
How to Fix a Crooked Seam
Fix a crooked seam by carefully removing the stitches with a seam ripper, pressing the fabric flat, and re-sewing the seam while keeping the fabric edge aligned with your machine’s seam guide. Prevention through proper alignment and slow, steady sewing beats fixing crooked seams after the fact.
Removal process:
- Use a seam ripper, Slide the pointed end under every 3-4 stitches on one side of the seam
- Cut threads carefully, Lift and cut without pulling or stretching the fabric
- Remove all thread bits, Pull out loose threads from both fabric sides
- Press the fabric, Iron the fabric flat to remove stitch holes and creases
- Re-pin if needed, Pin fabric pieces together again, checking alignment
Prevention techniques:
- Watch the fabric edge, not the needle, Keep your eyes on the seam guide marking, not where the needle enters the fabric
- Sew slowly, Speed causes wobbling; maintain a steady, moderate pace
- Use the throat plate guides, Align fabric edge with the 5/8-inch line throughout sewing
- Pin perpendicular, Place pins across the seam line so you can sew over them (or remove just before the needle reaches them)
- Practice on scraps, Sew straight lines on scrap fabric until you can maintain consistent alignment
When to accept “good enough”: Seams hidden inside garments don’t need to be perfectly straight if they’re within 1/16 inch of the intended line. Visible seams (like topstitching) require more precision.
Edge case: If you’ve already sewn multiple seams and one crooked seam affects the fit, you may need to adjust adjacent seams to compensate rather than ripping out everything.
French Seam vs Regular Seam: Which Is Better?
A French seam is better for sheer or lightweight fabrics and unlined garments because it completely encases raw edges, creating a clean, professional finish on both sides. A regular seam is better for most projects because it’s faster, easier for beginners, and works with all fabric weights.
French seam characteristics:
- Sewn twice: first with wrong sides together, then with right sides together
- Raw edges are hidden inside the seam
- Creates a narrow, neat seam visible from the inside
- Ideal for sheer fabrics (chiffon, organza, voile) where seam allowances would show through
- Best for straight seams; difficult on curves
Regular seam characteristics:
- Sewn once with right sides together
- Raw edges visible on the inside (usually finished with zigzag or serging)
- Works for all fabric types and weights
- Easier to sew and adjust
- Handles curves and corners better
Choose French seams when:
- Sewing sheer or semi-sheer fabrics where seam allowances would be visible
- Making unlined garments where the inside will be seen
- Creating heirloom or high-end garments
- Working with fabrics that fray heavily
Choose regular seams when:
- Learning to sew (simpler technique)
- Working with opaque fabrics
- Sewing lined garments (lining hides seam allowances)
- Dealing with curved seams or tight corners
- Working with thick or bulky fabrics
French seam process: Sew with wrong sides together at 1/4 inch, trim to 1/8 inch, press, fold right sides together, and sew again at 3/8 inch. The total seam allowance equals 5/8 inch, matching standard patterns.

Mini sewing kit with all the essentials for basic sewing and repairs; suitable for novice and expert sewers alike
Simple techniques and projects for first-time sewers

Complete Sewing Kit-The travel sewing kit contains all the necessary tools that are required for performing basic repairs-a scissor, threads (18 colors), 30 sewing needles, shirt buttons, seam ripper, needle threader tools and a foldable tape measure.
What Tension Setting Should You Use for Sewing Seams?
Most sewing machines should be set to a tension of 4-5 (on a 0-9 scale) for sewing basic seams with all-purpose thread on medium-weight cotton fabric. Proper tension creates stitches where the upper and lower threads lock together in the middle of the fabric layers, not on the top or bottom surface.
How to check tension:
Sew a test seam on scrap fabric and examine both sides. Correct tension shows even stitches on both top and bottom, with no loops or puckering. If you see loops of thread on the bottom, upper tension is too loose. If you see loops on top or the fabric puckers, upper tension is too tight.
Tension adjustments by fabric:
- Lightweight fabrics (chiffon, voile): Slightly lower tension (3-4) to prevent puckering
- Medium-weight fabrics (quilting cotton, linen): Standard tension (4-5)
- Heavy fabrics (denim, canvas): Slightly higher tension (5-6) for secure stitches
- Stretchy fabrics (jersey, spandex): Lower tension (3-4) to allow stretch
Bobbin tension: Most sewers never need to adjust bobbin tension. If you’ve tried everything and stitches still look wrong, consult your machine manual before touching the bobbin case screw. A quarter-turn makes a significant difference.
Common mistake: Adjusting tension to fix problems caused by other issues. Before changing tension, check that you’re using the correct needle size, threading the machine properly, and using quality thread. Old or cheap thread causes more tension problems than actual tension settings.
Quick diagnostic: If both upper and lower threads look loose and loopy, you probably didn’t thread the machine correctly. Re-thread from scratch, making sure thread passes through all guides and the tension discs.
How to Backstitch at the Beginning of a Seam
Backstitch at the beginning of a seam by sewing forward 3-4 stitches, pressing your machine’s reverse button or lever, sewing backward over those same stitches, then releasing the reverse and continuing forward. This locks the thread in place and prevents the seam from unraveling during wear or washing.
Step-by-step process:
- Position fabric, Place fabric under the presser foot with the needle about 1/2 inch from the fabric edge (or at your seam starting point)
- Lower the presser foot, This engages the tension discs
- Sew forward, Stitch 3-4 stitches (about 1/2 inch) into the seam
- Press reverse, Hold down the reverse button or lever (usually near the needle or on the front panel)
- Sew backward, Stitch backward over the same stitches you just made
- Release reverse, Let go of the button and continue sewing forward normally
- Repeat at the end, When you reach the seam end, sew forward to the edge, reverse for 3-4 stitches, then sew forward to the edge again
Why backstitching matters: Without backstitching, the thread ends can pull out easily, especially at stress points like armholes or crotch seams. The reverse stitching creates a knot-like lock that secures the thread.
Alternative for delicate fabrics: Instead of backstitching (which can create bulk), leave long thread tails at the start and end, then tie them in a square knot and trim. This works well for sheer fabrics or when backstitching would be visible.
Common mistake: Backstitching too far (more than 1/2 inch) creates a visible lump and wastes thread. Three to four stitches provide adequate security without bulk.
Common Mistakes When Sewing Seams
Beginners commonly make mistakes like forgetting to backstitch, sewing with the wrong side up, using inconsistent seam allowances, and not pressing seams after sewing. These errors affect fit, durability, and the professional appearance of finished projects.
Top mistakes and solutions:
1. Not backstitching at seam ends
- Seams unravel during wear or washing
- Always backstitch 3-4 stitches at both ends
2. Sewing with wrong sides together
- Creates exposed seams on the garment exterior
- Double-check that right (pretty) sides face each other before sewing
3. Inconsistent seam allowance
- Causes fit problems and misaligned seams
- Keep fabric edge aligned with the throat plate guide throughout sewing
4. Skipping the pressing step
- Seams look puckered and unprofessional
- Press seams flat as sewn, then press open or to one side as the pattern directs
5. Pulling fabric through the machine
- Creates stretched, wavy seams
- Let the feed dogs move the fabric; just guide gently
6. Using dull or wrong needles
- Causes skipped stitches, snags, or holes
- Change needles every 8-10 hours of sewing or when starting a new project
7. Not testing on scrap fabric
- Wastes project fabric when settings are wrong
- Always sew a test seam on scraps to check tension, stitch length, and technique
8. Sewing too fast
- Leads to crooked seams and loss of control
- Maintain a steady, moderate pace; speed comes with practice
9. Ignoring thread quality
- Cheap thread breaks, shreds, or creates lint buildup
- Invest in quality all-purpose polyester or cotton thread
10. Not securing thread tails
- Loose threads at seam ends look messy
- Trim thread tails to 1/4 inch after backstitching, or tie them off if not backstitching
Prevention strategy: Before starting any project, sew a practice seam on scrap fabric using the same materials and settings. This 2-minute test catches problems before they affect your actual project.
What Presser Foot Should You Use for Basic Seams?
Use the standard all-purpose presser foot (also called the zigzag foot or general-purpose foot) for sewing basic seams on most fabrics. This foot came with your sewing machine and has a wide opening that accommodates both straight and zigzag stitches while providing even pressure on the fabric.
The all-purpose foot works for approximately 80% of sewing projects, including garment seams, home décor, and quilting. The foot’s flat bottom and moderate width keep fabric layers aligned while allowing you to see the seam line clearly.
When to use specialized feet:
- Zipper foot, For sewing close to zipper teeth or piping
- Walking foot, For thick fabrics, multiple layers, or matching plaids and stripes
- Rolled hem foot, For narrow hems on lightweight fabrics
- Buttonhole foot, For creating buttonholes (not for seams)
- 1/4-inch foot, For precise quilting seams
Presser foot pressure: Most machines allow you to adjust how firmly the foot presses down on fabric. Use standard pressure for medium-weight fabrics, lighter pressure for delicate or stretchy fabrics, and heavier pressure for thick fabrics like denim.
Common mistake: Buying specialty feet before mastering the all-purpose foot. Learn to sew consistent seams with your standard foot before investing in accessories. The all-purpose foot handles basic seams perfectly well.
Edge case: If your machine came with multiple feet and you’re not sure which is the all-purpose foot, look for the one with a wide opening (about 5-7mm) and no special features like rollers, guides, or narrow slots.

TISEKER High Quality General Purpose Presser Foot.

✅ VERSATILE ALL-PURPOSE PRESSER FOOT: Ideal for everyday sewing projects, this universal sewing machine foot supports straight stitch, zigzag, and decorative stitches. Perfect for garment sewing, mending, crafting, and home décor with consistent stitch quality.
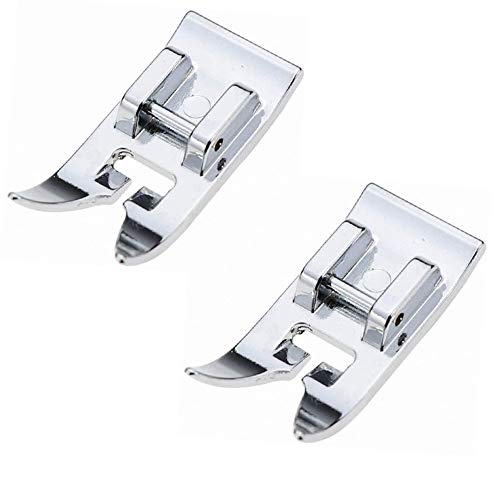
High Quality Premium Sewing Feet From TFBOY
How to Sew Seams on Stretchy Fabric
Sew seams on stretchy fabric using a ballpoint or stretch needle, a slight zigzag stitch (0.5-1.0mm width, 2.5mm length) or stretch stitch, and gentle handling to prevent wavy, stretched-out seams. Stretchy fabrics like jersey, spandex, and rib knits require different techniques than woven fabrics because they stretch during sewing.
Essential adjustments:
1. Use the right needle
- Ballpoint or stretch needles have rounded tips that slide between fibers instead of piercing them
- Size 75/11 or 80/12 for most knits
- Universal needles can cause runs or holes in knit fabrics
2. Choose appropriate stitches
- Narrow zigzag (0.5mm width) allows seam to stretch without breaking
- Stretch stitch (looks like a lightning bolt) built into most machines
- Straight stitch works only if you’re serging or using very stable knits
3. Adjust tension and pressure
- Lower tension slightly (3-4 instead of 4-5) to prevent puckering
- Reduce presser foot pressure if your machine allows it
- Test on scraps until seams lie flat without waves
4. Don’t stretch while sewing
- Let fabric feed naturally without pulling or stretching
- Support fabric weight on both sides of the machine
- Stretching during sewing creates wavy seams that won’t relax
5. Use a walking foot (optional)
- Helps feed stretchy fabric evenly
- Prevents the top layer from stretching more than the bottom layer
- Especially helpful for thick knits or multiple layers
Seam finishing for knits: Knit fabrics don’t fray like wovens, so you can leave raw edges unfinished or use a zigzag stitch to finish them. A serger creates the most professional finish but isn’t necessary.
Common mistake: Using a straight stitch on stretchy fabric. When the fabric stretches during wear, the non-stretchy stitches pop and break. Always use a stitch that can stretch with the fabric.
Is Sewing Seams Hard for Complete Beginners?
Sewing seams is not hard for complete beginners, but it requires practice to develop the muscle memory and coordination needed for straight, even stitches. Most beginners can sew acceptable seams within 2-3 hours of practice on scrap fabric, and professional-looking seams within a few simple projects.
What makes seams beginner-friendly:
- The basic technique is simple: align edges, sew in a straight line, backstitch at ends
- Mistakes are fixable with a seam ripper
- You can practice on scrap fabric without wasting materials
- Modern machines have guides and features that help you sew straight
- Hand sewing requires only a needle and thread
What beginners find challenging:
- Maintaining consistent seam allowance (solved with practice and using throat plate guides)
- Sewing straight lines (improves quickly with slow, steady practice)
- Understanding when to adjust tension or settings (learned through testing on scraps)
- Coordinating foot pedal speed with fabric guidance (becomes automatic within hours)
Realistic timeline:
- First 30 minutes: Understanding machine threading, bobbin winding, and basic operation
- First 2 hours: Sewing reasonably straight seams on scrap fabric
- First project: Seams may be slightly crooked but functional
- After 3-5 projects: Seams look professional and consistent
Best first projects for practicing seams:
- Pillowcase (straight seams only, forgiving fabric)
- Simple tote bag (straight seams, practical result)
- Drawstring bag (short seams, quick completion)
- Cloth napkins (practice straight stitching and corners)
Confidence builder: Start with medium-weight quilting cotton in a busy print. This fabric is easy to handle, and prints hide minor imperfections better than solid colors. Avoid slippery, stretchy, or sheer fabrics until you’ve mastered basic seams.
The learning curve for sewing seams is gentle. Unlike complex techniques like setting in sleeves or installing zippers, basic seams require only alignment and straight stitching. With patient practice, complete beginners achieve competent results quickly.
Frequently Asked Questions
How long should a seam allowance be? Most patterns use 5/8-inch seam allowances, though modern indie patterns often use 1/2-inch. Quilting typically uses 1/4-inch seam allowances for precise piecing. Always check your pattern instructions before cutting fabric.
Can you sew a seam without pins? Yes, experienced sewers often skip pins on short, straight seams by carefully aligning fabric edges as they sew. Beginners should use pins every 2-3 inches to prevent shifting, especially on longer seams or slippery fabrics.
What stitch length is best for seams? Use 2.5-3.0mm stitch length for most seams on medium-weight fabrics. Shorter stitches (2.0mm) work for lightweight fabrics or areas needing extra strength. Longer stitches (3.5-4.0mm) suit heavy fabrics or basting.
Do you need to finish seam allowances? Finishing seam allowances prevents fraying on woven fabrics and extends garment life. Use a zigzag stitch, pinking shears, or serger to finish edges. Knit fabrics don’t require finishing because they don’t fray.
How do you sew a curved seam? Sew curved seams slowly, stopping with the needle down every inch or so to pivot the fabric slightly. Clip into the seam allowance after sewing (without cutting the stitches) to help the curve lie flat when pressed open.
What’s the difference between pressing and ironing a seam? Pressing means lifting the iron up and down on the seam without sliding it. Ironing means sliding the iron back and forth. Press seams to avoid stretching or distorting the fabric, especially on bias cuts or delicate materials.
Can you sew over pins? You can sew over pins placed perpendicular to the seam if you’re using a quality machine and going slowly. However, hitting a pin can break your needle or damage the machine. Many sewers remove pins just before the needle reaches them.
Why does my thread keep breaking? Thread breaks due to incorrect threading, old or cheap thread, wrong needle size, tension too tight, or a dull needle. Re-thread the machine completely, use fresh quality thread, and change to a new needle appropriate for your fabric.
How do you fix a seam that’s too tight? Remove the seam with a seam ripper, press the fabric flat, and re-sew with a smaller seam allowance (taking less fabric into the seam). For example, if you sewed at 5/8 inch, try 1/2 inch to add 1/4 inch to the garment width.
What does “right sides together” mean? Right sides together means placing the two fabric pieces with their pretty, printed, or outer sides facing each other before sewing. This hides the seam on the inside when you turn the project right-side-out after stitching.
Do you backstitch when basting? No, don’t backstitch when basting because basting stitches are temporary and need to be removed later. Use the longest stitch length on your machine and leave long thread tails for easy removal.
How close to the edge can you sew? You can sew as close as 1/8 inch from the fabric edge using a standard presser foot, or even closer with an edge-stitching foot. However, seams closer than 1/4 inch may not be strong enough for garments that experience stress.
Conclusion
Sewing a seam is the foundational skill that unlocks all other sewing projects. By placing fabric right sides together, maintaining a consistent seam allowance, and backstitching at both ends, beginners can create strong, professional-looking seams within a few hours of practice.
Start with the basics: practice straight seams on scrap fabric, learn to adjust tension and stitch length for different materials, and master the art of letting the machine do the work without pulling or pushing. As confidence grows, experiment with French seams for delicate fabrics, zigzag stitches for stretch materials, and curved seams for more complex projects.
Your next steps:
- Gather scrap fabric in various weights and practice sewing straight seams
- Test your machine’s tension and stitch length settings on each fabric type
- Complete a simple project like a pillowcase or tote bag to apply your skills
- Learn to press seams properly for a professional finish
- Gradually tackle more complex seam types as your confidence builds
Remember that every experienced sewer started with crooked seams and tension troubles. The difference between a beginner and an expert is simply hours of practice. Set up your workspace, thread your machine, and start sewing. Each seam you complete builds the skills and confidence needed for your next project.