


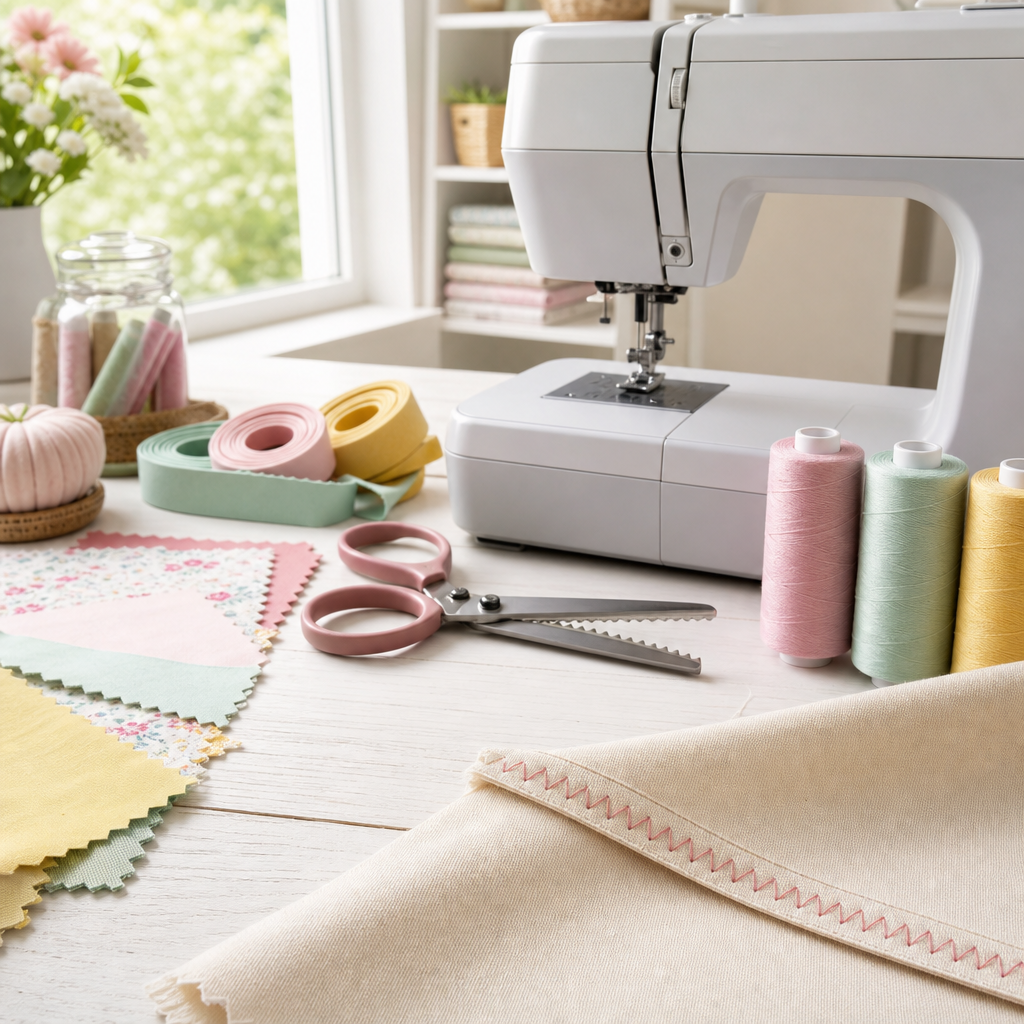
Most sewists don’t own a serger, yet professional-looking seam finishes are entirely achievable with a standard sewing machine and a few basic tools. Learning how to finish seams without a serger opens up garment construction to anyone with a regular machine, pinking shears, or even just a needle and thread. The key is matching the right finishing technique to your fabric type and project requirements.
Key Takeaways
- Zigzag stitch is the most versatile machine method for finishing seams without a serger, working well on woven and knit fabrics
- Pinking shears offer the fastest solution for fabrics that fray minimally, requiring no machine work at all
- French seams encase raw edges completely, making them ideal for sheer fabrics and garments that show the inside
- Bias tape or Hong Kong finish provides a couture-level edge treatment perfect for unlined jackets and coats
- Knit fabrics can be finished with a narrow zigzag or stretch stitch to maintain elasticity without a serger
- Lined garments often don’t require seam finishing since the lining hides raw edges
- Most seam finishing problems like puckering stem from incorrect tension, stitch width, or presser foot pressure
What Does Finishing a Seam Mean in Sewing?
Finishing a seam means treating the raw fabric edges to prevent fraying, reduce bulk, and create a neat appearance inside a garment. When fabric is cut, most woven materials will unravel over time as individual threads pull away from the edge, especially after washing and wearing. Seam finishing techniques secure these edges before they can fray.
A finished seam serves three main purposes:
- Prevents fraying during construction, washing, and long-term wear
- Improves durability by protecting the seam allowance from stress and abrasion
- Creates a professional appearance that makes homemade garments look store-bought
Not every seam requires finishing. Fabrics like fleece, felt, and some knits don’t fray significantly, and garments with full linings hide the raw edges entirely. However, for most woven cotton, linen, rayon, and lightweight fabrics, finishing seams extends the life of your project and elevates the overall quality.
Best Ways to Finish Seams Without a Serger for Beginners
Beginners should start with zigzag stitch or pinking shears, as both methods require minimal skill and deliver reliable results on common fabrics like quilting cotton and linen. A basic zigzag stitch on any home sewing machine creates a secure edge in seconds, while pinking shears need no machine at all.
Top beginner-friendly methods ranked by ease:
Pinking shears – Cut along the raw edge with specialized scissors that create a zigzag pattern. Works best on tightly woven fabrics like cotton and denim. No sewing required.
Zigzag stitch – Set your machine to a medium-width zigzag (3-4mm) and stitch close to the raw edge. The thread wraps around the fabric edge, preventing fraying.
Turned and stitched edge – Fold the raw edge under 1/4 inch and stitch close to the fold. Creates a clean, flat finish but adds slight bulk.
French seam – Requires two lines of stitching but completely encloses raw edges. Perfect for lightweight fabrics and reversible garments.
Common beginner mistake: Stitching too far from the edge when using a zigzag stitch. Position the needle so the right swing of the zigzag just barely clears the fabric edge, or the fabric may still fray between the stitching and the raw edge.
Choose pinking shears if you’re working on a simple cotton project and want the fastest option. Choose zigzag stitch if your fabric frays easily or if you’re making something that will be washed frequently, as the stitching provides more security than pinking alone.
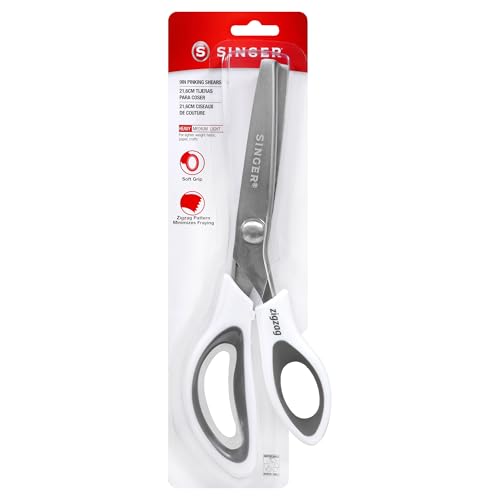
9” pinking shears cut in a precise zigzag pattern that helps to minimize fraying on fabric seams

Effortlessly cuts denim, leather, and silk—clean from first tooth to last. One tool handles heavy-duty to delicate materials with ease. Perfect for scallop fabric scissors, fabric scissors zig zag, and any scallop scissors for fabric project

Pinking shears for Fabric, Linings, Paper,leather,PU and Craft Uses. Ideal Craft Shears for Professional and Domestic Use. These pinking shears for fabric cutting can be used to add decorative edging to ribbon, paper, and other materials.
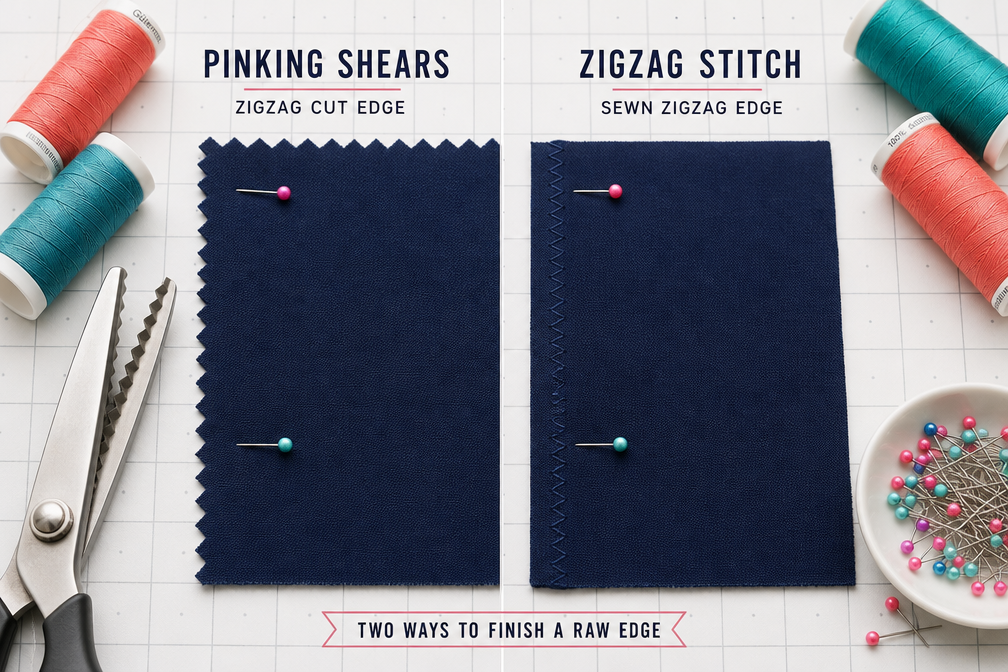
Pinking Shears vs Zigzag Stitch for Seam Finishing
Pinking shears work best for stable, tightly woven fabrics with minimal fraying, while zigzag stitch provides superior protection for loosely woven or delicate materials that unravel quickly. Pinking shears cut a sawtooth edge that interrupts the straight grain of the fabric, slowing fraying but not stopping it entirely. Zigzag stitching wraps thread around the raw edge, creating a physical barrier that holds threads in place even under stress.
Comparison of both methods:
| Method | Best For | Speed | Durability | Equipment Needed |
|---|---|---|---|---|
| Pinking shears | Quilting cotton, denim, stable wovens | Very fast | Moderate | Pinking shears only |
| Zigzag stitch | Rayon, linen, loosely woven fabrics | Fast | High | Sewing machine |
When to choose pinking shears:
- Quick projects like quilts or home decor where seams won’t show
- Fabrics that barely fray (test by cutting a scrap and rubbing the edge)
- When you want to avoid adding any bulk to seam allowances
- Projects that won’t be washed frequently
When to choose zigzag stitch:
- Garments that will be worn and washed repeatedly
- Fabrics that fray aggressively (rayon challis, linen, raw silk)
- When you need the most secure edge treatment without a serger
- Curved seams where pinking shears are difficult to maneuver
Edge case: Some sewists combine both methods, first pinking the edge then adding a zigzag stitch for maximum security on extremely loose weaves. This is overkill for most projects but can be useful for heirloom garments or fabrics that cost a lot per yard.

37 UNIQUE BUILT-IN STITCHES: The XM3700 lightweight sewing machine features 37 unique built-in stitches, and a one-step auto-size buttonhole

27 Unique Built-in Stitches: The Brother XM2701 sewing machine includes 27 built-in stitches including decorative, blind hem, zigzag, and stretch stitches and an auto-size buttonhole

How to Do a French Seam on Cotton Fabric
A French seam on cotton fabric requires sewing the seam twice: first with wrong sides together at 1/4 inch, then with right sides together at 3/8 inch, completely encasing the raw edges inside the seam. This technique works beautifully on lightweight to medium-weight cotton, creating a clean finish that looks professional from both sides.
Step-by-step French seam process:
Place fabric wrong sides together (the opposite of a normal seam). Pin if needed.
Sew a 1/4-inch seam using a straight stitch. This narrow seam will end up hidden inside the final seam.
Press the seam to one side, then trim the seam allowance to about 1/8 inch to reduce bulk.
Fold the fabric right sides together along the seam line, enclosing the raw edges you just stitched. Press flat.
Sew a 3/8-inch seam from the fold. This second seam traps the raw edges inside a neat tunnel.
Press the finished seam to one side. The inside of your garment now shows a single clean seam with no raw edges visible.
Fabric weight matters: French seams work best on cotton voile, lawn, poplin, and lightweight quilting cotton. On heavier cotton like denim or canvas, the double layer of fabric creates too much bulk and is better finished with a different method.
Common mistake: Sewing the first seam too wide. If your initial seam is more than 1/4 inch, you’ll need to sew the second seam even wider to enclose it, eating into your seam allowance and potentially changing the fit of your garment. Stick to the 1/4-inch and 3/8-inch measurements for best results.
French seams take about twice as long as a simple zigzag finish but are worth the effort for blouses, dresses, and children’s clothing where the inside might be visible during wear.
Can I Just Leave Raw Edges on Seams If Fabric Doesn’t Fray Much?
Yes, you can leave raw edges unfinished on fabrics that don’t fray, such as fleece, felt, boiled wool, faux leather, and some stable knits, especially if the garment won’t be washed frequently or if seams are enclosed in a lining. However, even minimally fraying fabrics benefit from finishing if the item will see heavy use or frequent laundering.
Fabrics that rarely need seam finishing:
- Fleece and polar fleece (cut edges remain stable indefinitely)
- Felt and boiled wool (the felting process locks fibers together)
- Faux leather and vinyl (synthetic materials don’t have a grain to unravel)
- Some stable knits like ponte and scuba knit (though edges can curl)
Test before deciding: Cut a 2-inch square of your fabric and rub the edges vigorously between your fingers. If no threads pull away after 30 seconds of abuse, the fabric is stable enough to leave raw in most applications.
When to finish anyway:
- Garments worn directly against skin (raw edges can feel scratchy)
- Items washed in machines with aggressive agitation
- Seams under stress, like armholes and crotch seams
- Projects you want to last for years
Edge case for quilting cotton: Some quilters leave seam allowances raw inside quilts, relying on the quilting stitches to hold everything in place. This works because the batting and backing sandwich the raw edges, and the dense quilting prevents movement. This approach doesn’t translate to garment sewing where seams experience more stress.
If you’re unsure, finishing takes only a few extra minutes and provides insurance against future fraying. Skip it only when you’re confident the fabric is truly stable.
What Seam Finish Works Best for Knit Fabrics Without a Serger?
A narrow zigzag stitch or stretch stitch works best for finishing knit fabric seams without a serger, as both methods allow the seam to stretch with the fabric without breaking threads. Standard straight stitching on knits can pop when the fabric is stretched, but zigzag and stretch stitches build in flexibility.
Recommended settings for knit seam finishing:
- Zigzag stitch: Set width to 2-3mm and length to 2-2.5mm. Stitch close to the raw edge.
- Stretch stitch (lightning bolt icon): Use the built-in stretch stitch if your machine has one. This creates a stitch pattern that can extend without breaking.
- Twin needle: For hems and visible seams, a twin needle creates a professional double-stitch on the right side with a zigzag on the wrong side.
Technique tips for knits:
- Use a ballpoint or stretch needle to prevent skipped stitches
- Reduce presser foot pressure if your machine allows it, so the fabric feeds smoothly without stretching
- Don’t pull the fabric as you sew; let the feed dogs move it naturally
- Test on scraps first, as different knit weights require different settings
Alternative for stable knits: If you’re working with a very stable knit like ponte or double knit, you can use the turned-and-stitched method (fold under 1/4 inch and stitch) or even pinking shears, though these won’t provide stretch. Reserve these methods for knits that won’t be stretched during wear.
Common mistake: Using too wide a zigzag stitch on lightweight knits. A 5mm zigzag can create waves and distortion along the edge. Start narrow and test before committing to your final garment pieces.
For t-shirts, leggings, and activewear made from jersey or spandex blends, the narrow zigzag is your best friend when a serger isn’t available.


Superior Control & Consistency: The SCHMETZ Jersey Ball Point needle features a rounded medium ball point design that glides between fabric fibers instead of piercing them, helping prevent snags, runs, and holes on delicate knits and stretch fabrics


Superior Control & Consistency: The SCHMETZ Jersey Ball Point needle features a rounded medium ball point design that glides between fabric fibers instead of piercing them, helping prevent snags, runs, and holes on delicate knits and stretch fabrics
How to Finish Seams on Sheer Fabric by Hand
Hand-finishing seams on sheer fabric is best accomplished with a rolled hem or hand-whipped edge, both of which create nearly invisible seam finishes that won’t show through delicate materials like chiffon, organza, or silk georgette. Machine stitching can look heavy and obvious on sheers, while hand methods offer control and delicacy.
Rolled hem by hand (best for straight edges):
- Trim the seam allowance to 1/4 inch
- Fold the raw edge under about 1/8 inch and press lightly with a cool iron
- Roll the folded edge between your thumb and finger to create a tiny tube
- Use a slip stitch or tiny whip stitch to secure the roll, catching just a thread or two of the main fabric
- Work in 1-2 inch sections, rolling and stitching as you go
Whipped edge (faster, works on curves):
- Trim seam allowance to 1/4 inch
- Fold the raw edge under about 1/8 inch
- Use a whip stitch over the folded edge, spacing stitches about 1/8 inch apart
- Keep tension even but not tight to avoid puckering
Thread choice matters: Use fine silk thread or polyester thread in a color that matches your fabric exactly. On very sheer fabrics, even a slightly off color will show through and create a shadow line.
When to use French seams instead: If your sheer fabric isn’t too delicate, a French seam (described earlier) is faster than hand finishing and creates an equally clean result. French seams work well on cotton voile, lightweight linen, and silk habotai.
Hand finishing takes time, expect to spend 15-30 minutes per seam depending on length, but the result is couture-quality and nearly invisible, perfect for special occasion garments or heirloom sewing.
Do I Need to Finish Seams on Lined Garments?
You don’t need to finish seams on lined garments if the lining completely encloses the seam allowances and the garment won’t be subjected to heavy stress or frequent washing. The lining acts as a barrier, hiding raw edges and protecting them from abrasion, making seam finishing redundant in most cases.
When you can skip seam finishing:
- Fully lined skirts and dresses where the lining is sewn to the waistband and hem
- Lined jackets and coats where the lining covers all interior seams
- Garments made from stable fabrics that don’t fray aggressively
- Couture or tailored pieces where the lining is carefully constructed to hide all raw edges
When you should finish anyway:
- Seams that will be visible even with lining (armholes before lining is attached)
- Garments made from fabrics that fray heavily, as loose threads can work their way through the lining
- Items that will be dry cleaned frequently, as the cleaning process can be harsh on raw edges
- Seams under high stress, like side seams on fitted dresses
Partial lining consideration: If only part of your garment is lined (like a skirt with a lining that stops at the hip), finish the seams in the unlined sections. The exposed seam allowances in the upper portion will be visible and subject to wear.
Professional approach: High-end ready-to-wear often finishes seams even in lined garments because it extends the garment’s lifespan and prevents any possibility of fraying threads escaping through the lining. If you’re investing significant time in a project, the extra 20 minutes to finish seams provides insurance.
Choose to skip seam finishing on lined garments when you’re confident the lining will stay in place and the fabric is reasonably stable. Finish seams if there’s any doubt or if you want the garment to last for decades.
Why Are My Zigzag Stitches Puckering the Fabric Edge?
Zigzag stitches pucker fabric edges when thread tension is too tight, the stitch width or length is incorrect for the fabric weight, or the presser foot pressure is too high, causing the fabric to stretch as it feeds through the machine. Puckering creates wavy, distorted seam allowances that can show through on the right side of lightweight fabrics.
Primary causes and solutions:
1. Thread tension too tight
- Reduce upper thread tension by one or two numbers
- Check that the bobbin is wound evenly and inserted correctly
- Test on scrap fabric, adjusting until the fabric lies flat after stitching
2. Stitch width too wide for fabric weight
- Use 2-3mm width for lightweight fabrics
- Use 3-4mm width for medium-weight fabrics
- Use 4-5mm width only for heavy fabrics like denim or canvas
3. Stitch length too short
- Increase stitch length to 2.5-3mm for most fabrics
- Very short stitches (below 2mm) pack too much thread into a small space, causing bunching
4. Presser foot pressure too high
- Reduce pressure if your machine has an adjustment dial
- The fabric should feed smoothly without being compressed or stretched
5. Wrong presser foot
- Use an open-toe or zigzag presser foot that allows the fabric to move freely
- Standard straight-stitch feet can restrict fabric movement during zigzag stitching
Quick test: Before stitching your project, cut two 6-inch strips of your fabric. Zigzag along one edge of each strip using different settings. Hold each strip up to see which lies flat and which puckers. Adjust settings based on the results.
Edge case for very lightweight fabrics: Silk chiffon, rayon challis, and similar delicate fabrics may pucker no matter what settings you use. For these materials, consider using a French seam or hand finishing instead of zigzag stitching.
If puckering persists after adjusting all settings, try placing a strip of tissue paper or tear-away stabilizer under the fabric edge while stitching, then tear it away afterward. This provides support during stitching and often eliminates puckering on problem fabrics.
Hong Kong Seam Finish vs Bias Tape: Which Is Easier?
A Hong Kong seam finish and bias tape application are essentially the same technique, both wrap the raw edge in a strip of bias-cut fabric, but pre-made bias tape is significantly easier for beginners because it’s already cut, pressed, and ready to use. Making your own bias strips for a Hong Kong finish requires cutting fabric on the bias, joining strips, and pressing, adding 30-60 minutes to your project.
Hong Kong finish (traditional method):
- Cut 1-inch wide bias strips from lightweight fabric (silk organza or cotton lawn)
- Join strips to create the length needed
- Press strips in half lengthwise
- Wrap around raw edge and stitch in place
- Trim excess and press flat
- Time investment: 45-90 minutes for a jacket, depending on experience
- Best for: Couture garments where you want complete control over color and fabric
Pre-made bias tape method:
- Purchase single-fold bias tape in a matching or contrasting color
- Unfold one side and align the raw edge with the seam allowance raw edge
- Stitch in the fold line
- Wrap the tape around the edge and stitch from the right side, catching the back
- Time investment: 15-30 minutes for a jacket
- Best for: Most home sewing projects where speed matters
Cost comparison: Pre-made bias tape costs $3-6 per package (typically 3 yards), while making your own uses about 1/4 yard of fabric ($2-5) but requires more skill and time.
When to make your own: If you’re working with a unique fabric and want the bias binding to match exactly, or if you’re making a high-end garment where the extra effort is worthwhile, cut your own bias strips. For everyday sewing, pre-made tape is the practical choice.
Common mistake with bias tape: Stretching the tape as you sew, which causes the seam allowance to curl and pucker. Let the tape feed naturally without pulling, and pin every few inches to keep it aligned.
Both methods create a beautiful, professional finish that’s standard in unlined jackets and coats. Choose pre-made bias tape unless you have a specific reason to make your own.
What Presser Foot Do I Need for Seam Binding?
You don’t need a special presser foot for most seam binding applications, a standard zigzag or all-purpose presser foot works well for bias tape, Hong Kong finishes, and turned-and-stitched edges. However, a bias tape binder attachment can speed up the process significantly if you finish seams with bias tape frequently.
Presser feet for different seam finishing methods:
Standard zigzag/all-purpose foot:
- Works for zigzag stitching along raw edges
- Suitable for applying bias tape manually
- Best for occasional seam finishing
Open-toe presser foot:
- Provides better visibility when stitching close to edges
- Helpful for precise bias tape application
- Prevents fabric from bunching under the foot
Bias tape binder attachment:
- Folds and applies bias tape in one pass
- Requires practice to thread the tape correctly
- Saves significant time if you bind many seams
- Available in different sizes (1/4″, 1/2″, 3/4″) to match tape width
Edge-stitching foot:
- Has a guide that helps you stitch consistently close to an edge
- Useful for turned-and-stitched seam finishes
- Creates perfectly straight lines parallel to the fold
Overcast foot (sometimes called overedge foot):
- Has a brush or pin on the right side that prevents fabric edge from curling
- Designed specifically for zigzag seam finishing
- Creates neater results than a standard foot on lightweight fabrics
What to buy first: If you’re just starting to finish seams without a serger, stick with your standard presser foot and master the techniques. Invest in specialty feet only if you find yourself doing a particular type of seam finishing repeatedly and want to improve speed or quality.
Edge case: Some sewists use a walking foot for applying bias tape to very slippery fabrics like satin or silk, as it helps feed both layers evenly. This isn’t necessary for most projects but can solve feeding problems on difficult materials.
The presser foot matters less than proper technique and machine settings. Focus on tension, stitch width, and fabric handling before investing in specialty feet.
Is It Worth Buying a Serger or Are Hand Methods Good Enough?
Hand methods and regular sewing machine techniques are good enough for most home sewists who make garments occasionally, while a serger becomes worth the investment ($200-400 for entry-level models) if you sew garments weekly, work with knits frequently, or want to speed up your construction process significantly. A serger can finish a seam in seconds compared to 2-3 minutes with a zigzag stitch.
When hand/machine methods are sufficient:
- You sew fewer than 5 garments per year
- You primarily work with quilting cotton and stable wovens
- You enjoy the slower, meditative pace of hand finishing
- You have limited space or budget for additional equipment
- You make mostly lined garments that don’t require visible seam finishing
When a serger is worth buying:
- You sew garments regularly (weekly or more)
- You work with knits, activewear, or swimwear frequently
- You want to make garments faster and more efficiently
- You’re interested in professional-looking ready-to-wear finishes
- You have space for a dedicated machine and budget for the investment
Cost-benefit analysis:
- Entry-level serger: $200-300
- Mid-range serger: $400-600
- Time saved per garment: 30-60 minutes on average
- If you make 20 garments per year, you’ll save 10-20 hours annually
Learning curve consideration: Sergers require learning to thread (which can be intimidating at first), adjust tension for different fabrics, and maintain the machine. Budget 4-6 hours to become comfortable with a new serger. Many sewists find the threading frustrating initially but report it becomes second nature after a few projects.
Alternative approach: Some sewists rent time at sewing studios or makerspaces that have sergers available, paying $10-20 per hour to use the equipment without buying it. This works well if you only need a serger occasionally.
What you can’t replicate without a serger: The differential feed on a serger (which prevents wavy seams on knits) and the ability to trim, stitch, and finish in one pass are genuinely difficult to replicate with a regular machine. If these features matter for your projects, a serger is worth considering.
For most home sewists making dresses, blouses, and quilts from woven fabrics, the techniques in this article provide professional results without the expense or space requirements of a serger. Upgrade when your sewing frequency and project types justify the investment.
Common Mistakes When Finishing Seams with Pinking Shears
The most common mistake when using pinking shears is cutting with dull blades, which crushes fabric fibers instead of cleanly cutting them, actually increasing fraying rather than preventing it. Pinking shears require sharp blades to create the clean zigzag edge that interrupts the fabric grain effectively.
Top mistakes and how to avoid them:
1. Using dull pinking shears
- Dull blades mash and tear fabric instead of cutting cleanly
- Test on scrap fabric, if the edge looks ragged or threads pull, blades need sharpening
- Sharpen professionally every 1-2 years or replace blades if possible
- Never use pinking shears on paper, which dulls them quickly
2. Cutting too close to the seam line
- Pink at least 1/4 inch from the stitching line to leave adequate seam allowance
- Cutting too close can weaken the seam and cause it to pull away from the stitching
3. Using pinking shears on the wrong fabrics
- Pinked edges don’t work well on loosely woven fabrics like gauze or raw silk
- Very thick fabrics like canvas or denim can dull blades quickly
- Slippery fabrics like satin may shift and create uneven cuts
4. Expecting pinking to stop fraying completely
- Pinking slows fraying but doesn’t eliminate it
- Fabrics will still fray slightly, especially after multiple washes
- Use zigzag stitch instead if you need complete fray prevention
5. Cutting with the wrong part of the blade
- Use the full length of the blade for each cut, not just the tip
- Cutting with only the tip creates uneven points and stresses the blade joint
- Open shears fully between cuts for the cleanest edge
6. Pinking after washing
- Some fabrics fray significantly during the first wash
- Pink edges before washing if possible, or use a different finishing method for fabrics that will be pre-washed
Blade maintenance tip: Cut through aluminum foil 8-10 times to help sharpen pinking shear blades between professional sharpenings. This removes minor burrs and can extend the time between services.
When to abandon pinking: If you’ve pinked an edge and it still frays noticeably after rubbing it between your fingers, that fabric needs a more secure finish. Don’t waste time pinking fabric that won’t respond to the treatment, switch to zigzag or another method immediately.
Pinking shears are a valuable tool when used correctly on appropriate fabrics with sharp blades. Treat them as a specialized tool rather than a universal solution, and they’ll serve you well for years.
Frequently Asked Questions
What is the fastest way to finish seams without a serger? Pinking shears are the fastest method, taking just seconds per seam with no machine setup required. For fabrics that need more security, a zigzag stitch on a sewing machine is the next fastest option, finishing a seam in 1-2 minutes.
Can I use a straight stitch to finish seam edges? Yes, you can fold the raw edge under 1/4 inch and straight stitch close to the fold, creating a turned-and-stitched finish. This method works well on woven fabrics but adds slight bulk to the seam allowance and isn’t suitable for knits that need stretch.
Do I need to finish seams on a quilt? Most quilters don’t finish seam allowances inside quilts because the quilting stitches and batting sandwich the raw edges, preventing significant fraying. Finish seams only if you’re using a very loosely woven fabric or want extra durability.
What’s the difference between a French seam and a flat-felled seam? A French seam encloses raw edges inside a tunnel of fabric and is sewn from both sides, while a flat-felled seam wraps one seam allowance around the other and is visible as a double row of stitching on the right side. Both completely enclose raw edges but create different looks.
Can I finish seams after the garment is sewn together? Yes, most seam finishing methods can be applied after construction, though it’s easier to finish seams as you go. French seams and flat-felled seams must be done during construction because they require specific folding and stitching sequences.
How do I finish curved seams like armholes? Zigzag stitch works best for curved seams because it follows the curve smoothly. Bias tape also works well on curves since bias-cut fabric has natural stretch. Avoid pinking shears on tight curves as they’re difficult to maneuver and may create uneven cuts.
Will seam finishing make my seams bulky? Most seam finishing methods add minimal bulk. Pinking and zigzag stitching add almost no bulk, while French seams and bias binding add one or two extra layers. Choose methods appropriate to your fabric weight, use French seams on lightweight fabrics and simpler methods on heavy fabrics.
What thread should I use for seam finishing? Use all-purpose polyester thread that matches your fabric color for most seam finishing. The thread weight should match your fabric weight, use fine thread (50-60 weight) for lightweight fabrics and regular thread (40 weight) for medium to heavy fabrics.
Can I finish seams on stretch fabrics without a serger? Yes, use a narrow zigzag stitch or the stretch stitch setting on your machine to finish knit fabric seams. Both methods allow the seam to stretch without breaking threads, though they won’t be as stretchy or professional-looking as a serger finish.
How much seam allowance do I need for different finishing methods? Standard 5/8-inch seam allowances work for most finishing methods. French seams require at least 1/2-inch allowances (preferably 5/8 inch) to accommodate the double stitching. Pinking and zigzag work with any seam allowance width.
Do I need to press seams after finishing them? Yes, pressing seams after finishing improves the final appearance and helps seam allowances lie flat. Press seams open or to one side depending on your pattern instructions, using the appropriate heat setting for your fabric.
What’s the most professional-looking seam finish without a serger? Hong Kong finish (bias binding) and French seams are considered the most professional hand-sewing techniques. Both are used in couture garment construction and create clean, durable edges that look as good as or better than serged seams.
Conclusion
Finishing seams without a serger is not only possible but can produce results that rival or exceed machine-serged edges when you match the right technique to your fabric and project. Whether you choose the speed of pinking shears, the versatility of zigzag stitching, the elegance of French seams, or the couture quality of Hong Kong finishes, each method has its place in a well-rounded sewing skill set.
Start by mastering zigzag stitching and pinking shears, as these two techniques will handle 80% of your seam finishing needs. As you gain confidence, experiment with French seams on lightweight projects and bias binding on unlined jackets. Test each method on fabric scraps before committing to your final project, adjusting machine settings and technique until you achieve clean, flat results.
The key to professional-looking seams lies not in expensive equipment but in understanding fabric behavior, choosing appropriate techniques, and taking the time to finish properly. Your next project deserves the polished, durable seams that proper finishing provides, and you now have the knowledge to deliver them with the tools you already own.
Take action: Pull out your current project and identify which seam finishing method best suits the fabric and construction. Spend 15 minutes practicing on scraps, then finish those seams with confidence.


