


Quick Answer
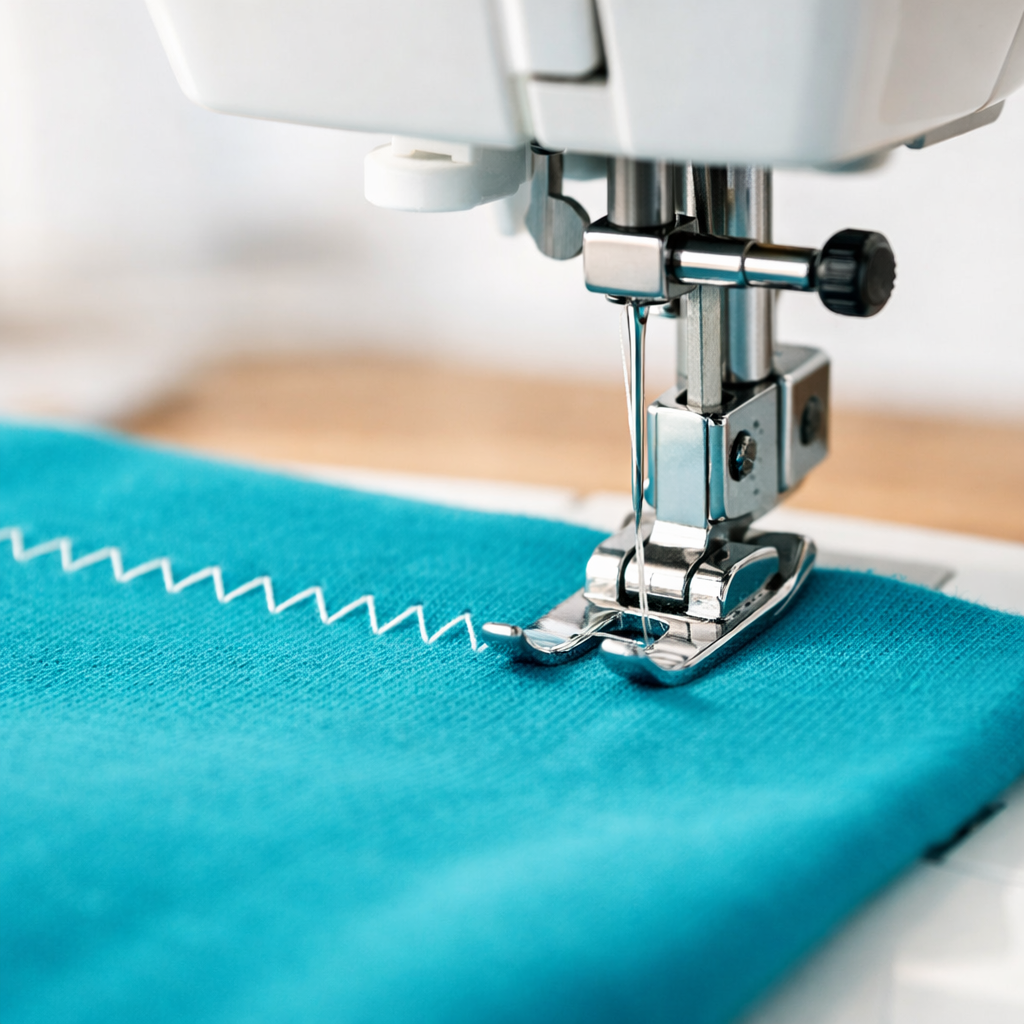
The zigzag stitch is a versatile sewing technique that moves the needle side-to-side while stitching forward, creating a flexible seam perfect for stretchy fabrics, finishing raw edges, and decorative work. Learning how to sew a zigzag stitch and when to use it takes about 10 minutes of practice on most modern machines, and it’s one of the most useful stitches after the straight stitch. You’ll use it primarily on knits, for seam finishing, appliqué, and anywhere you need flexibility or want to prevent fraying.
Key Takeaways
- Zigzag stitches create flexible seams that stretch with knit fabrics, unlike straight stitches that can snap when pulled
- Most sewing machines have built-in zigzag capability using a standard zigzag presser foot (no special equipment needed for basic zigzag work)
- Typical settings for knits: 2.5mm stitch length, 3-4mm width; for seam finishing: 2mm length, 3mm width
- Common causes of puckering: tension too tight, stitch width too wide for fabric weight, or pulling fabric while sewing
- Zigzag works for seam finishing but a serger creates a more professional edge and sews faster
- Hand-sewing a zigzag is possible but time-consuming; it’s best reserved for small repairs or decorative work
- Avoid zigzag on: very sheer fabrics (causes puckering), thick upholstery (machine may struggle), or when you need the strongest possible seam under stress
- Thread bunching underneath usually means bobbin tension is too loose or you’re sewing too fast for the fabric type
What Is a Zigzag Stitch Used For in Sewing?
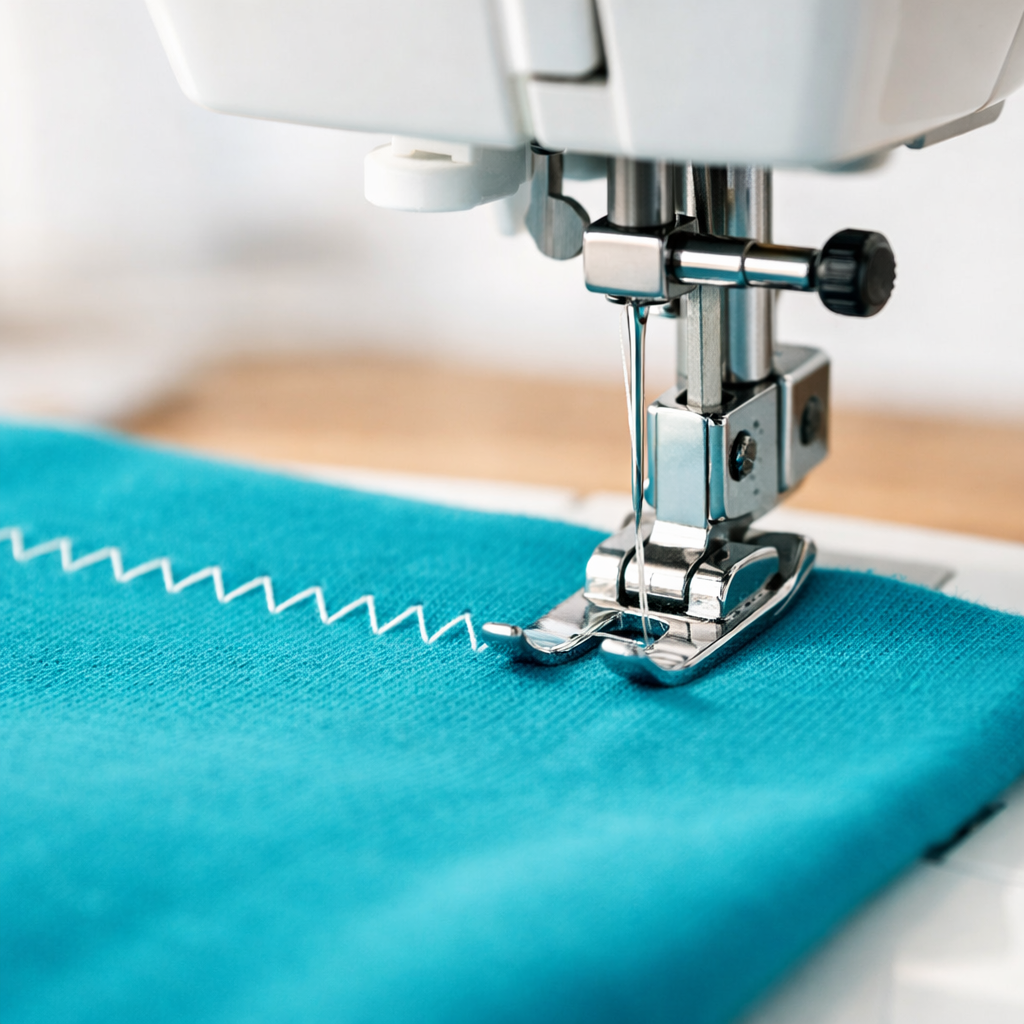
A zigzag stitch serves three primary purposes: preventing fabric edges from fraying, creating flexible seams on stretchy materials, and adding decorative elements to projects. Unlike a straight stitch that locks fabric rigidly in place, the zigzag’s side-to-side motion allows the thread to stretch and contract with the fabric, making it essential for knits, jerseys, and any material with give.
Common uses for zigzag stitching:
- Seam finishing, Stitching along raw edges to stop fraying on woven fabrics like cotton, linen, or polyester blends
- Sewing knits, Creating seams on T-shirts, leggings, and activewear that won’t pop when stretched
- Appliqué work, Attaching fabric shapes to a base layer with a tight zigzag (satin stitch)
- Elastic attachment, Securing elastic waistbands while allowing them to stretch
- Mending tears, Reinforcing ripped seams or small holes with a flexible repair
- Decorative topstitching, Adding visual interest with contrasting thread colors and varying widths
- Buttonhole creation, Most buttonholes use a very tight zigzag stitch
The zigzag stitch became standard on home sewing machines in the 1950s and quickly replaced hand-overcasting for edge finishing. Before that, sewers had to finish seams by hand with a whip stitch or use pinking shears, which were far less durable.
How to Sew a Zigzag Stitch on a Machine
Sewing a zigzag stitch on a machine requires selecting the zigzag setting (usually a wavy line icon on your stitch selector), adjusting the width and length dials, and sewing at a steady, moderate pace. Most machines default to a medium zigzag (3mm width, 2mm length), which works well for general seam finishing.
Step-by-step process:
- Select the zigzag stitch, Turn your stitch selector dial or press the zigzag button on digital machines (look for a wavy line symbol)
- Set stitch width, Start with 3-4mm for seam finishing; wider for decorative work, narrower for delicate fabrics
- Set stitch length, Use 2-2.5mm for most applications; shorter creates a denser satin stitch, longer creates a more open zigzag
- Attach the zigzag foot, Most machines come with a standard zigzag foot (has a wide opening in the center to accommodate needle movement)
- Position your fabric, For edge finishing, align the raw edge so the right swing of the needle goes just off the fabric edge
- Lower the presser foot and start sewing at a moderate speed
- Guide, don’t pull, Let the feed dogs move the fabric; pulling causes uneven stitches and puckering
Common mistake: Setting the width too wide for lightweight fabrics causes tunneling (fabric bunches into a tube along the stitch line). For fabrics like chiffon or voile, reduce width to 2mm or less.
Pro tip: Test your settings on a scrap of the same fabric before sewing your actual project. Adjust tension if you see loops on top or bottom.

Made in Taiwan High Quality Premium Sewing Presser Feet From ZIGZAGSTORM.Part No.XC3021051 Alt : BLG-ZZ, SA175, SA176, XC3875052, XC3021-051, XC3021-031, XC3021031.

TISEKER High Quality General Purpose Presser Foot.

Made in Taiwan High Quality Premium Sewing Presser Feet From ZIGZAGSTORM.Part No. 172075
Zigzag Stitch vs Straight Stitch: When to Use Each
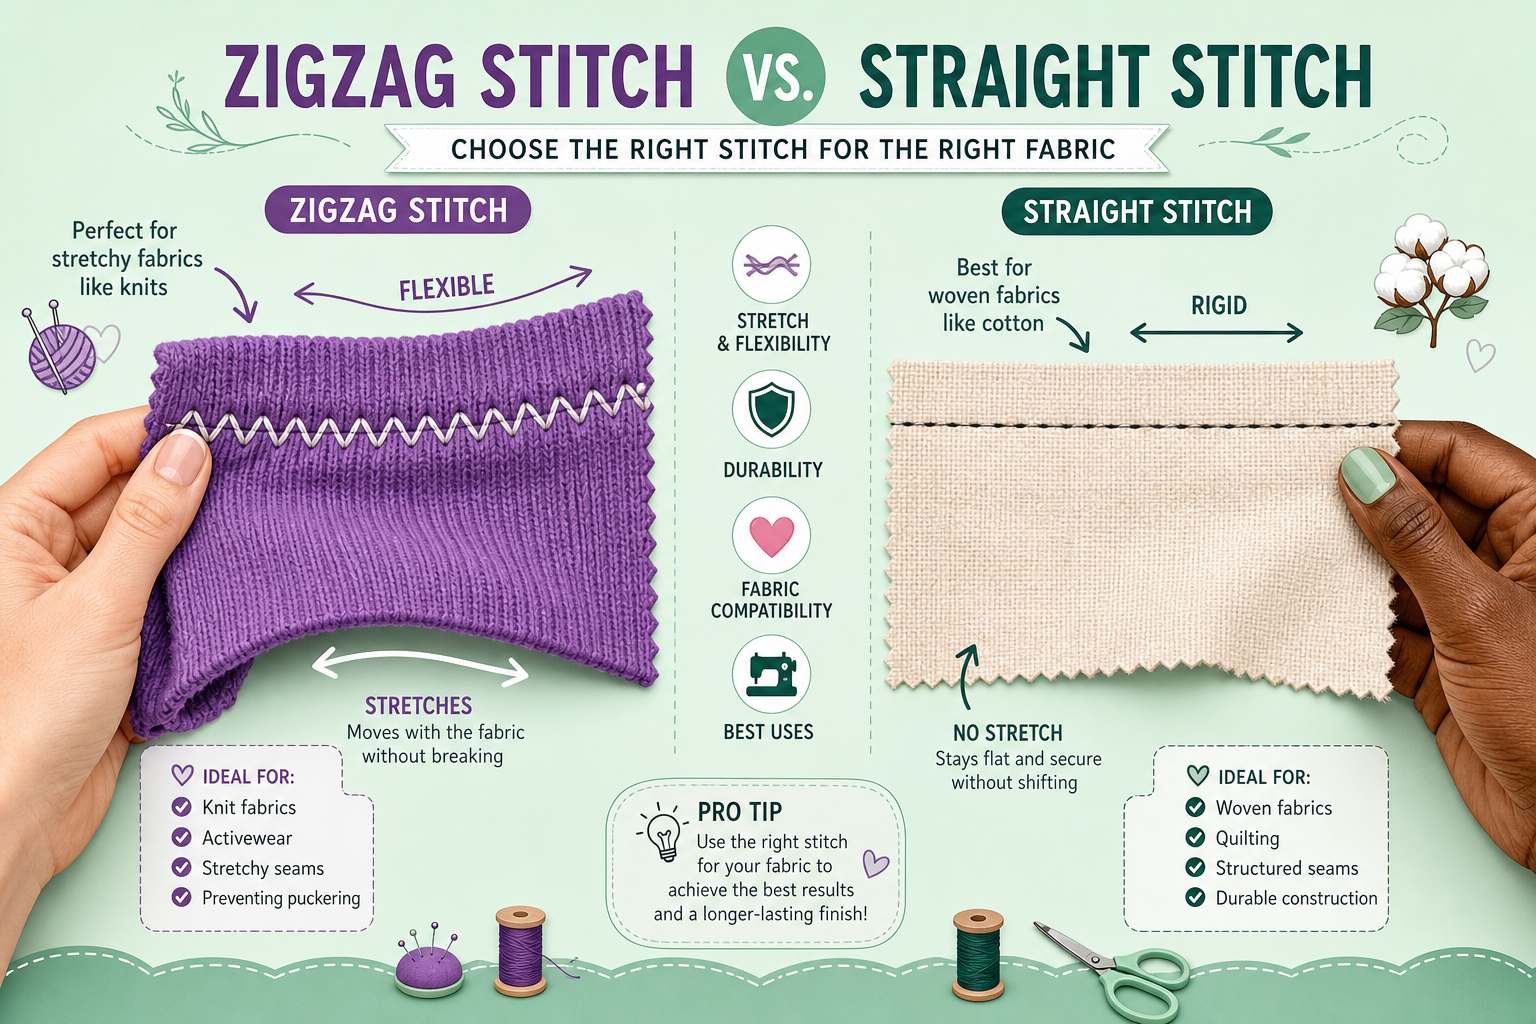
Use a straight stitch for non-stretch fabrics and structural seams that need maximum strength; use a zigzag stitch for stretchy fabrics, edge finishing, and anywhere flexibility matters more than seam strength. The straight stitch creates a stronger seam under tension but will break if the fabric stretches beyond the thread’s breaking point.
Choose straight stitch when:
- Sewing woven fabrics (cotton, linen, denim) that don’t stretch
- Creating structural seams on bags, home décor, or quilts
- Topstitching for a clean, professional look
- Maximum seam strength is the priority
- Sewing very thick fabrics where zigzag might skip stitches
Choose zigzag stitch when:
- Working with knits, jerseys, or any stretchy material
- Finishing raw edges to prevent fraying
- Attaching elastic or other stretch trims
- Creating decorative effects or appliqué
- Sewing over areas that need to flex (like the crotch seam on pants)
The key difference: A straight stitch uses less thread and sews faster, but it’s rigid. A zigzag uses more thread and takes longer but moves with the fabric. For most garment construction on woven fabrics, you’ll use straight stitches for seams and zigzag for finishing the raw edges afterward.
Edge case: Some sewers use a narrow zigzag (1.5mm width) instead of a straight stitch on all seams for added durability. This technique, called a “stretch straight stitch” on some machines, provides a bit of give while maintaining most of the straight stitch’s strength.
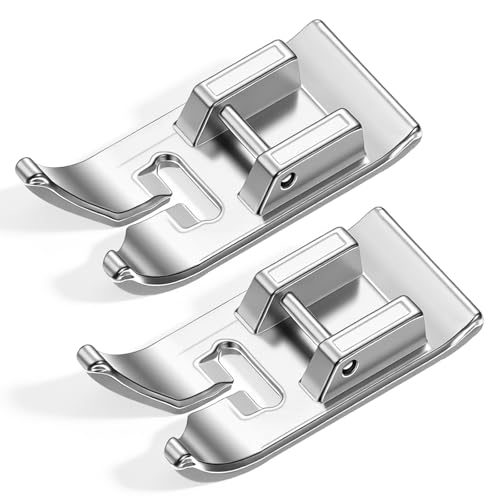
Universal Compatibility Presser Foot: The sewing machine foot is meticulously crafted to ensure universal compatibility with most low-shank sewing machines, including popular models like compatible with Brother. With the sewing machine foot, you can effortlessly switch between different machines.


1 Pcs Non-Stick Zigzag Teflon Presser Foot. The Best Foot For Sewing Vinyl And Thick Fabrics.
What Tension Setting Should I Use for Zigzag Stitch?
Start with your machine’s normal tension setting (usually 4 or 5 on a scale of 0-9) and adjust only if you see loops on the top or bottom of your fabric. Zigzag stitches use more thread than straight stitches, so you may need to reduce tension by one number (from 4 to 3, for example) when working with stretchy fabrics or wide zigzag settings.
Signs your tension needs adjustment:
- Loops on top surface, Bobbin tension too loose or top tension too tight; decrease top tension by one number
- Loops underneath, Top tension too loose; increase top tension by one number
- Fabric puckering, Tension too tight overall; decrease top tension and check bobbin case isn’t over-tightened
- Balanced stitch, Thread interlocks in the middle of the fabric layers; you shouldn’t see bobbin thread on top or top thread underneath
Fabric-specific guidelines:
- Lightweight knits (jersey, interlock): Tension 3-4, may need to reduce from standard
- Medium-weight wovens (quilting cotton, linen): Tension 4-5, standard setting usually works
- Heavyweight fabrics (denim, canvas): Tension 4-6, may need to increase slightly
- Stretchy synthetics (spandex, swimwear): Tension 3-4, use woolly nylon in bobbin for extra stretch
Common mistake: Adjusting tension before checking other factors. Before touching your tension dial, verify you’re using the correct needle size for your fabric, the thread isn’t old or cheap, and the machine is threaded correctly (especially through the tension discs).
Why Is My Zigzag Stitch Puckering the Fabric?
Fabric puckering during zigzag stitching happens when tension is too tight, the stitch width is too wide for the fabric weight, or you’re pulling the fabric while sewing. The zigzag’s side-to-side motion naturally draws fabric together more than a straight stitch, so lightweight fabrics are especially prone to puckering.
Solutions for puckering:
- Reduce stitch width, Try 2-2.5mm instead of 4mm on lightweight fabrics
- Decrease tension, Lower top tension by one or two numbers
- Use a stabilizer, Place tear-away stabilizer or tissue paper under the fabric while sewing
- Check needle size, Too large a needle creates big holes that pucker; use 70/10 or 80/12 for lightweight fabrics
- Slow down, Sewing too fast doesn’t give the fabric time to relax between stitches
- Don’t pull, Guide the fabric gently without pulling it taut or pushing it through
- Press afterward, Steam pressing can relax minor puckering
Fabric-specific fixes:
- Chiffon, organza, voile: Use a narrow zigzag (1.5-2mm width), tissue paper underneath, and a fine needle (60/8 or 70/10)
- Knits: Slight puckering is normal and usually relaxes when you remove the fabric from the machine; if severe, reduce tension
- Woven cotton: Shouldn’t pucker with standard settings; if it does, check that your tension discs are clean and thread is seated properly
When puckering is actually tunneling: If the fabric forms a tube or ridge along the stitch line, your width is definitely too wide for the fabric weight. This is different from general puckering and requires reducing width, not just tension.
Can You Use Zigzag Stitch on Knit Fabrics?
Yes, zigzag stitch is the standard choice for sewing knit fabrics on a regular sewing machine because it stretches with the fabric instead of breaking like a straight stitch would. Use a ballpoint or stretch needle, set your stitch to 2.5mm length and 3-4mm width, and reduce tension slightly for best results on T-shirt knits, jersey, and interlock.
Best settings for common knits:
| Fabric Type | Stitch Length | Stitch Width | Tension | Needle |
|---|---|---|---|---|
| T-shirt jersey | 2.5mm | 3-4mm | 3-4 | 80/12 ballpoint |
| Interlock knit | 2.5mm | 3mm | 4 | 80/12 ballpoint |
| Rib knit | 2mm | 2.5mm | 3 | 90/14 stretch |
| Sweater knit | 3mm | 4mm | 3-4 | 90/14 ballpoint |
| Spandex/Lycra | 2mm | 2.5mm | 3 | 75/11 stretch |
Technique tips for knits:
- Don’t stretch while sewing, Let the fabric feed naturally; stretching causes wavy seams
- Use a walking foot, Helps feed slippery knits evenly (optional but helpful)
- Sew a test seam, Pull it firmly; if the thread breaks, reduce tension or increase width
- Consider a lightning stitch, Some machines have a built-in stretch stitch (looks like a zigzag with extra stitches) that’s even more flexible
When zigzag isn’t enough: For very stretchy activewear or swimwear, a standard zigzag may still break. In these cases, use a triple zigzag (if your machine has it), a lightning stitch, or switch to woolly nylon thread in the bobbin for maximum stretch.
What Stitch Length and Width for Zigzag on Stretchy Material?
For stretchy materials like jersey, spandex, or rib knits, use a stitch length of 2-2.5mm and width of 2.5-3mm as your starting point. This creates a flexible seam that stretches with the fabric without using so much thread that the seam becomes bulky or stiff.
Width guidelines by stretch amount:
- Low stretch (stable knits, ponte): 2.5-3mm width
- Medium stretch (jersey, interlock): 3-4mm width
- High stretch (spandex, swimwear, activewear): 2-2.5mm width with a stretch needle and potentially woolly nylon thread
Why narrower for high-stretch fabrics? Counterintuitively, very stretchy fabrics work better with a narrower zigzag because the fabric itself provides the stretch. A wide zigzag on spandex creates a bulky seam that can actually restrict movement. The goal is to let the fabric stretch while the thread accommodates that movement, not to create stretch solely through stitch width.
Length considerations:
- Shorter length (1.5-2mm): Creates a denser, more stable seam; use for areas under stress like crotch seams
- Medium length (2-2.5mm): General-purpose setting for most knit sewing
- Longer length (3mm+): More flexible but less secure; use only for basting or very stable knits
Test method: Sew a 4-inch seam on scrap fabric, then stretch it firmly. The seam should stretch at least 75% as much as the fabric without breaking. If the thread snaps, increase width or decrease tension. If the seam feels stiff, decrease width or increase length.
Do I Need a Special Foot for Zigzag Stitching?
No, the standard zigzag presser foot that comes with most sewing machines works perfectly for basic zigzag stitching. This foot has a wide opening in the center (or an open toe design) that allows the needle to move side-to-side without hitting the foot, and it’s suitable for widths up to 5-7mm depending on your machine.
When you might want specialty feet:
- Open-toe embroidery foot, Better visibility for appliqué and decorative zigzag work; you can see exactly where the needle will land
- Overcast foot, Has a brush or pin on the right side that prevents fabric edges from curling while you zigzag; ideal for seam finishing
- Satin stitch foot, Has a groove on the bottom that glides over dense zigzag stitches without crushing them; use for appliqué and buttonholes
- Walking foot, Feeds top and bottom layers evenly; helpful for zigzagging on slippery knits or multiple layers
How to tell if your foot is compatible: Look at the bottom of your presser foot. If the opening is narrower than your desired stitch width, the needle will hit the foot and break. Most standard zigzag feet accommodate up to 5mm width. If you want to sew wider decorative zigzags (6-7mm), you may need an open-toe or embroidery foot.
Common mistake: Using a straight-stitch foot (with a small round hole) for zigzag stitching. The needle will hit the foot and break immediately. Always check that your foot has a wide opening before selecting a zigzag stitch.

Made in Taiwan High Quality Premium Sewing Presser Feet From DreamStitch. ALT: 40080962, 718W, JU-5900-01Z

Enhanced Visibility: The open toe design provides excellent visibility, allowing you to precisely follow your embroidery patterns and achieve intricate designs with ease.

High Quality Metal Low Shank Open Toe Quilting Darning Free Motion Embroidery Foot
Zigzag Stitch vs Serger: Which Is Better for Seam Finishing?
A serger creates a more professional, durable edge finish and sews about three times faster than a zigzag stitch, but a zigzag on a regular sewing machine is perfectly adequate for home sewing and doesn’t require buying additional equipment. Sergers trim the fabric edge while simultaneously overcasting it with 3-4 threads, creating a stretchy, fray-proof finish that looks like ready-to-wear garments.
Zigzag advantages:
- Uses equipment you already own
- Easier to learn and control
- Better for decorative work and appliqué
- Can be sewn on any part of the fabric (not just edges)
- No thread-tension juggling with multiple spools
- Easier to rip out if you make a mistake
Serger advantages:
- Faster (sews 1,500 stitches per minute vs. 800-1,000 for home machines)
- Trims and finishes in one pass
- Creates a more professional, durable edge
- Better for high-volume sewing
- Stretches more than zigzag (important for activewear)
- Uses less thread per inch despite using 3-4 spools
Cost comparison: A basic serger costs $200-400 for entry-level models, plus you’ll need to keep 3-4 thread spools on hand. If you’re sewing garments regularly (more than one project per month), a serger pays for itself in time saved. If you’re an occasional sewist or primarily do quilting and home décor, a zigzag stitch is sufficient.
Practical approach: Most home sewists use both. Sew seams with a straight stitch on the regular machine, then finish edges with either a zigzag (if you don’t have a serger) or run them through the serger. For knit garments, you can sew and finish in one pass on a serger, which is much faster.
How to Sew a Zigzag Stitch by Hand Without a Machine
Hand-sewing a zigzag stitch involves creating a series of diagonal stitches that alternate direction, mimicking the machine zigzag pattern. Bring your needle up on one side of the seam line, cross diagonally to the other side, go down, then come back up near your starting point and cross diagonally in the opposite direction.
Step-by-step hand zigzag:
- Thread your needle with a single strand (doubled thread creates too much bulk)
- Knot the end and bring the needle up from the wrong side at point A on the left edge
- Insert the needle at point B on the right edge, about 3-4mm forward and 4-5mm to the right
- Bring the needle up at point C on the left edge, 3-4mm forward from point A
- Insert the needle at point D on the right edge, 3-4mm forward from point B
- Repeat this diagonal pattern, keeping spacing consistent
- Secure with a backstitch or knot when finished
When to hand-sew a zigzag:
- Emergency repairs when you don’t have machine access
- Decorative embroidery work where you want visible stitches
- Attaching appliqué on delicate fabrics that might pucker in a machine
- Small areas where setting up the machine isn’t worth the time
- Historical costume work requiring period-accurate techniques
Realistic expectations: Hand-sewing a zigzag takes about 10-15 minutes per foot, compared to 30 seconds on a machine. The stitches won’t be as even or as strong as machine stitches. For functional seam finishing, a hand whip stitch or blanket stitch is actually faster and more effective than trying to replicate a machine zigzag.
Better hand alternatives: If you’re finishing edges by hand, use a blanket stitch (more decorative) or a simple whip stitch (faster). Both prevent fraying more effectively than a hand-sewn zigzag and are traditional hand-finishing techniques that have been used for centuries.
Common Mistakes When Sewing Zigzag Stitch
The most common zigzag mistakes are using the wrong needle type, setting the width too wide for the fabric weight, and pulling the fabric while sewing. These errors cause skipped stitches, puckering, and uneven stitch formation that can ruin your project.
Top mistakes and fixes:
1. Using a universal or sharp needle on knits
- Problem: Needle punches holes in the fabric instead of sliding between fibers
- Fix: Switch to a ballpoint or stretch needle (80/12 for most knits)
2. Stitch width too wide for fabric
- Problem: Causes puckering, tunneling, or fabric distortion
- Fix: Reduce width to 2-3mm for lightweight fabrics; test on scraps first
3. Pulling or pushing fabric through
- Problem: Creates uneven stitches, puckering, and can damage feed dogs
- Fix: Guide fabric gently and let the machine do the work
4. Wrong presser foot
- Problem: Needle hits foot and breaks, or foot crushes dense stitches
- Fix: Use a zigzag foot with wide opening; switch to satin-stitch foot for dense zigzags
5. Not testing settings first
- Problem: Ruins your actual project with wrong tension or stitch size
- Fix: Always test on fabric scraps before sewing the real thing
6. Sewing too fast on thick fabrics
- Problem: Machine skips stitches or jams
- Fix: Slow down and use a heavier needle (90/14 or 100/16)
7. Old or cheap thread
- Problem: Thread breaks repeatedly, especially on wide zigzags
- Fix: Use quality polyester or cotton thread; replace thread older than 3-5 years
8. Forgetting to backstitch
- Problem: Zigzag stitches unravel at the beginning and end
- Fix: Backstitch 3-4 stitches at start and finish, or tie off thread ends
Edge case: If your zigzag looks perfect on top but messy underneath, your bobbin may be inserted incorrectly or the bobbin case needs cleaning. Remove the bobbin, clean out lint, and reinsert following your machine’s manual.
Is Zigzag Stitch Strong Enough for Seams?
A zigzag stitch is strong enough for seams on knit fabrics and low-stress areas, but a straight stitch creates a stronger seam on woven fabrics for high-stress areas like bag straps, waistbands, or crotch seams. The zigzag’s flexibility is its strength for stretchy fabrics but a weakness for maximum durability under tension.
Strength comparison:
- Straight stitch: Approximately 30-40% stronger under direct tension; thread lies in a straight line so force is distributed evenly
- Zigzag stitch: More flexible but uses a longer thread path, creating more potential break points; about 60-70% the strength of a straight stitch
- Triple zigzag: Stronger than regular zigzag due to multiple thread passes; about 80-85% the strength of a straight stitch
When zigzag is strong enough:
- Seams on knit garments (T-shirts, leggings, underwear)
- Attaching elastic or stretch trims
- Decorative seams that won’t bear weight
- Seam finishing (not the structural seam itself)
- Repairs on stretchy fabrics
When to use straight stitch instead:
- Bag construction (handles, straps, body seams)
- Woven fabric garments (button-up shirts, pants, dresses)
- Home décor items (curtains, pillow covers)
- Quilting (piecing blocks together)
- Any seam that will bear weight or stress
Best practice for maximum strength: Use a straight stitch for the structural seam, then finish the raw edges with a zigzag stitch. This gives you the strength of a straight stitch with the fray-prevention of a zigzag. For knits, use a narrow zigzag (2mm width) for the seam itself, which provides nearly the strength of a straight stitch with added flexibility.
How to Fix Thread Bunching Under Fabric with Zigzag Stitch
Thread bunching underneath your fabric (also called bird’s nesting) during zigzag stitching usually means your machine isn’t threaded correctly, the bobbin tension is too loose, or you’re starting to sew without holding the thread tails. Re-thread your machine completely, ensuring the thread passes through all guides and the tension discs, and hold both top and bobbin thread tails behind the presser foot when you start sewing.
Systematic troubleshooting:
Step 1: Re-thread the machine
- Remove thread completely and start over
- Make sure presser foot is UP when threading (tension discs must be open)
- Check that thread passes through every guide, especially the take-up lever
- Thread should seat firmly in the tension discs
Step 2: Check the bobbin
- Remove bobbin and reinsert, making sure it’s oriented correctly
- Thread should pull with slight resistance (not too loose, not too tight)
- Check for lint buildup in the bobbin case; clean thoroughly
- Verify you’re using the correct bobbin type for your machine
Step 3: Adjust technique
- Hold both thread tails behind the presser foot for the first 2-3 stitches
- Don’t start sewing right at the fabric edge; begin 1/4 inch in
- Sew at a moderate, steady pace (not too fast)
Step 4: Check needle and thread
- Replace needle (dull or bent needles cause bunching)
- Verify needle is inserted correctly (flat side to the back on most machines)
- Make sure thread weight matches needle size (40-weight thread with 80/12 needle)
Step 5: Adjust bobbin tension (last resort)
- Only adjust if all else fails; bobbin tension rarely needs changing
- Turn the small screw on the bobbin case 1/8 turn at a time
- Clockwise = tighter, counterclockwise = looser
- Test after each tiny adjustment
Why zigzag is more prone to bunching: The side-to-side needle motion uses more thread per inch than a straight stitch, so any tension imbalance becomes more obvious. The machine must feed thread quickly enough to accommodate the wider needle swing, and if the top thread doesn’t flow smoothly, the bobbin thread gets pulled up excessively.
When Not to Use a Zigzag Stitch
Avoid zigzag stitches on very sheer fabrics (causes excessive puckering), when you need maximum seam strength under tension, on thick upholstery fabrics that may cause your machine to skip stitches, or when you want invisible hems and topstitching. Straight stitches are cleaner, faster, and stronger for most woven fabric construction.
Situations where zigzag is the wrong choice:
1. Sheer fabrics (chiffon, organza, tulle)
- Zigzag creates visible puckering and distortion
- Better option: French seams or rolled hems
2. Invisible hems
- Zigzag shows on the right side
- Better option: Blind hem stitch or hand-sewn slip stitch
3. Topstitching for a tailored look
- Zigzag looks casual and homemade
- Better option: Straight stitch with matching or contrasting thread
4. High-stress seams on woven fabrics
- Zigzag is weaker than straight stitch
- Better option: Straight stitch, possibly double-stitched
5. Very thick fabrics (upholstery, canvas, leather)
- Machine may skip stitches or jam on wide zigzags
- Better option: Straight stitch with appropriate heavy-duty needle
6. Precision piecing (quilting)
- Zigzag makes it impossible to maintain accurate seam allowances
- Better option: Straight stitch with 1/4-inch presser foot
7. Professional garment construction on wovens
- Zigzag edge finishing looks homemade
- Better option: Serged edges, Hong Kong finish, or bound seams
Exception: Some couture sewing techniques use a very narrow zigzag (1mm width) instead of a straight stitch for slightly more give in fitted garments. This is an advanced technique and not the same as a standard zigzag.
Best Zigzag Stitch Settings for Appliqué
For appliqué work, use a tight zigzag (also called a satin stitch) with a length of 0.3-0.5mm and width of 2-3mm, which creates a dense, smooth edge that completely covers the raw fabric edge. Use an open-toe embroidery foot for better visibility and a tear-away stabilizer underneath to prevent puckering.
Optimal appliqué settings:
| Element | Setting | Notes |
|---|---|---|
| Stitch length | 0.3-0.5mm | Very short; creates dense coverage |
| Stitch width | 2-3mm | Adjust based on curve tightness |
| Tension | 3-4 | Slightly looser than normal |
| Presser foot | Open-toe embroidery | Allows you to see the edge |
| Stabilizer | Tear-away | Prevents puckering and tunneling |
| Needle | 80/12 universal | Sharp point for woven fabrics |
| Thread | 40-weight cotton or polyester | Rayon for extra sheen |
Technique tips:
For curves:
- Outer curves: Use slightly wider stitch (3-3.5mm)
- Inner curves: Use narrower stitch (2-2.5mm)
- Sharp points: Stop with needle down, lift foot, pivot, continue
Thread color strategy:
- Matching: Blends appliqué into background; subtle look
- Contrasting: Makes appliqué pop; bold, graphic look
- Variegated: Creates rainbow effect; fun for kids’ projects
Preventing common problems:
- Tunneling: Use stabilizer and reduce width if needed
- Thread breakage: Slow down and check tension
- Uneven coverage: Maintain consistent speed; practice on scraps
Alternative approach: Some sewers prefer a blanket stitch for appliqué, which creates a more handmade, folk-art look. The blanket stitch is less dense than a satin stitch and shows more of the background fabric between stitches.
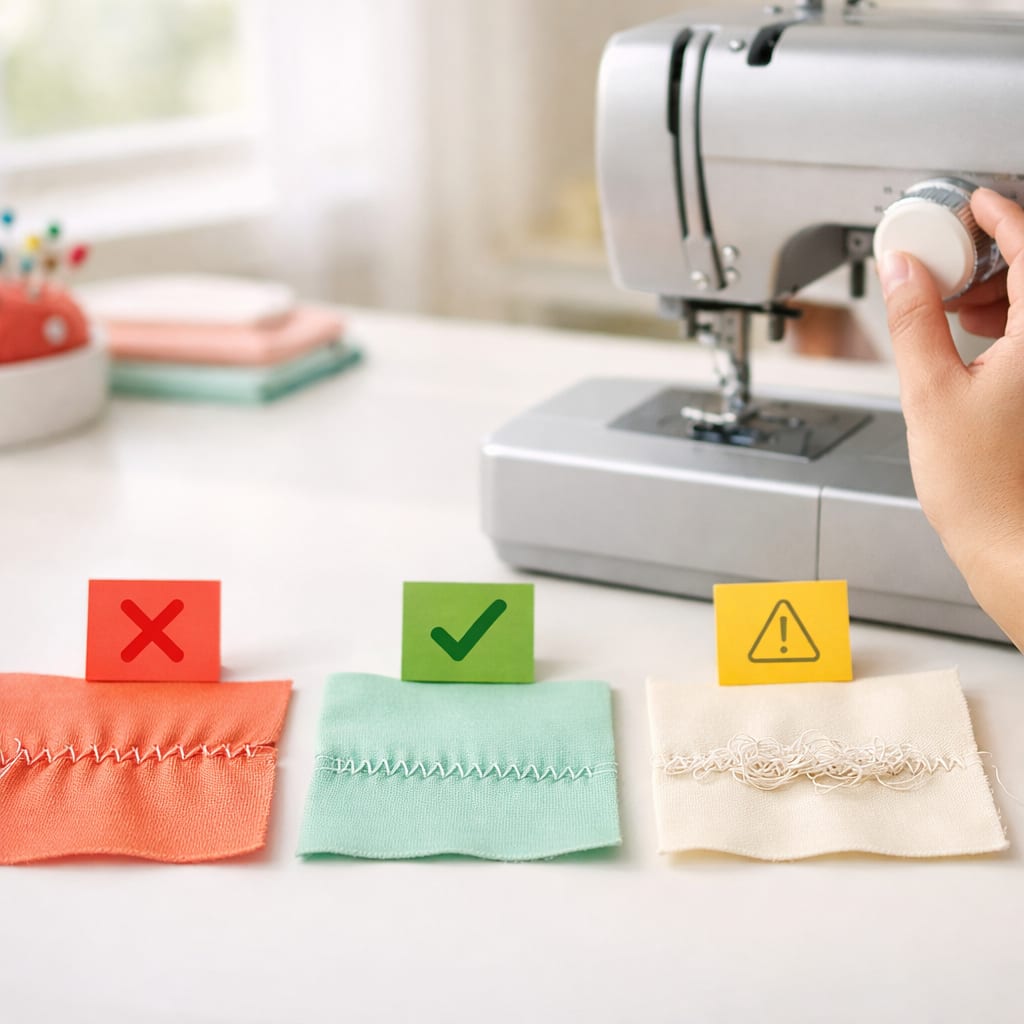
Practice exercise: Draw a simple shape (heart, star, circle) on paper, then practice sewing along the line without fabric. This helps you learn to control curves and corners before working on your actual project.
Frequently Asked Questions
Can I use a zigzag stitch on denim? Yes, but use a denim needle (100/16) and reduce your stitch width to 2-3mm to prevent the machine from struggling. Denim is thick and tightly woven, so a wide zigzag may cause skipped stitches. Sew slowly and use quality polyester thread for best results.
What’s the difference between a zigzag and a three-step zigzag? A three-step zigzag (also called a multi-stitch zigzag) makes three small stitches for each zig and each zag, creating a more flexible, durable seam that’s ideal for elastic attachment and very stretchy fabrics. It uses more thread but stretches significantly more than a regular zigzag.
Why does my zigzag stitch look loopy on top? Loopy stitches on the top surface mean your bobbin tension is too loose or your top tension is too tight. Start by re-threading your machine completely, making sure the thread is seated in the tension discs. If that doesn’t fix it, increase your top tension by one number.
Can I backstitch with a zigzag stitch? Yes, most machines allow you to backstitch in zigzag mode by pressing the reverse button. Backstitch 3-4 stitches at the beginning and end of your seam to prevent unraveling. Alternatively, you can leave long thread tails and tie them off by hand.
How do I prevent my fabric from stretching while zigzag stitching? Don’t pull or stretch the fabric as it feeds through the machine. Let the feed dogs do the work and simply guide the fabric gently. If the fabric is very stretchy or slippery, use a walking foot or place tissue paper underneath that you tear away after sewing.
What’s a satin stitch and how is it different from a zigzag? A satin stitch is simply a very tight zigzag with a length of 0.3-0.5mm, creating a dense, smooth column of thread. It’s used for appliqué, buttonholes, and decorative work. A regular zigzag has visible space between stitches, while a satin stitch creates solid coverage.
Can I use zigzag stitch for hemming? Yes, but it’s not ideal for most hems because it’s visible and can look homemade. Zigzag works well for hemming knits where you want a stretchy hem, or for raw-edge hems on casual garments. For a professional look on woven fabrics, use a blind hem stitch or hand-sew the hem.
Why does my machine skip stitches when zigzagging? Skipped stitches usually mean you’re using the wrong needle type (use ballpoint for knits), the needle is dull or bent, or you’re sewing too fast on thick fabric. Replace the needle first, then slow down and make sure you’re using the appropriate needle size for your fabric weight.
How wide should my zigzag be for seam finishing? For most woven fabrics, use a 3mm width and 2mm length for seam finishing. Lightweight fabrics may need a narrower 2-2.5mm width to prevent puckering. The goal is to catch the fabric edge without causing distortion.
Can I use metallic thread for zigzag stitching? Yes, but metallic thread is more fragile than regular thread and may break frequently. Use a metallic or topstitch needle (which has a larger eye), reduce your machine speed, and slightly loosen your top tension. A straight stitch is easier with metallic thread than a wide zigzag.
What’s the best zigzag stitch for preventing fraying on fleece? Fleece doesn’t fray, so you don’t need to finish the edges at all. If you want to finish them for appearance, use a narrow zigzag (2mm width) or simply leave the edges raw. Many sewers prefer to use decorative stitches on fleece rather than a standard zigzag.
How do I zigzag stitch around corners? Stop with the needle down in the fabric at the corner point, lift the presser foot, pivot the fabric to the new direction, lower the foot, and continue sewing. For sharp corners, you may need to adjust your stitch width narrower as you approach the point, then widen it again after turning.
Conclusion
Learning how to sew a zigzag stitch and when to use it opens up a world of sewing possibilities, from creating stretchy seams on knit garments to finishing edges professionally and adding decorative touches to your projects. The zigzag stitch is one of the most versatile tools in your sewing arsenal, second only to the straight stitch in usefulness.
Key points to remember:
- Start with medium settings (2.5mm length, 3mm width) and adjust based on your fabric
- Use ballpoint needles for knits, universal needles for wovens
- Test on scraps before sewing your actual project
- Let the machine feed the fabric; don’t pull or push
- Reduce tension slightly if you see puckering
- Choose straight stitch for strength, zigzag for flexibility
Next steps:
- Practice on scraps, Spend 15 minutes experimenting with different width and length settings on various fabric types
- Try a simple project, Finish the edges of a cotton napkin or make a simple knit T-shirt
- Explore your machine, Check your manual for specialty zigzag stitches like triple zigzag or lightning stitch
- Invest in the right tools, Get ballpoint needles, an open-toe foot, and tear-away stabilizer for your next project
The zigzag stitch may seem simple, but mastering it takes practice. Don’t get discouraged if your first attempts aren’t perfect. Every experienced sewist has dealt with puckering, thread bunching, and tension issues. With patience and experimentation, you’ll develop an intuitive feel for the right settings for each fabric and project. Now grab some scrap fabric and start practicing, your sewing projects will thank you.


